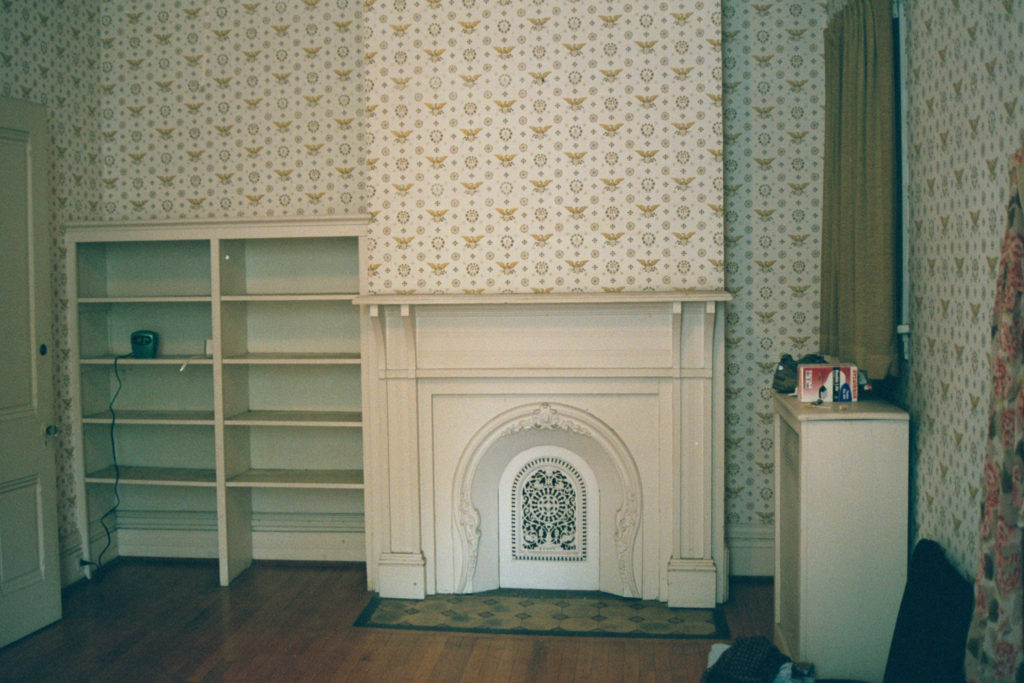
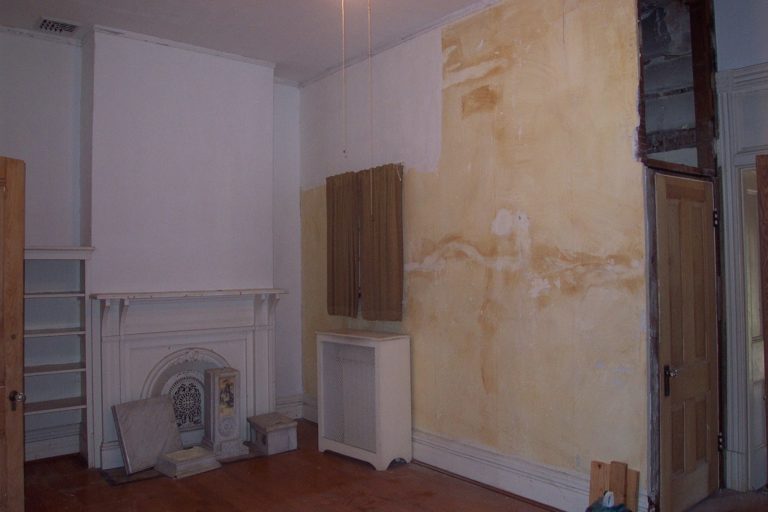
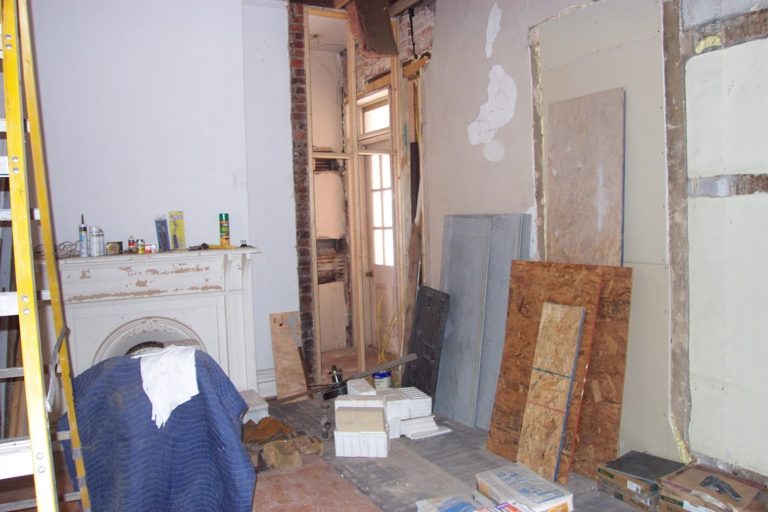
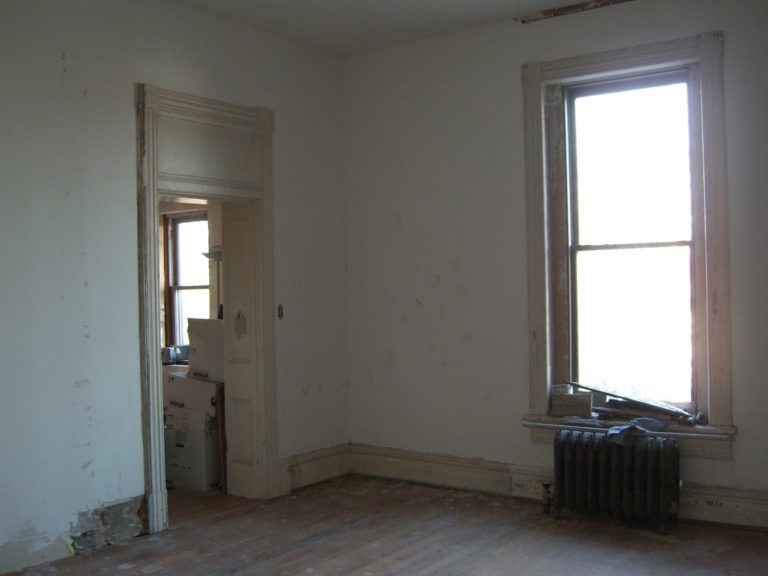
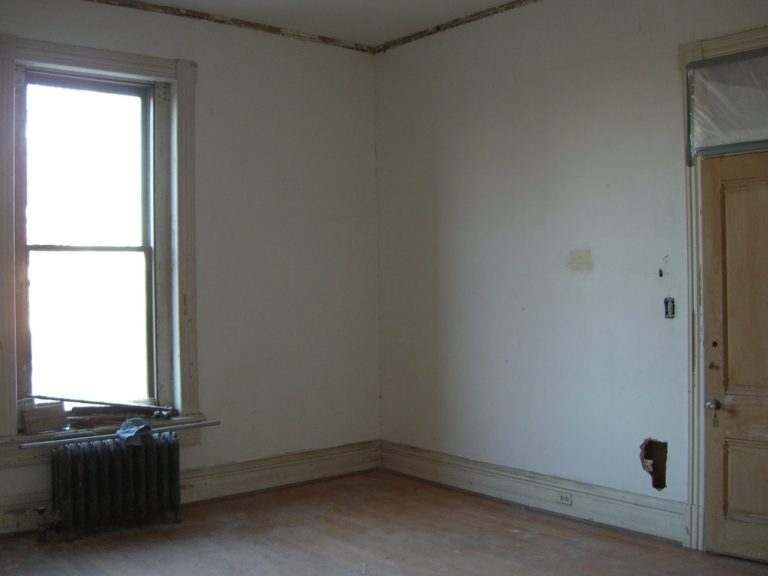
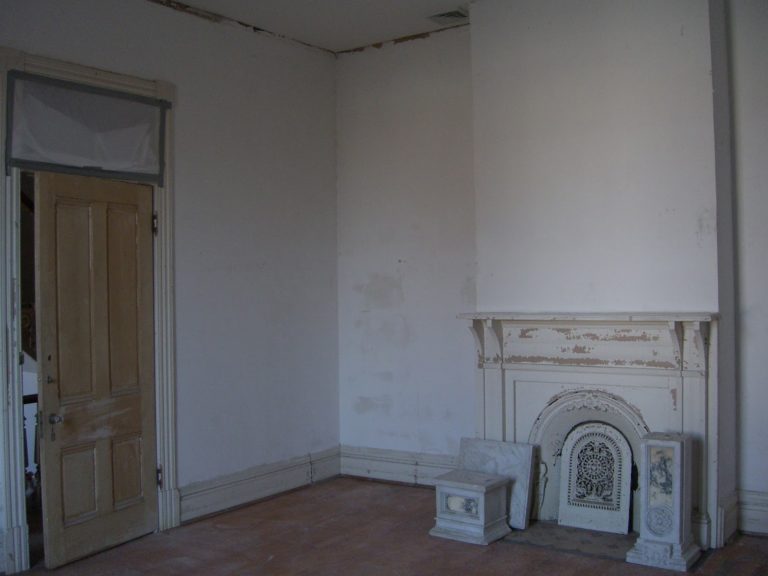
I knew it was the smallest bedroom, and it was the only bedroom with a single window. The two front bedrooms each had three large windows in the front, and one on the side. The other rear bedroom had a window to the rear and side. All of the other bedrooms had ample bathrooms, this one had a tiny outdated blue-tiled bathroom. In addition, the room had been clearly cut down in size with a wall added to the right side of the fireplace to accommodate a rear hallway for access to a later-added wing of the house. The small window set above the radiator actually opened into a hallway, and not the great outdoors. I can’t say why I was immediately drawn to this darker, smaller room, but I immediately wanted to create the master bedroom out of the space.
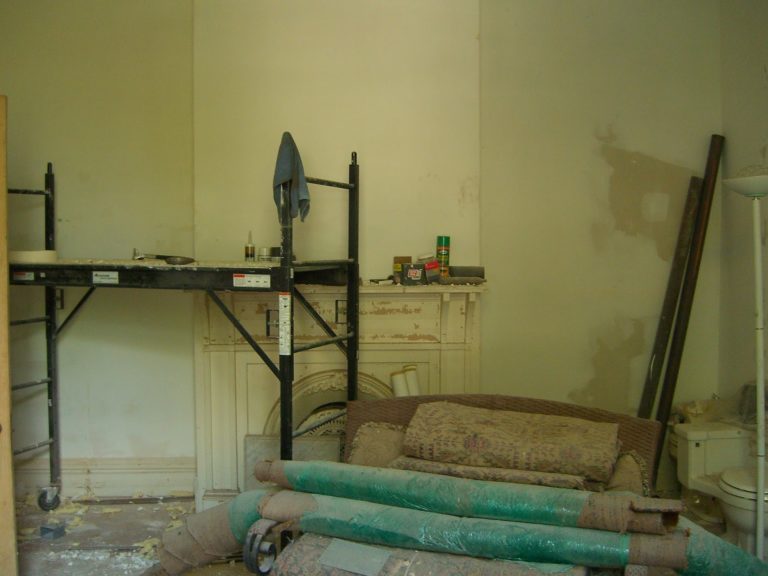
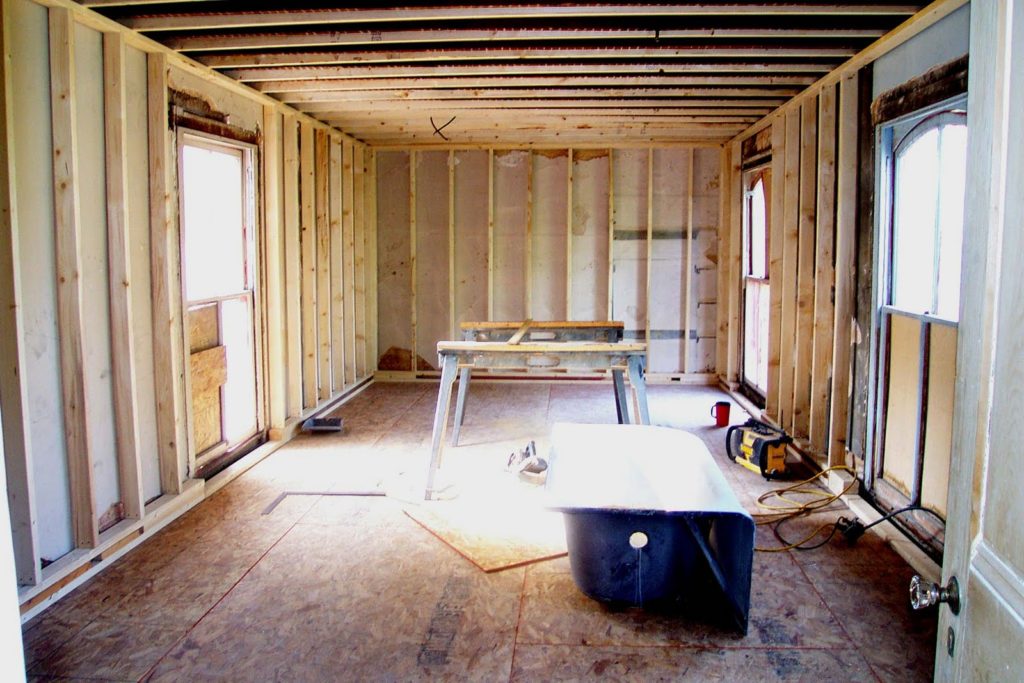
There were two smallish closets set awkwardly in the room, facing one another, each with a storage space set above, unreachable without a tall ladder in the eleven-and-a-half foot ceilings. I itched to take down the long-ago added wall that created the rear hallway. Doing so would re-claim the original proportions of the room, rendering it symmetrical to the fireplace once again.
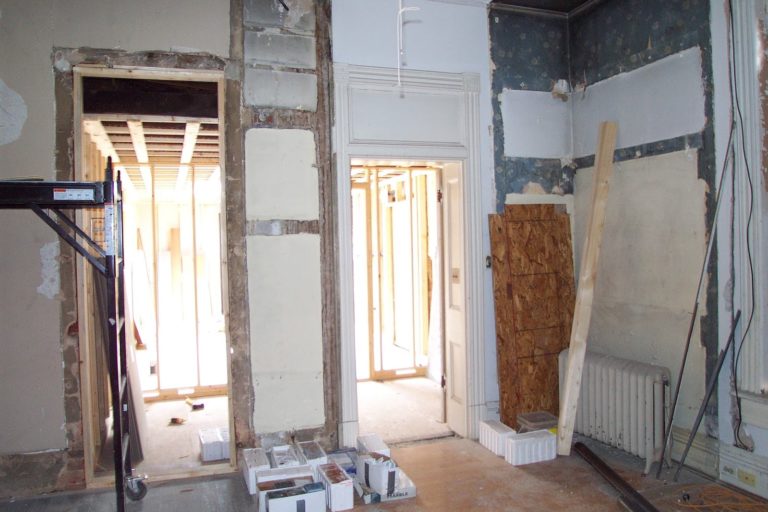
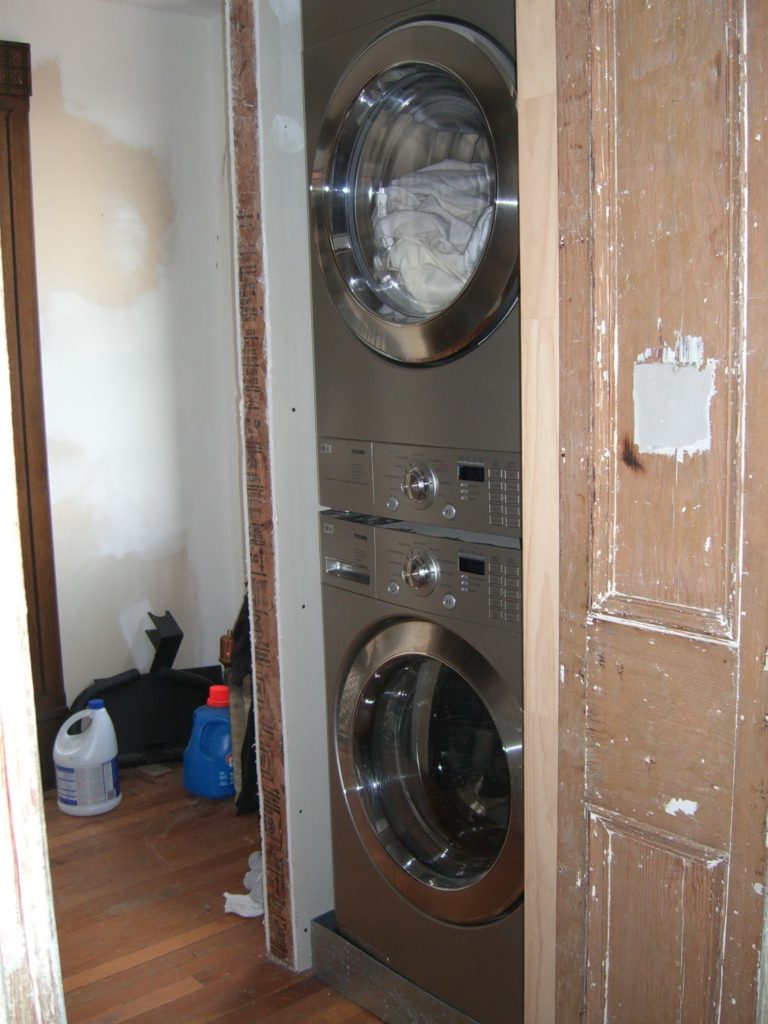
With the removal of the wall and the second closet butting rudely into the large square room, came the great feeling of relief and openness that the room had not experienced for many years. The doorway to the right had formerly led into the 1940s blue bathroom. The ancient bathroom had been so nondescript and without a single feature of note, that I entirely forgot to take even a single photo of the space to document its’ “before” condition. No loss, I suppose. The space to the right of the doorways, defined by dark blue floral wallpaper, used to house the larger of the two bedroom closets; the space in between the two doorways was the former smaller bedroom closet. The doorway to the left was the entry to the rear wing, which had three steps down into a high-ceilinged area with two large storage rooms. We raised the floor to the entire back wing so that it was level with that of the bedroom (and the former blue bathroom), and would close off the left doorway. The right doorway would now provide access to the laundry, walk-in closet, and master bathroom. You can see the transformation of that space in an earlier blog by clicking here.
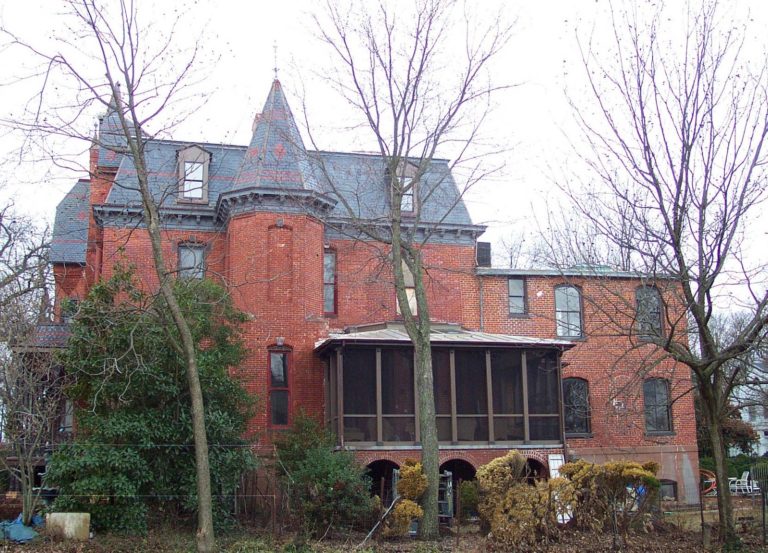
Though the removal of the rear hallway necessitated moving the door to the rear screened porch over by two feet, it was well worth the added expense, and we were able to have the bricks carefully removed from one side and placed to fill in the other side, so the exterior bricks match perfectly, and it doesn’t look like a “patch job” on the exterior of the house.
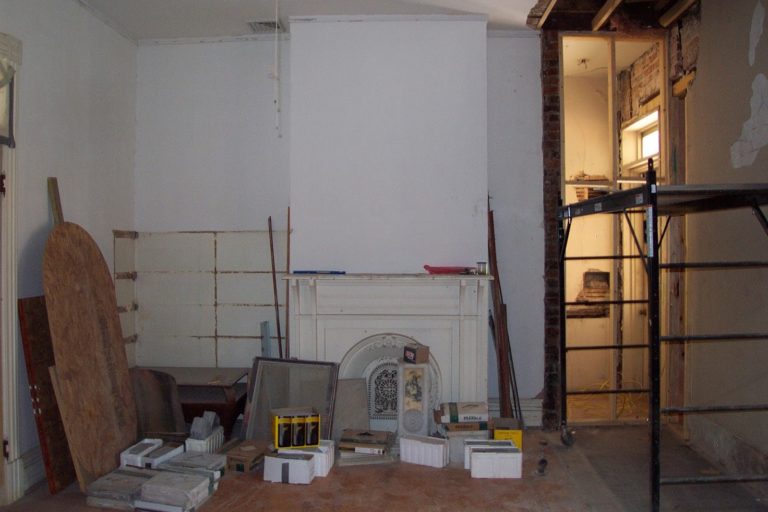
With the rear hallway eliminated, and re-claiming the space for the master bedroom once again. It was beginning to look like a much more grand bedroom, one worthy of being called the Master. After speaking with one of the family members who grew up in the house, I was informed that this room was always referred to as “the boy’s room.” I can only guess that each of the young Mr. Millers who grew up in this house once occupied that room in their youth before eventually graduating to a larger bedroom.
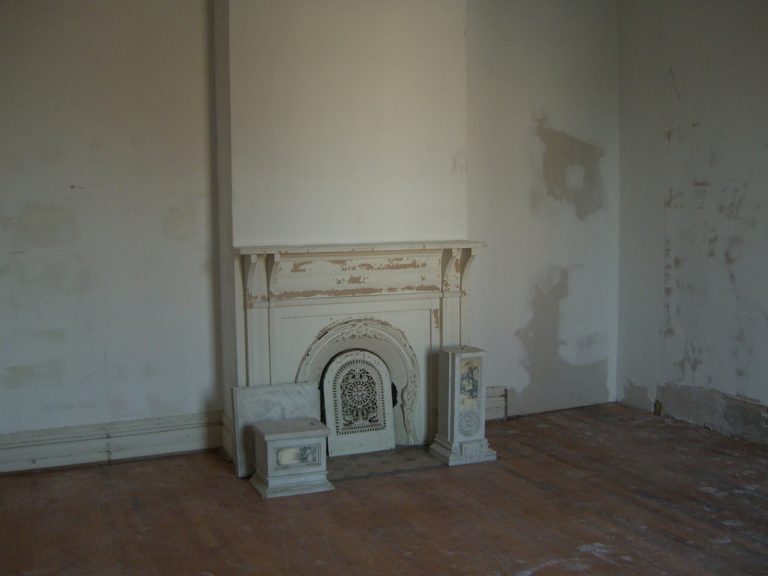
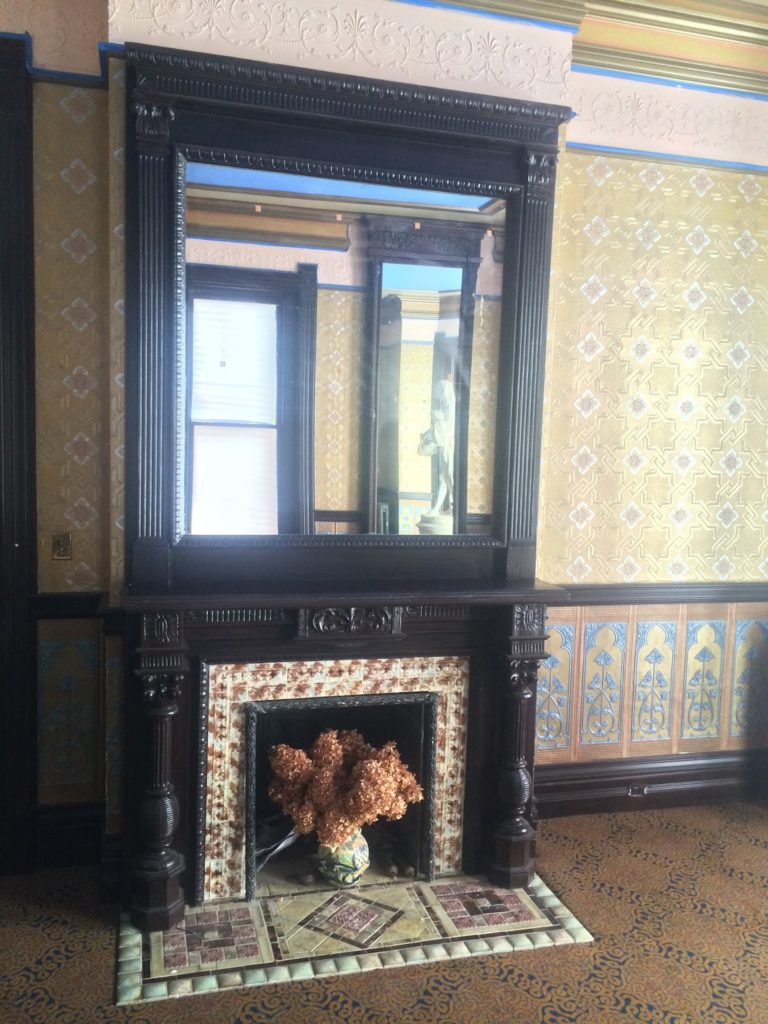
With the hardwood floors patched and the openings in the walls filled in, the room needed matching trim to round out the newly re-claimed corners. The fireplace now sits, symmetrically placed in the room, as it originally had been designed. The rudimentary built-in bookcase to the left of the fireplace was fortunately built over the existing trim, saving us the trouble of having to replace the elaborate profile of the wood in that corner, as well.
The wide-open feel of the room continued, as there were no longer any superfluous angles, no closets awkwardly jutting into the room, no foreshortening of the expected sight lines. Though the room still only had a single window, the Eastern exposure afforded it ample light for the space.
The transom window above the door to the hallway had been removed for restoration purposes. It would provide some measure of cross-ventilation and light when it was re-installed. The walls at this point were a bank slate, and work began on removing the myriad layers of paint from the wood trim throughout the room as we planned the ultimate scheme for the surfaces.
The heat gun was applied most meticulously to the woodwork, carefully peeling away the painted history of the room. Heart Pine was underneath, as it was throughout the rest of the entire house. As Heart Pine was a basic building material when the house was built, and never intended to be showcased by staining and shellac, we also intended to put a surface on the woodwork in this room. The paint removal was necessary, however, due to the thickness of the layers applied over the last hundred-and-thirty-some years. The delicate lines cut by the original knife were mostly obscured. The simple stylized flower pattern in the corner blocks was barely visible. Even the larger curves of the profile were blunted and dull. Removing the paint brought back a vivid quality to the beautifully-wrought casements. The woodwork had appeared tired and bland; muffled by the thick paint, which, once removed, revealed crisp profiles with a sense of luxury and quality.
Finally, a new skim coat was applied over all of the repairs, until the surface was smooth and uniform.
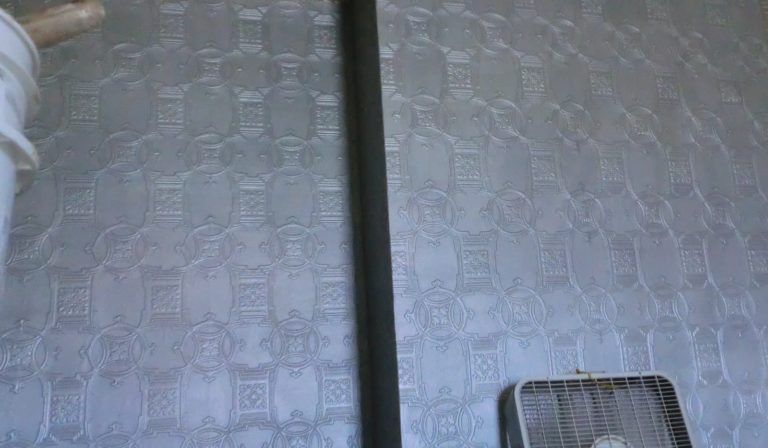
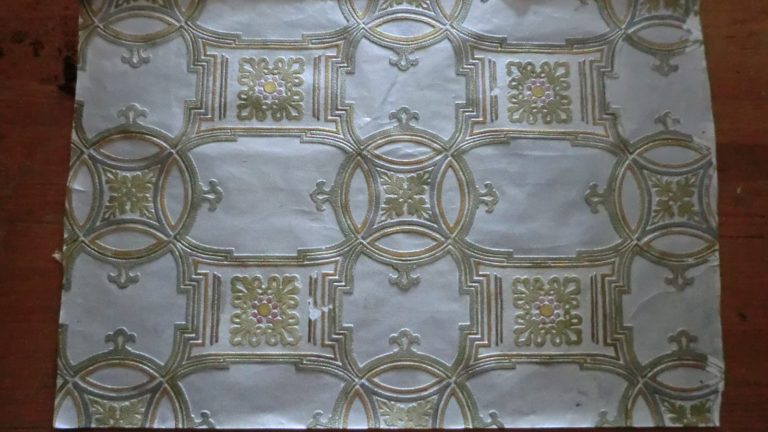
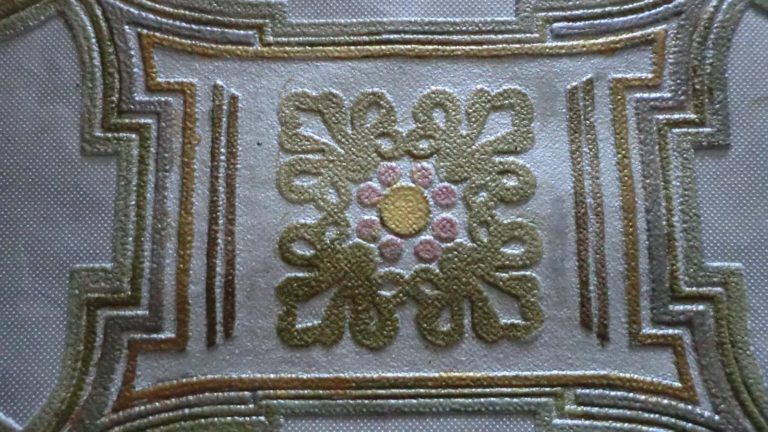
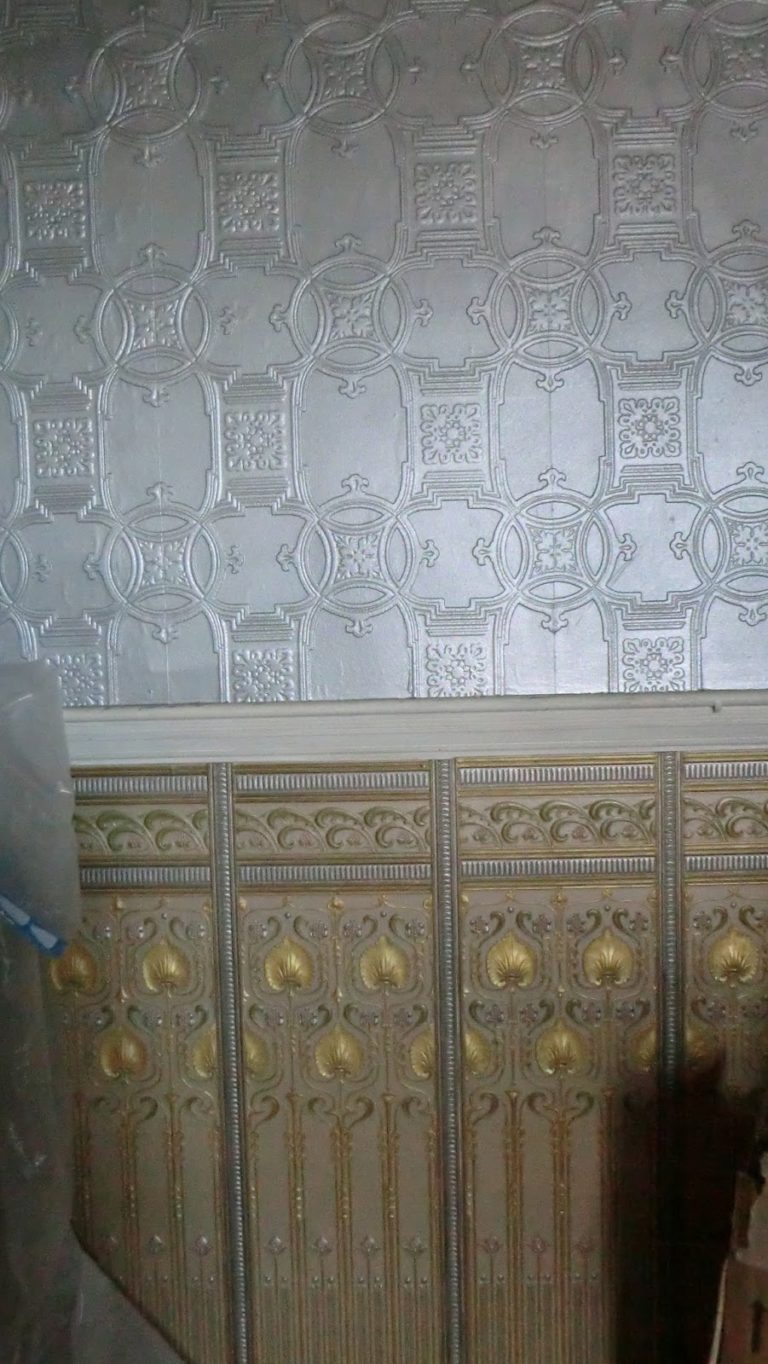
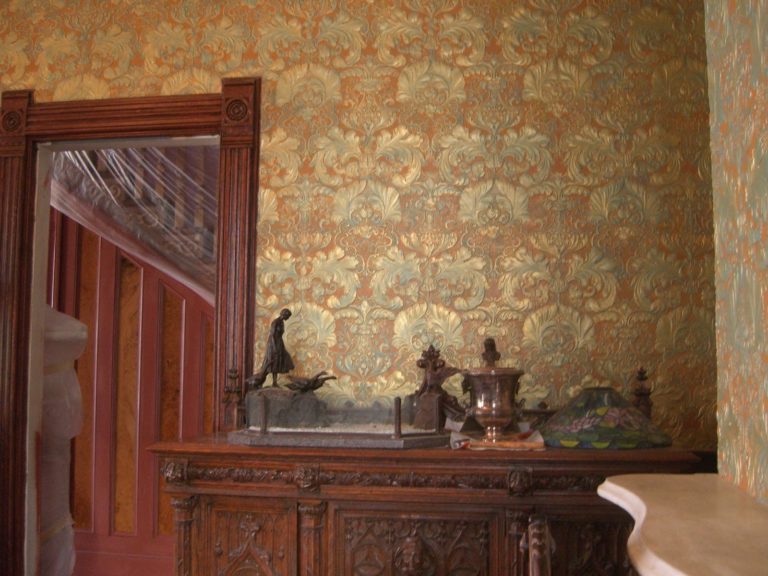
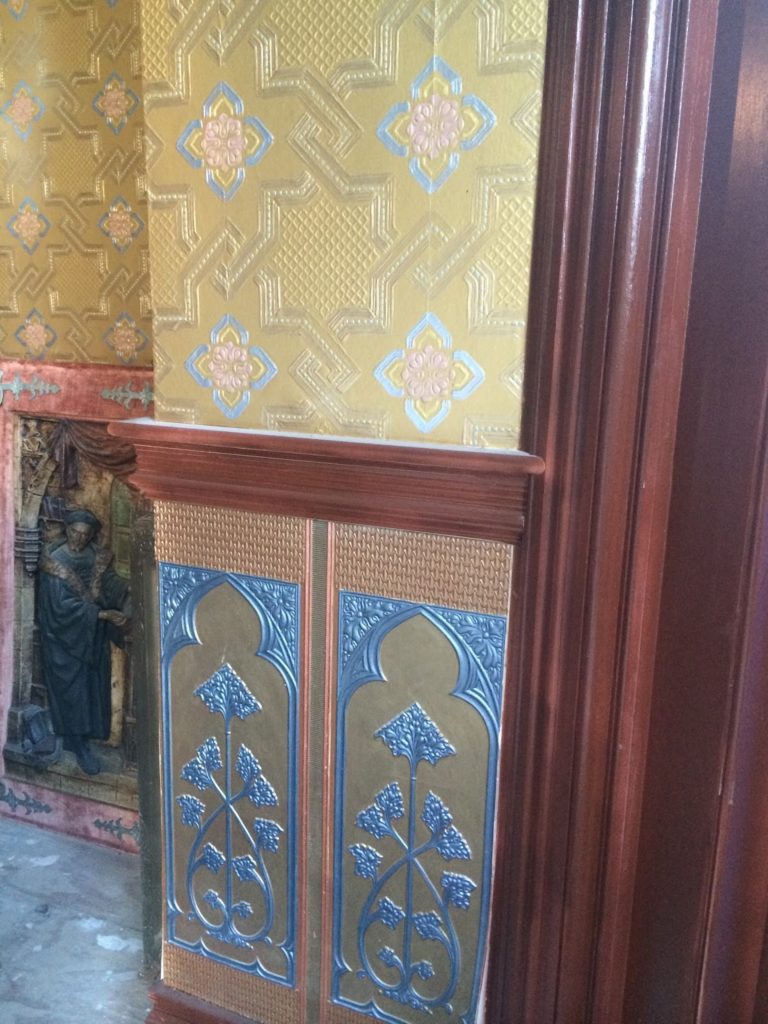
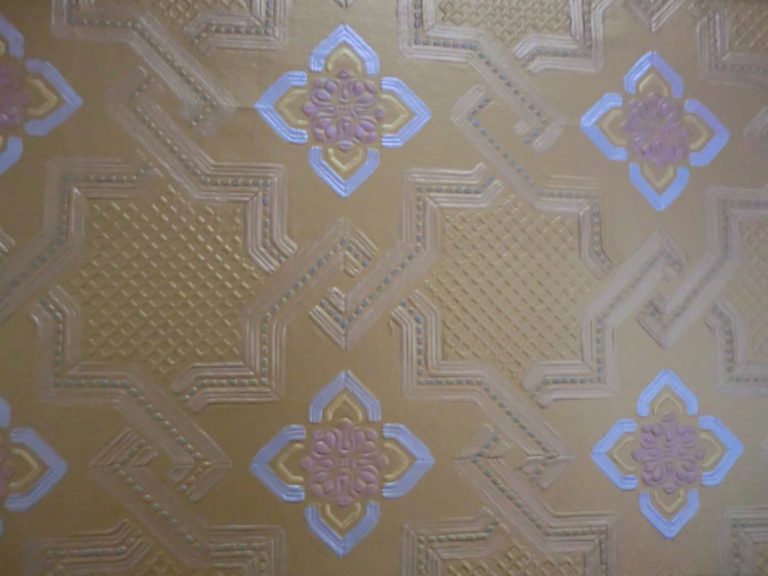
Yes indeed, I did say paint. Therein lies the beauty of Anaglypta; it is limited only by your imagination. The material can be painted a single color or a multitude of tones and hues. Metallic paints are a favorite with this material, as the 3-D effect can fool the eye into thinking that some patterns are stamped metal. The textures of the material also lend a hand in fooling the eye, as seen in this particular pattern, called “Early Victorian” in their Heritage series. as the centers of the rectangle-form portion of the pattern appear to be just a shade lighter than the oblong-form portions of the pattern. This discrepancy is created through a slightly different texture within the rectangles than within the ovals. As “luck” would have it, our painter rolled the silver paint on just a hair too thick, and completely obscured this slight variation in tone, which was a crucial component of the overall color scheme.
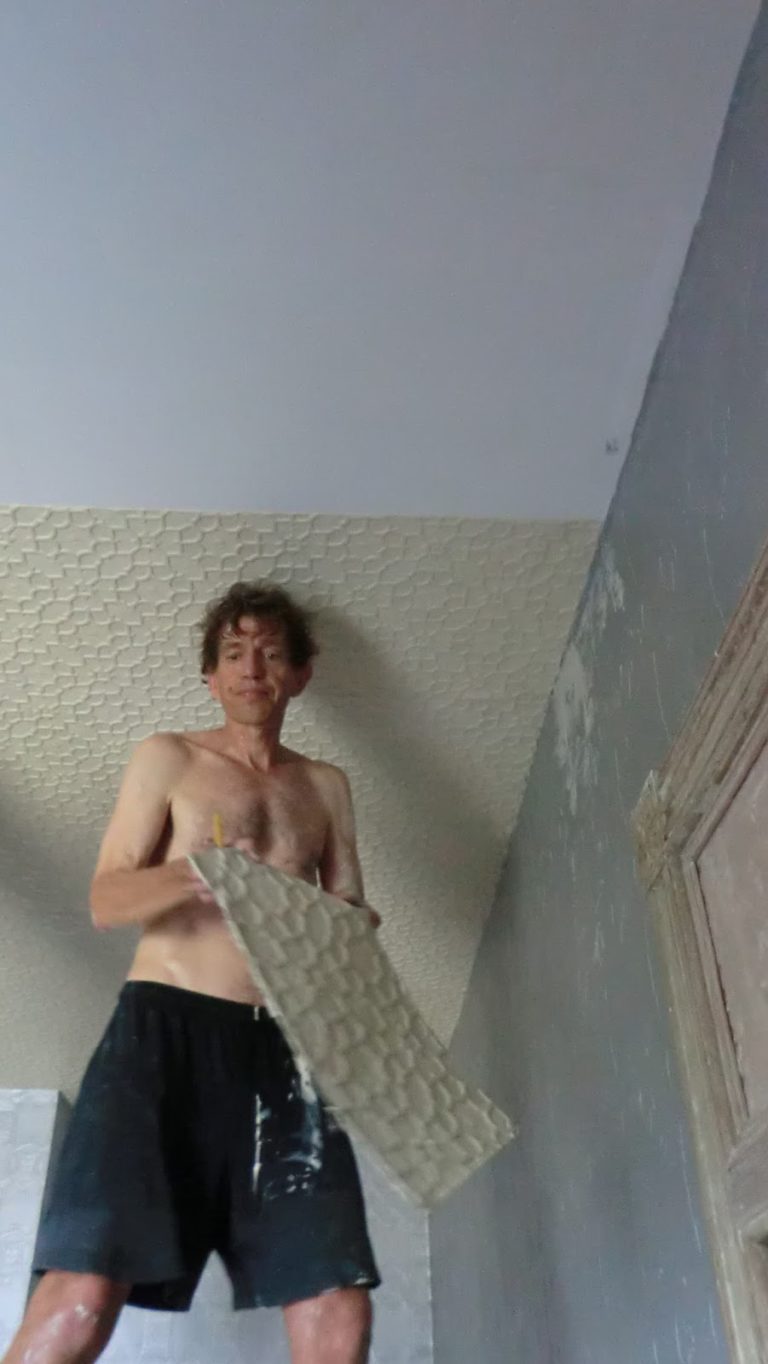
And so, our first attempt at Anaglypta was a complete failure, and the paper would eventually be completely stripped from the walls. Fortunately, our paperhanger was more than happy to get paid to do the same job yet again. Frustrated, we moved on to the ceiling as we waited to get back on the paperhanger’s schedule. As a side note, I mentioned Supaglypta. This is a newer material by the manufacturer of Anaglypta. The tendency of most paperhangers to over-roll the seams, creating a flat spot at the seams. This was an inherent challenge to the material. A properly-trained paperhanger could avoid that issue, but many paperhangers are homeowners, or amateurs. With a single-colored wall, the defect would be glaring. As a result, the company came up with a new material that was three-dimensional, but squashy and quickly rebounded to its’ original shape. Now even a novice paperhanger would not over-roll the seams and permanently flatten the design. Thus, Supaglypta was born.
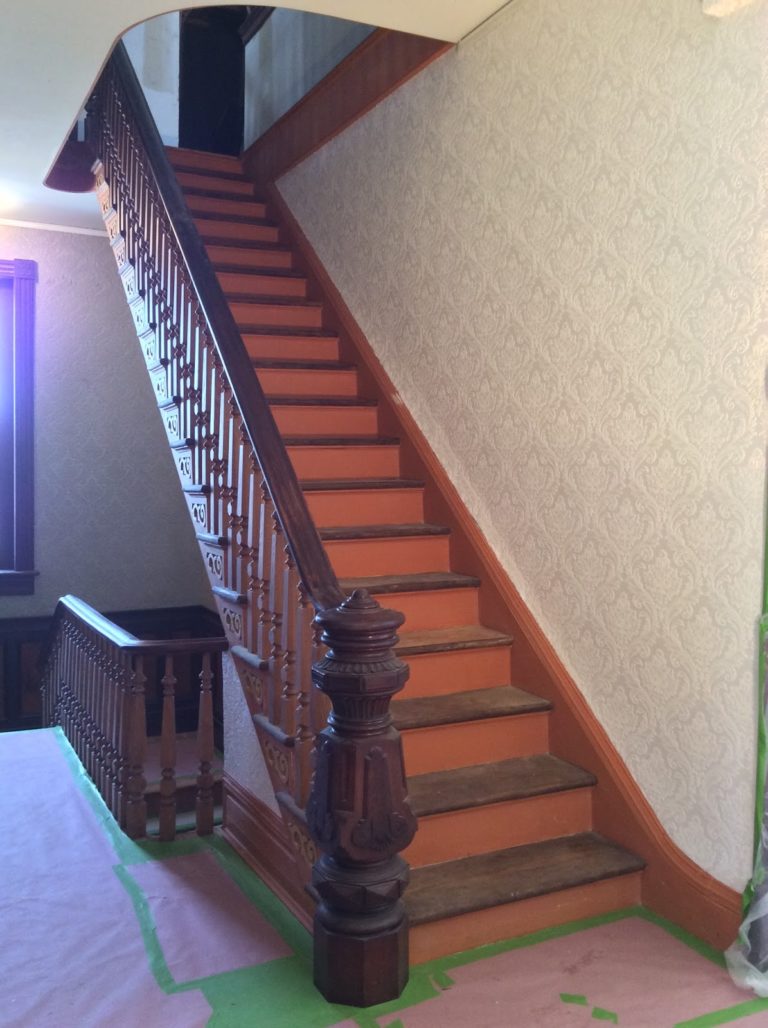
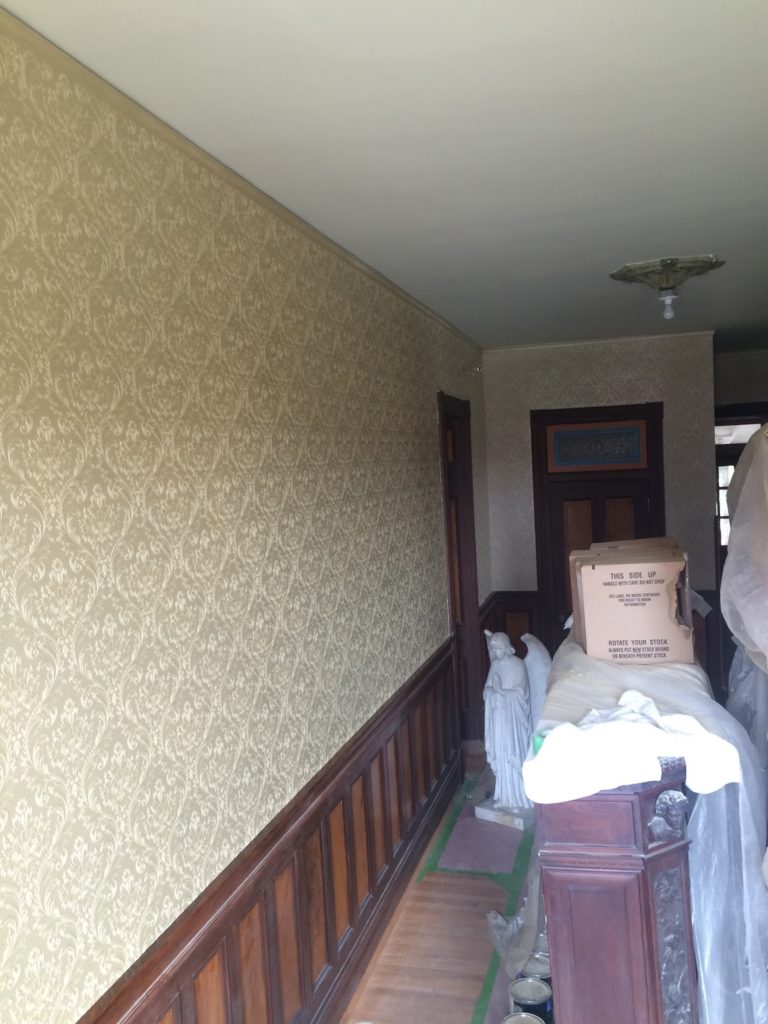
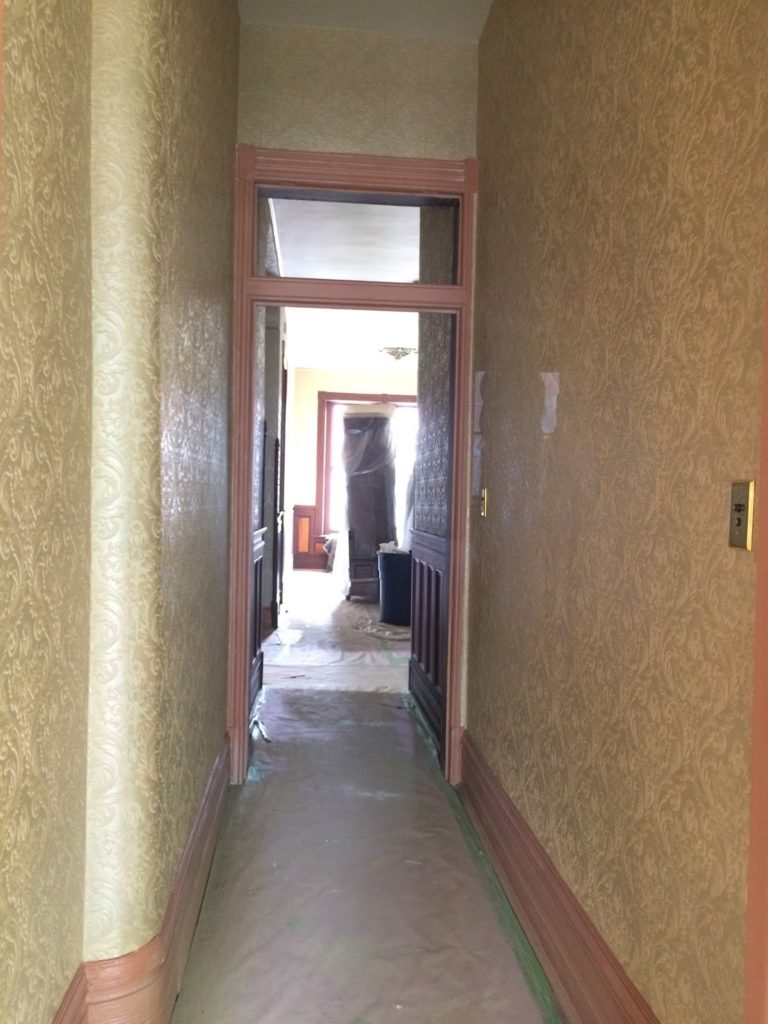
We used another Supaglypta pattern, “High Tradition”, also from their Heritage line in the hallways both upstairs and downstairs. The beauty of that pattern was that by applying the thinnest layer of spray to the paper, a single color with a metallic base produced a two-toned effect that did not involve the tedious and time-consuming task of applying paint brush to paper to create. Here, the staircase to the attic has had the Supaglypta applied, but it has not yet been painted.
A Ralph Laurent metallic paint, “Great Hall Cream” is mixed with a silver metallic base. The painting of this hallway was delayed first when the paint cans were opened in preparation for painting, and one of the gallons was found to have gone bad. This left our painter without sufficient material to complete the painting in a single session. We were not inclined to do the job in sections, as we worried about inconsistencies.
The local Home Depot, fortunately carried the line of Ralph Laurent metallics, and even had a couple of gallons of the silver base on hand at the store. The staff were able to find the formula for the “Great Hall Cream” in the computer, but were somehow at a loss as how to actually get the paint mixed with their sophisticated machine. Frustrated, we waited until we were back in Falls Church to have the Home Depot in Northern Virginia fulfill the task. Alas, even the experienced staff at the busy Merrifield store were unable to figure out how to get the machine to spit out the formula they desired.
Tackling the ceiling now became our next order of business. We had bought rolls and rolls of another product, called Lincrusta, anticipating that we would use it in our hallways upstairs and downstairs, but we changed our minds. Now, all of this raw material on hand suddenly became exactly the right material for the ceilings in our Master bathroom as well as in the Master bedroom. It was just perfect! The “Elizabeth” pattern, it seemed, had been destined for this space.
Lincrusta is a thick and heavy three-dimensional material. It was created in the 1870s by a British firm. The product combines a paper pulp with linseed oil and takes the doughy material through a series of conveyor belts that squash it flat and thin, and finally through heavy rollers which stamp a deep relief pattern into the material. After it dries, you have a somewhat-pliable heavy and thick wallcovering that is resistant to cracks in the walls. This product also comes in a single color, slightly yellowish, off-white, and painting is required to complete the look. Lincrusta gets increasingly brittle with age, and antique Lincrusta is difficult to restore, as most of the old oil-based paints that can be removed easily with oil-based paint stripper will also have the unintended effect of dissolving the underlying material, which is also, of course, oil-based.
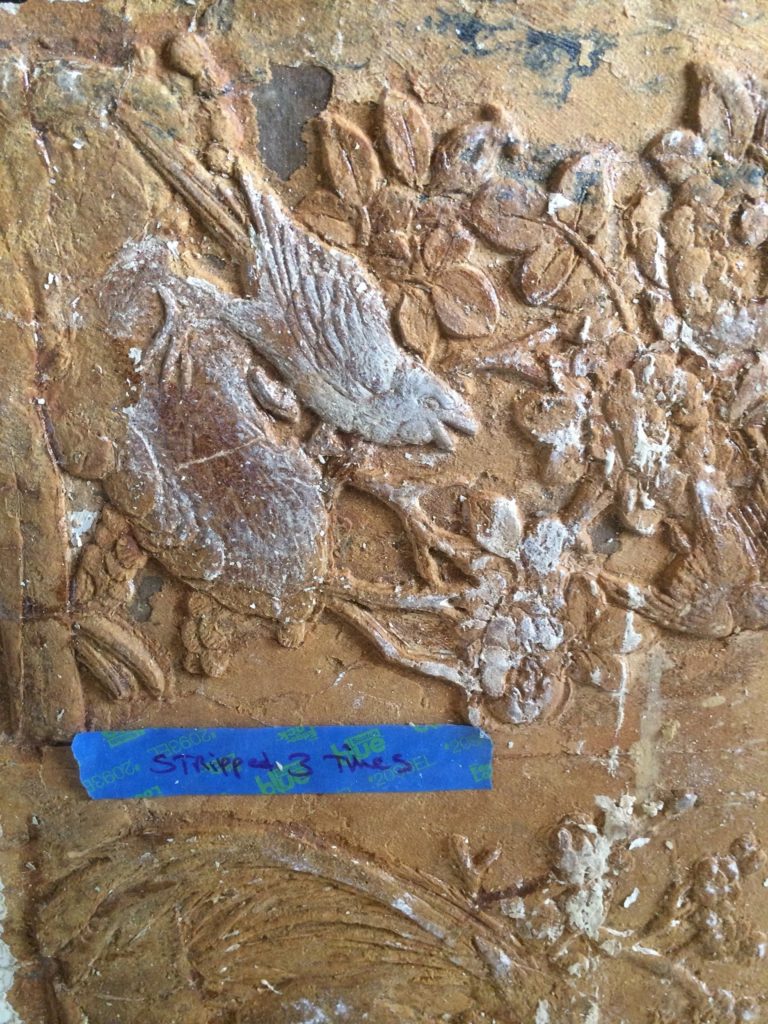
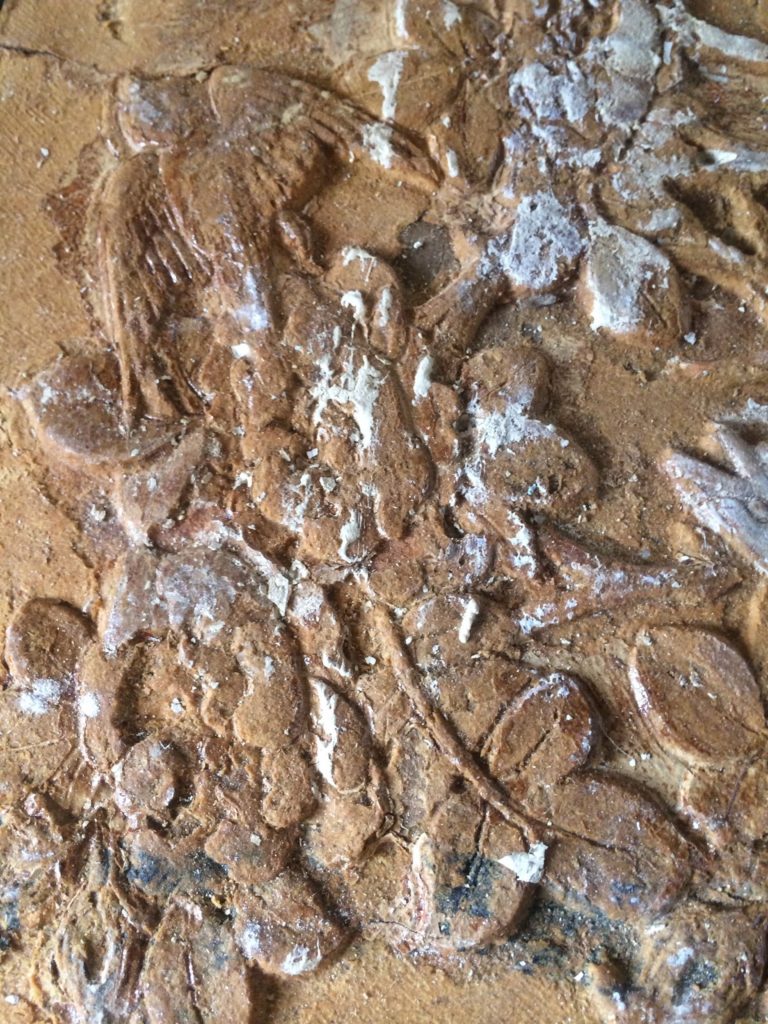
Our house still had some extant ancient Lincrusta panels, designs of birds, fruit, flowers and foliage. Each of the transoms over the main hallway, and inside the music room and double parlors possessed a unique set of panels. Only one transom was empty, having lost its precious panel some many years before. The years had not been kind to these survivors, however, as the layers of paint piled over their delicate designs had a marshmallow effect, blurring the delicate designs. Early attempts at restoring these panels had been quickly aborted, as the tiniest attempts using the heat gun and various strippers threatened the underlying medium. Thus, the panels sat, for over a decade, comfortably ensconced in protective layers of plywood and cardboard, wrapped and visibly labeled.
A gentle stripper was finally the answer to the question about how to go about restoring these beauties to their former glory. And when I say gentle, I mean REALLY gentle. You would apply the product to the painted surface, leave it on overnight with a covering of plastic wrap to keep it from drying out. The following day would be spent painstakingly wiping off the stripper with a paper towel and gently massaging the surface with a slightly firm brush to dislodge some of the paint remaining in the crevices. It took multiple applications and a gentle hand to ultimately reveal the final layer of original surface.
For once, I was excited to announce that the “third time’s the charm” when mentioning a Danville project. It was the third application of the stripper that managed to overcome the majority of the gooped-on paint to reveal the beautiful textures and details of the original Lincrusta panels.
In the meantime, work was progressing on the ceiling of the Master bedroom…
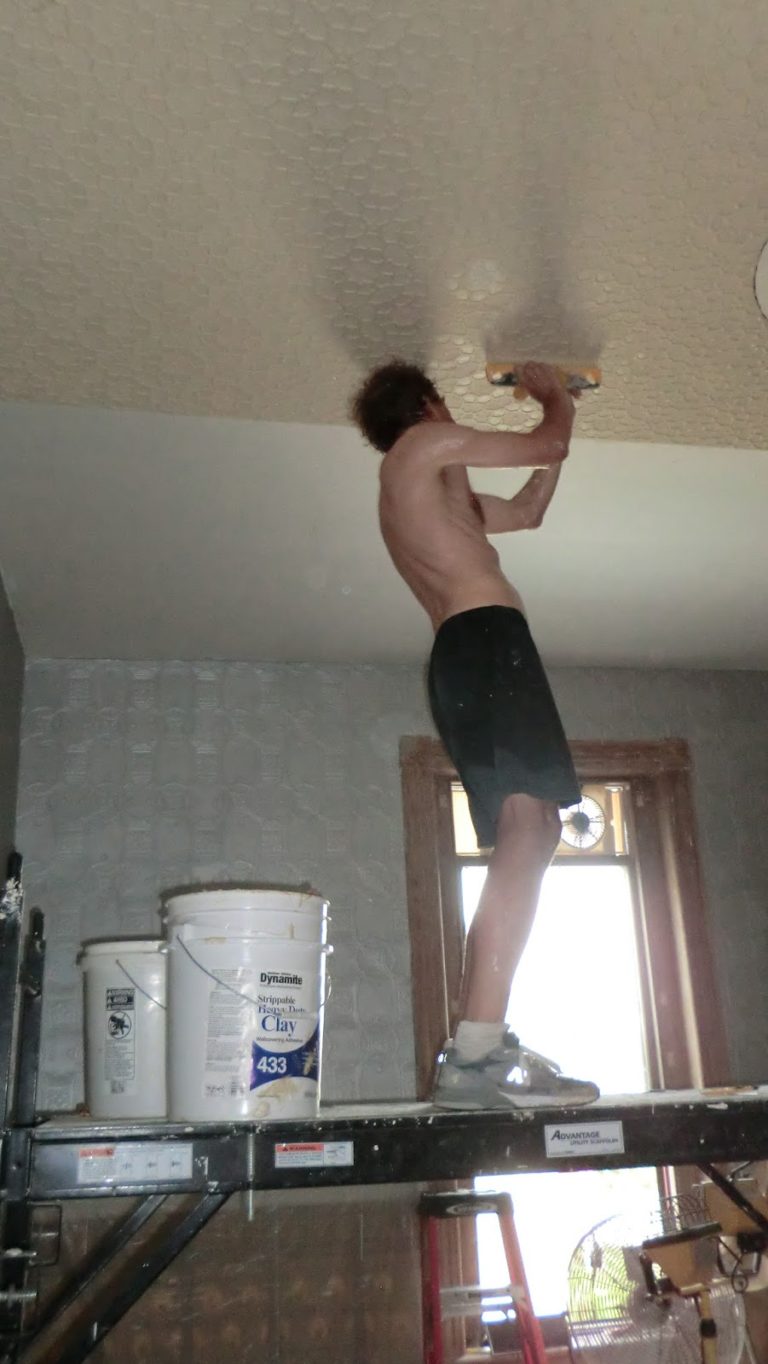
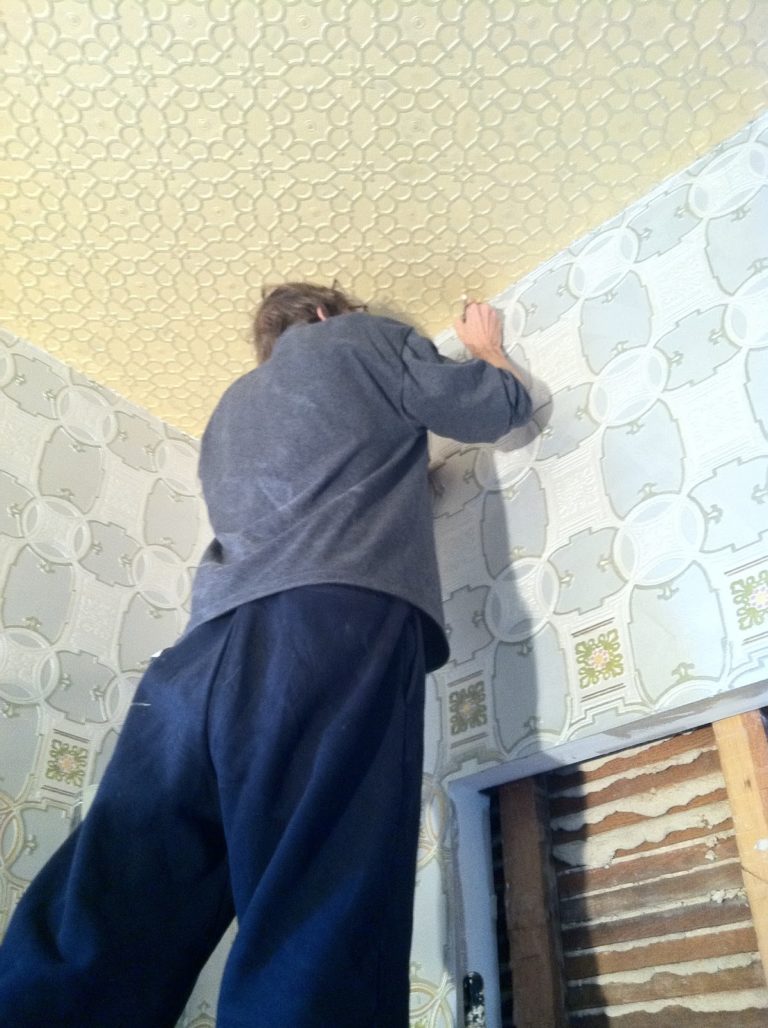
The material is put up with a clay-based adhesive. It goes on thickly to the back of the slightly-moistened Lincrusta. As you can imagine, hanging it on the ceiling is heavy, sweaty, dirty work. Two people are required in the installation process: one to hold the material in place and push newly-pasted sections into place; one to thickly brush the clay on the reverse side and continue to unroll the roll. The pattern is easily matched up, as the deep embossing makes it easy to eyeball, and the clay allows for some slippage if you are slightly off. You can manhandle the strip forward or backward a few increments if necessary. In the process, clay drips out from the seams upon your head and shoulders, and the effort of moving a section forward or backward, even a smidgeon can leave you breathless with the effort. Each section is then inspected for pattern matching, and the seams brushed, with a heavy hand, toward each other to minimize any gaps.
There is certainly some skill required in the handling of this material, but if a lawyer and a nurse practitioner can do it, well, why couldn’t anyone else. My main deficiency in this project was lack of musculature. We had to stop frequently because my arms were shaking, and I just couldn’t maintain the pressure against the ceiling necessary to keep the roll from peeling away again. In the end, our neighbor’s strapping teenage son stood in for me to complete the bedroom ceiling. The Master bathroom ceiling consisted of much shorter runs, so I was able to pull my weight much more fully in that project.
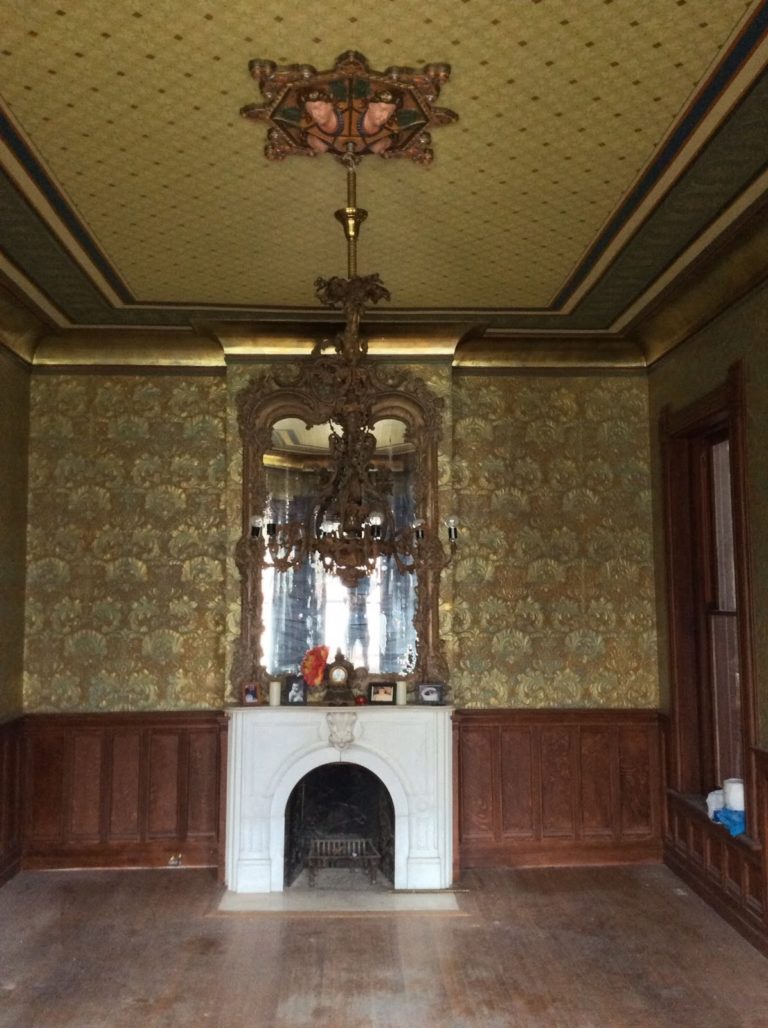
The end result is better than even I could have expected when first the raw material was placed in its off-white state on the walls of this room. You can read more details about the restoration and painted surfaces of this room here.
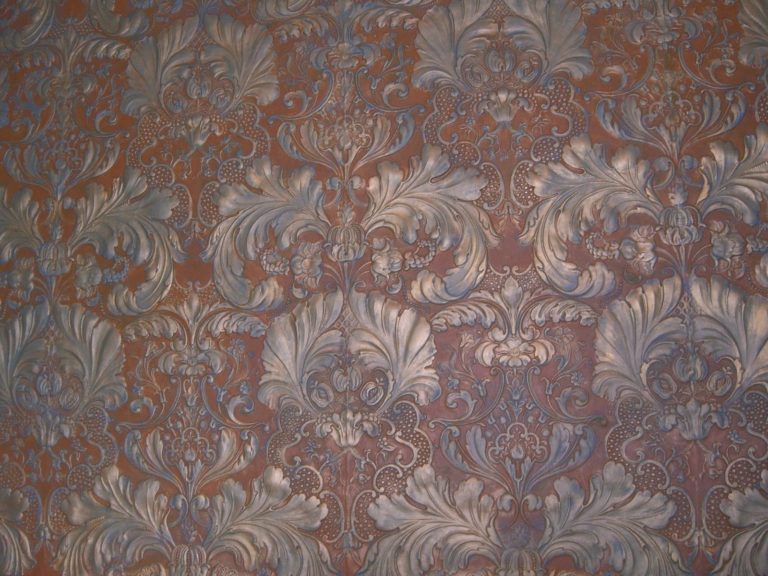
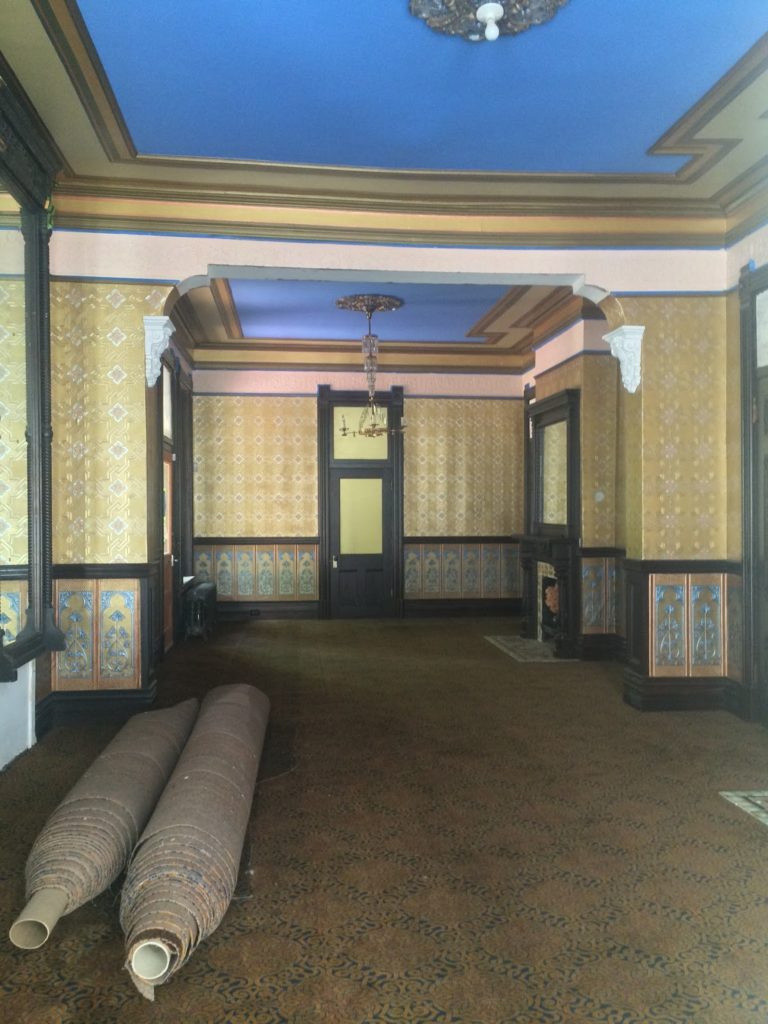
The double parlors, also, received their allotment of Lincrusta. The inspiration for these rooms was the remnants of carpeting pulled from a Knights of Pythias Temple’s upper meeting chamber, and was Moorish/Gothic in design and colors. Given that the house is also a Gothic edifice, it only seemed fitting to outfit the grandest rooms of the home with design elements to match the style of the architecture.
I love how the pattern changes color according to how the light hits it. It looks bright and really picks up on the silvery blue/gold during the light of day, and dulls down to a mellow coppery bronze feel in the evening with the light from the chandeliers. The room has many moods as a result; somewhat gloomy with the darkening sky from a storm, cheerful on a Summer day, and subdued and relaxed in the dead of Winter. Its as though the home is alive with expression and temperament and has an emotional tone reflected through the eyes of its windows and with the lifeblood of its electrical light.
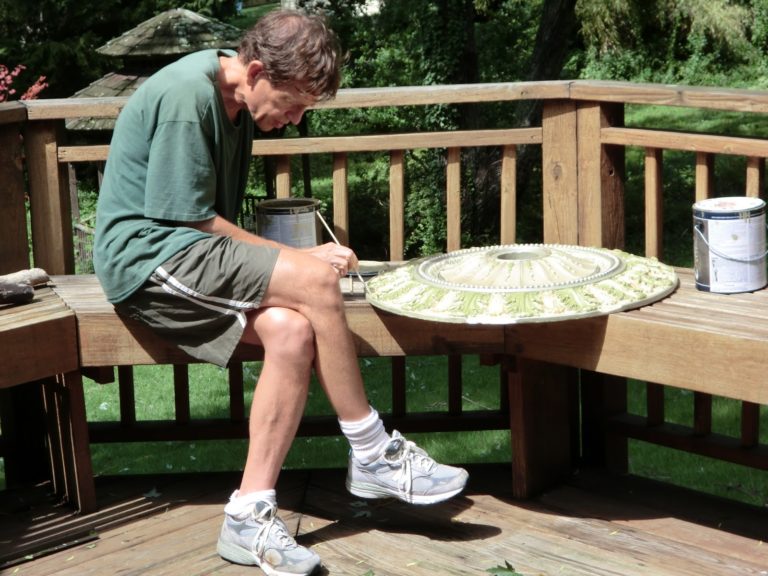
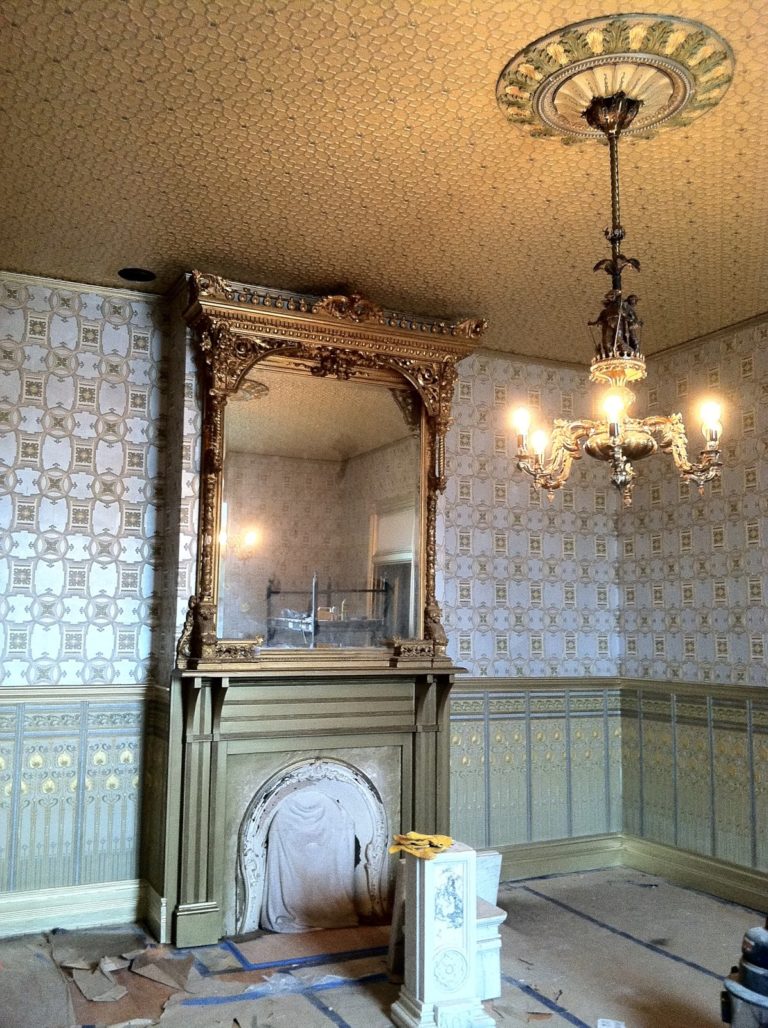
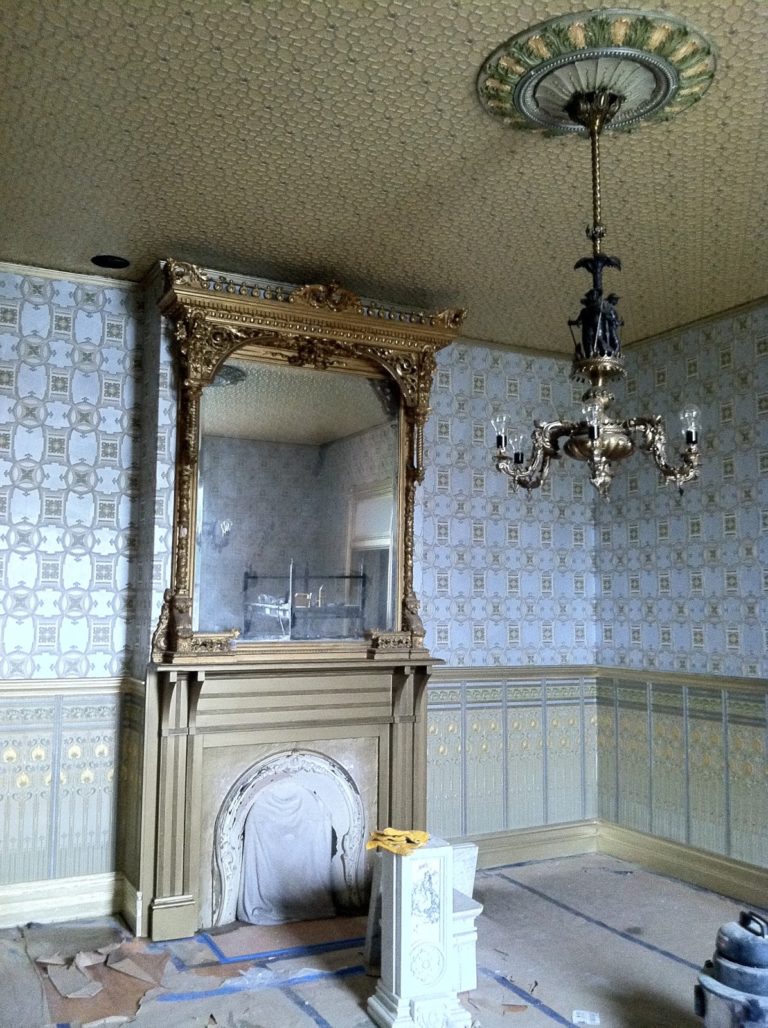
The echoes of a ceiling medallion in this room were heard loud and clear, and so we sought a ceiling medallion to replace the one long lost. Finding a company who reproduced historic designs in actual plaster, we fixed upon a pattern which was sympathetic to the other design elements of the room. The color scheme was already pre-ordained, it was a complicated matter, however, to place the colors from the Lincrusta and Anaglypta in just the right places on the medallion to pull together all of the elements of the room.
There certainly is nothing better than having this handsome man sitting on my back porch happy, painting, busy, creating. I don’t know how I got so lucky…just saying…
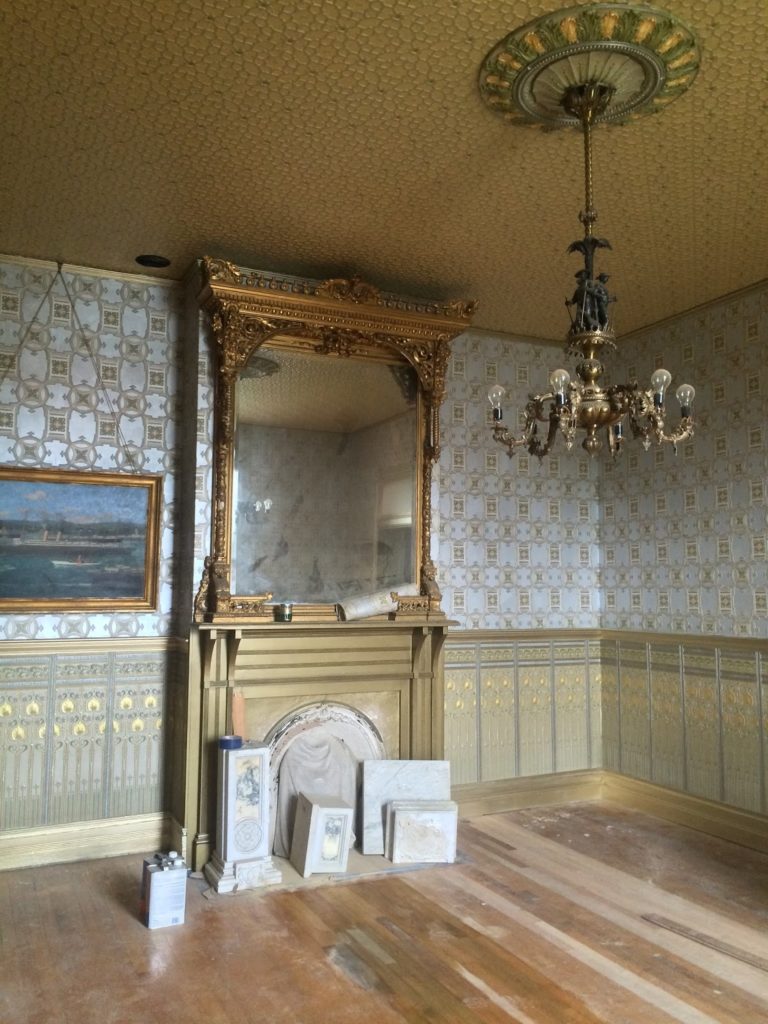
Finally the paint removal was complete, the picture molding put in place, and the remaining missing portions of trim milled and installed. The bright gold finish applied to the woodwork further enhanced the look of this room as a jeweled box from the inside. A Lincrusta panel will eventually adorn the empty transom above the entry to the Master bathroom.
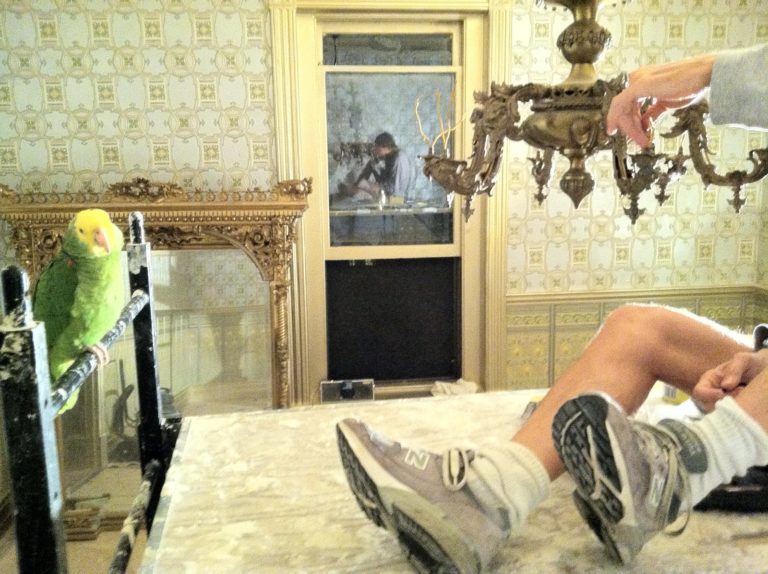
We consider lighting to be just as important to a room as the furniture, wallcoverings, carpeting, and other design elements. We like to be true to the period, and so purchased a pair of Archer & Warner six-arm chandeliers. The firm operated out of Philadelphia, PA from the mid 1800s. One of the pair will hang in this bedroom, the second from the pair will hang in the other rear bedroom. As luck would have it, we also found a matching pair of sconces which will eventually be installed in one of the bedrooms, perhaps this one. For now, Tom is well-supervised under the watchful eye of Austin as he installs the chandelier in this room.
The ceiling medallion, finally in place, and the silver tips to the ceiling pattern, still awaiting the gold highlights. The Archer & Warner piece presiding over the gilded lily.
As with the other metallic-painted rooms, this one has its moods and personality. My favorite time of day for this room is the early morning sun. With the Eastern exposure, the slanting light favors the metallic surfaces with a rich glow, like the embers of a dying fire. The shadows of the picture molding are accentuated, making the ceiling appear to be floating, detached from the walls, as though some other-worldly force was lifting the lid off of my beautiful jeweled box. The highlights of bright silver and brilliant gold on the ceiling are their most vibrant at this time of day. I love to lie in bed and bask in the glow of this magnificent jeweled box, knowing that it gives me more pleasure to wake up to this view than any other room I have ever experienced in my entire life.
While various options of tung oil, waxes, and other surfaces were experimented with, ultimately it was a simple thin application of a matte finish polyurethane which was applied. While I am somewhat mortified that I just admitted to using polyurethane in this house, I believe that it was tastefully applied, not made to look like liquid floors, and hardly had the effect of turning the surface underfoot into a “brand new” appearing material.
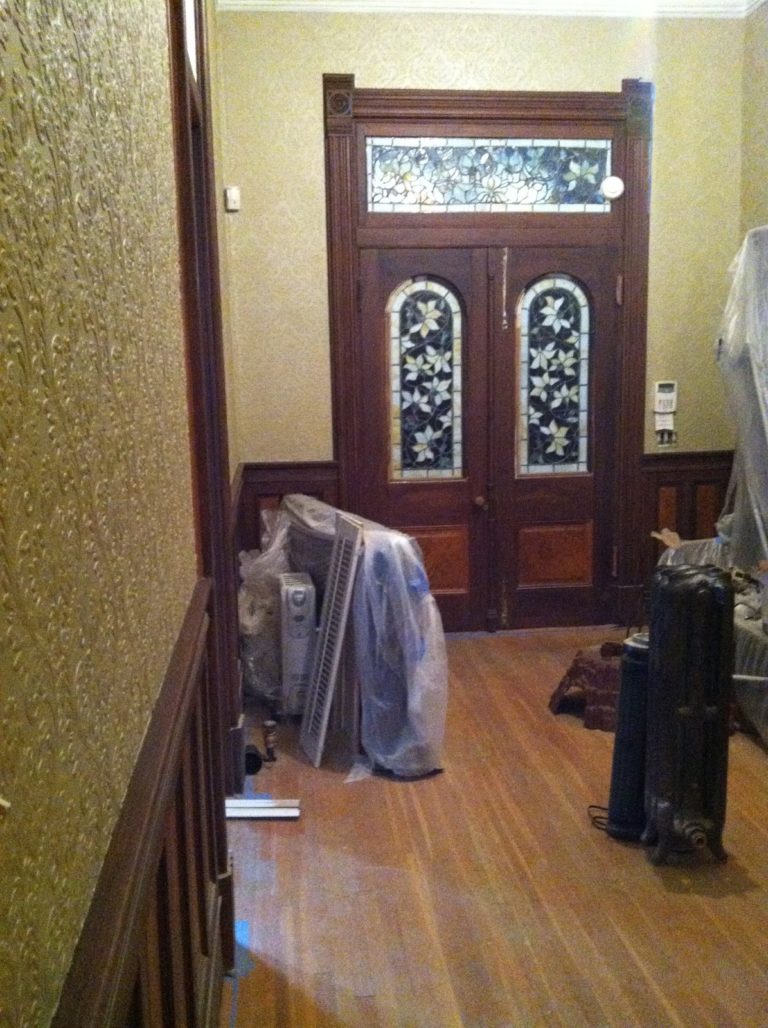
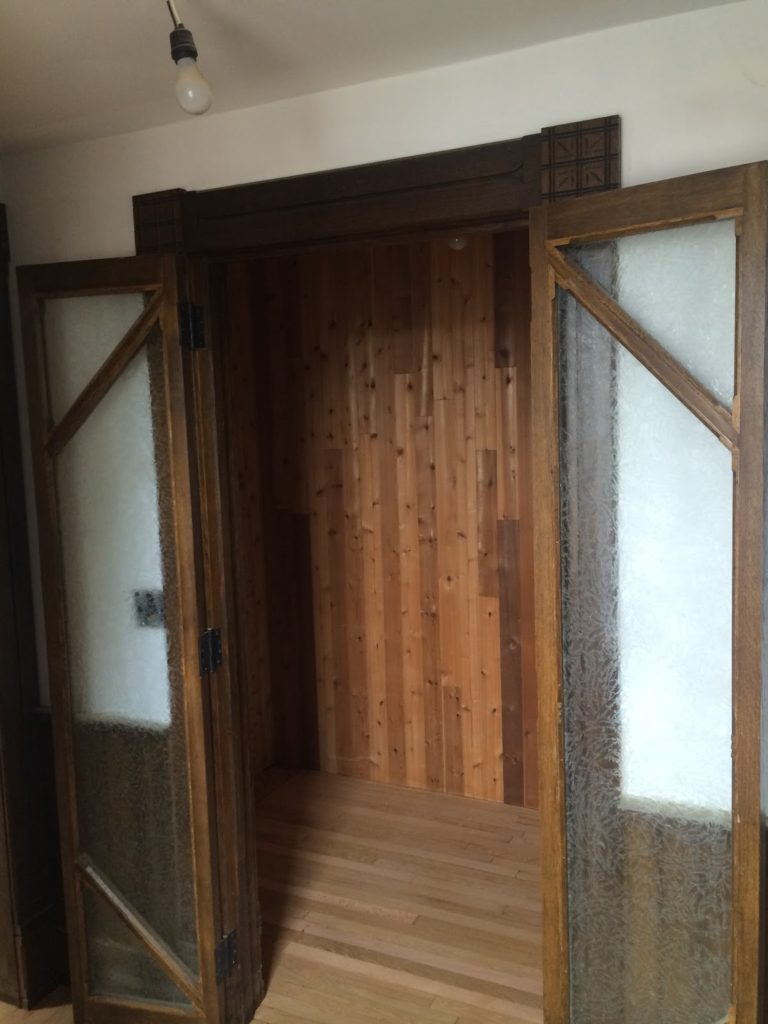
The glass in the doors is an ingenious treatment for glass. It is called glue chip. Literally, there is a glue that is applied to the surface of the glass, and the glue shrinks as it dries, pulling chips off of the top layer of the glass to create this random pattern of tendrils, ferns, and curves most closely resembling frost on a winter window.
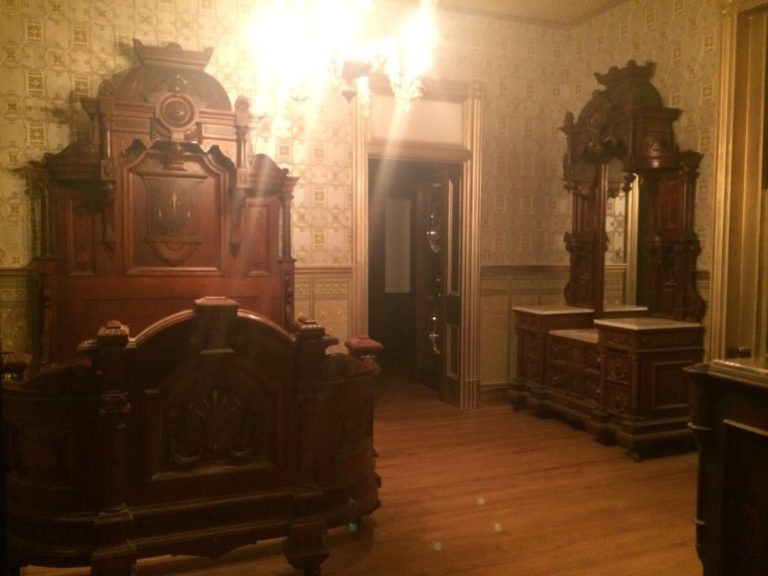
And now, ultimately, to see my favorite bedroom suite installed in my Master bedroom is the hight of satisfaction and pleasure. I have waited fourteen years to finally fall asleep in this bedroom suite in this room in this house. I almost dread picking out a rug from the collection, as I simply adore the hardwood floors just as they are. But I must protect these assets for the future, so I will find my way up to the attic, pick through the collection, and find just the right Persian to complement my jewel box Master bedroom.

Carla Minosh
While I am new to Blogging, I have always enjoyed sharing the stories of my crazy life, so this is simply another medium to share, and hopefully entertain and enrich others. Perhaps you can feel thankful that your life is so steady and predictable after reading these, perhaps you can appreciate the insanity and wish you had more of it in your life. Either way, the crazy tales are all true (to the best of my spotty recollection) and simply tell the tale of a life full of exploration, enthusiasm, curiosity and hard work. I hope you all enjoy being a part of the journey.



Once again, I am gobsmacked at the beauty of your work, your dedication to Doing It Right, and the results which make me stare in abject wonder.
Whoa, it's absolutely gorgeous!
You are an amazing couple! I am mesmerized by the beauty of the wall, ceiling and floor treatments. I deeply admire your tenacity and painstaking patients to detail.
Beautiful. Tastefully and Decadently beautiful. It's such a joy to to watch this transformation! Thank you, so very much for sharing your journey with us. I am awed and humbled.
The level of your patience and attention to detail is astonishing. I love the colors and patterns you selected in all facets of this wonderful restoration. The tiles, wallpaper, paint etc are a marvel to behold.
I am renovating my Queen Anne and struggling with the decision process every day. Have you ever thought about working on other folk's projects? I would so love to get your help and advice..
You are too kind…I would be remiss to point out, however, that my husband is the "straight guy with the queer eye" who comes up with all of the design, colors, patterns, and details. I am just his support staff, backup crew, cook, cleanup crew, and cheerleader. For the time being, until his clients finally let me have him back, his time belongs to them. As scary as it may seem, all of this was done in our "spare time." Maybe someday he will retire, at that point, who knows what projects might capture his attention…
You perform an absolutely vital role as the backbone of the process. Yup i totally get that he puts the artistic touches in everything he does. Both of you are visionaries… Best of luck to you the house is wonderful and so are you guys.
This room is my introduction to this project, so I apologize if you've answered this question before. Where, oh where, did you find that bed/suite set?! I have attempted internet searches before, but only come up with images and nothing ever for sale…I recently toured the Winchester Mystery House and became enamored with these HUGE carved masterpieces!
I just…I mean…how…you guys are amazing! I had to reread the part where it said it was all HAND painted! I just bought a 1901 craftsman bungalow and I hope I can restore it by just a fraction of what you two have accomplished. It is literally breath taking!
I did write about that in another blog post, but I don't remember off the top of my head which one it was. You just have to scour the Bee, the Main Antique Digest, and any other source for antique furniture auctions available including liveauctioneers.com, etc. Lots of luck to you!
Hi, Carla Minosh
you have done a great job here, most of the time i am note interested in long articles but at this time i love your post and you have to share pic's that was really nice , thanks for shearing.
Commercial Wall Coverings
I really enjoyed reading the transformation of your master bedroom! It is beautiful! I will be using Lincrusta for my hallway and wondered what brand of paint you used for the master bedroom? You mentioned Ralph Lauren for the hallway…I don't know if I'll use any metallics but if I do, I'd like to make sure it will look this good!
I would very much like to agree with the previous commenter! I find this blog really useful for my uni project.residential painting services I hope to add more useful posts later.
Wow. Just wow. What a blog ! What a project ! You've done an incredible job. You should be very proud. Congratulations.
Fantastic post! Please keep sharing. btw, I know of a roofing company if you are interested in roofing washington. Please get in touch! Thanks, have a good day.