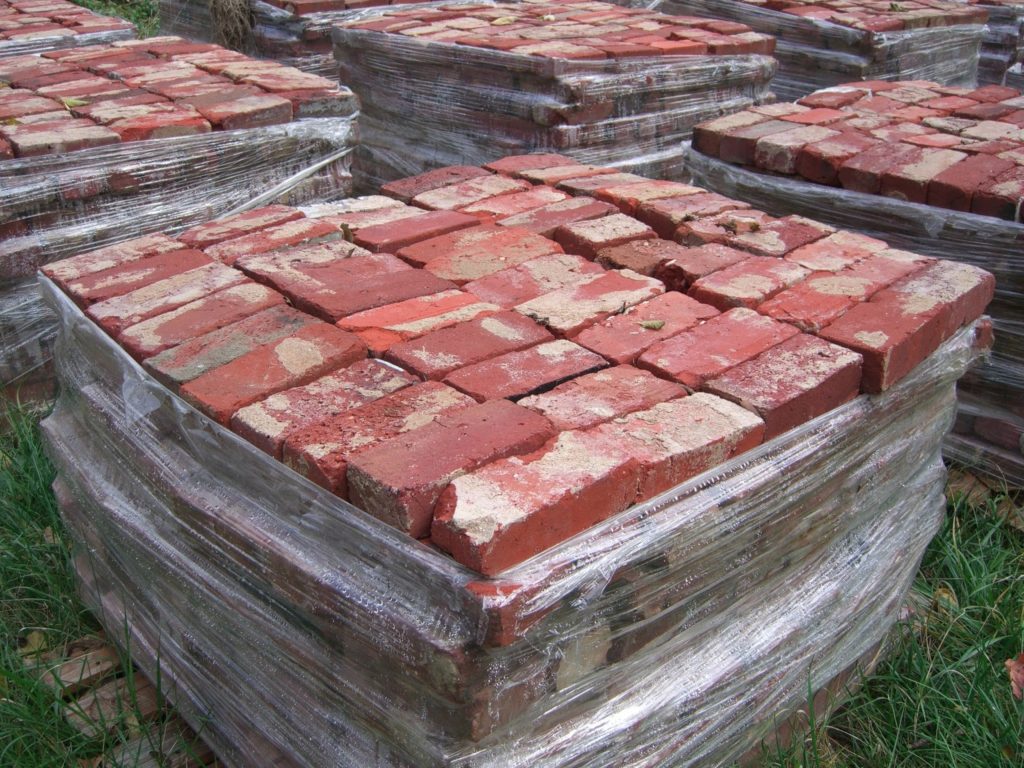
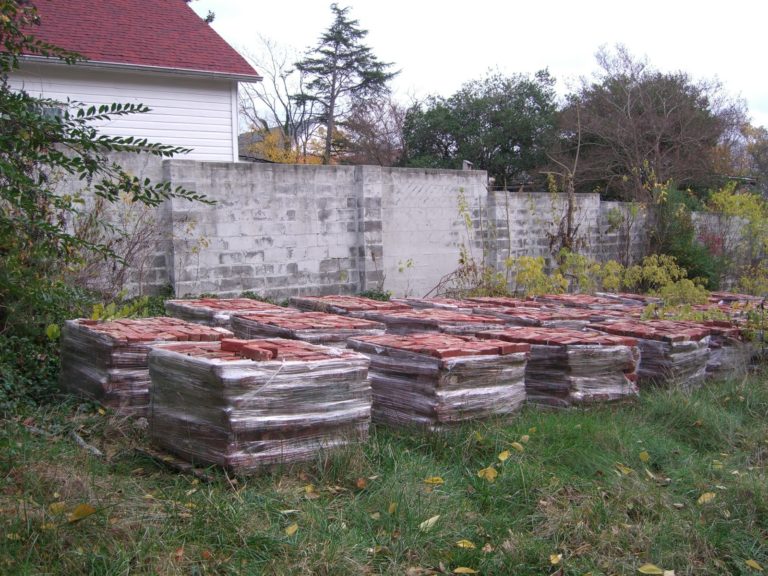
Bricks everywhere you looked; pallet after pallet of neatly stacked bricks. And they all needed to be carefully assembled into a cohesive and uniform straight and decorative wall.
We stood there looking at the start that our mason had made, and both of us were left scratching our heads, standing at the corner of the property staring at the solid column of bricks which had been built in our absence; mortared into place and slowly starting to spread in one direction along the side of the house. Where would this wall ultimately terminate? Where would the end column reside? When we pulled a line down the length of the budding wall, and brought the end of the string to its terminal point, the answer made no sense.
The landscape crew had come along and dug a ditch. Even though the Southern Virginia building code required a concrete footer for the wall sufficient to withstand the milder frost risk, we built the footer an extra twelve inches deeper just to make sure it never moved. With rebar lining the hole, we ordered fiber-reinforced concrete to be poured, and had allowed it the proper amount of moisture and time required to cure. As we sighted along the lines of the beginnings of the new property boundary wall, it was unclear why our mason was going where it appeared he was headed with this new structure. We needed answers. Finally, he arrived at the house to respond to our query.
He was dismissed. While his repointing work had been good quality work, his wall-building skills left much to be desired. As we sat dejectedly upon one of our many pallets of reclaimed antique bricks, we pondered the monumental task of getting this wall built. We already had some idea of how to handle the lime mortar, and already had received four 50-gallon barrels of slaked lime, a pallet stacked high with bags of white Portland cement, and a mountain of river sand. We had the raw materials, but not the experience for the task. A few interviews with local masons left us even further from our goal, as none were willing to work with the slaked lime putty. After explaining the general principles of working with the lime putty, one mason even had the audacity to laugh in my face, saying that he wouldn’t have some little girl telling him how to do his job.
The internet brought us more knowledge and books, however, and after turning many pages, devouring the information within, and after talking on the phone to a couple of people with training and experience with using period materials and techniques, we felt that we could handle the task of properly laying these old bricks.
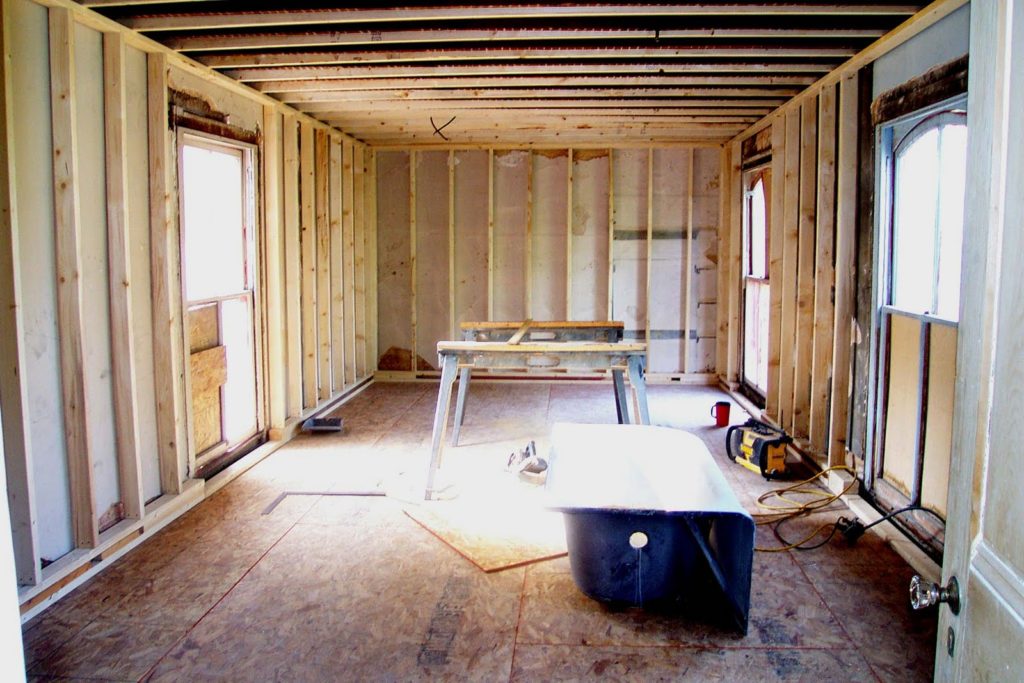
As always, other work was going on in the house, and our carpenter was hard at work replacing the rotted trim on the large arched window in the central tower on the third floor. It was exacting work to get the curve of the woodwork just right, and he had to kerf out (saw out little notches) the entire length of the trim pieces in order to get it to bend into the proper shape. Using a form to guide it into the proper arch, he nailed and glued all the pieces, let them dry, then installed the newly-built structure for the arched window.
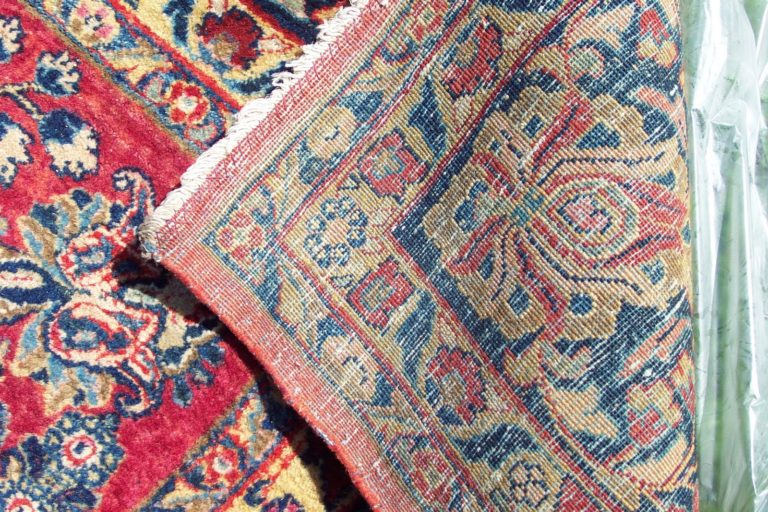
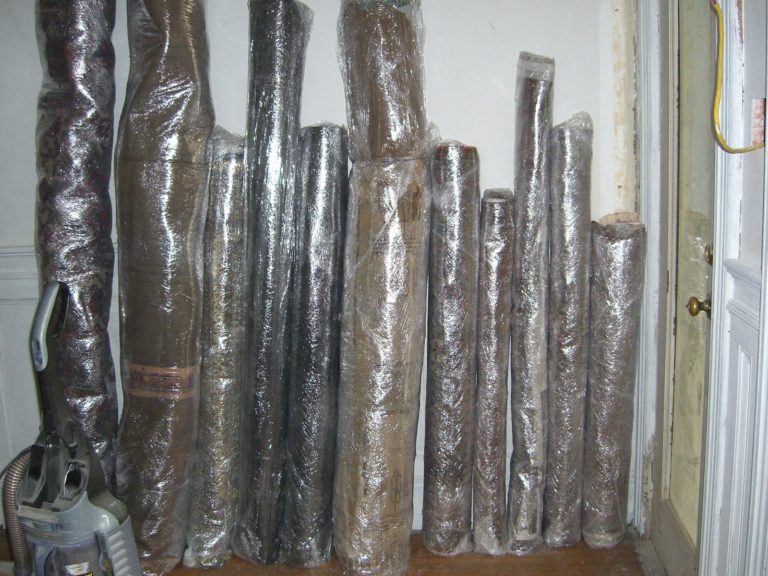
In the meantime, we had been out shopping for decorative things with which to furnish our house, and had recently come across an out-of-the-way auction selling some really nice antique Persian rugs, and were the successful bidder on a few of the lots, coming away from the auction with three old oversized wool carpets for the house. We love the colors and textures that these rugs bring to a Victorian home, and happily stuffed our car full of them and hauled them up the side entry steps with the aid of a hand truck. As we shifted the last one off the hand truck, and into place along the wall of a room we were using for storage, we surveyed our stash of rugs, curled and tightly bound, resolutely standing at attention in a neat row. It was as though they were patiently awaiting the day when they would be opened again, their colors, patterns, and thick pile facing outward to the world in their final placement in the house. For now, the subdued colors and tight knots of their backsides gave only a hint of the beauty hidden inside each rolled carpet.
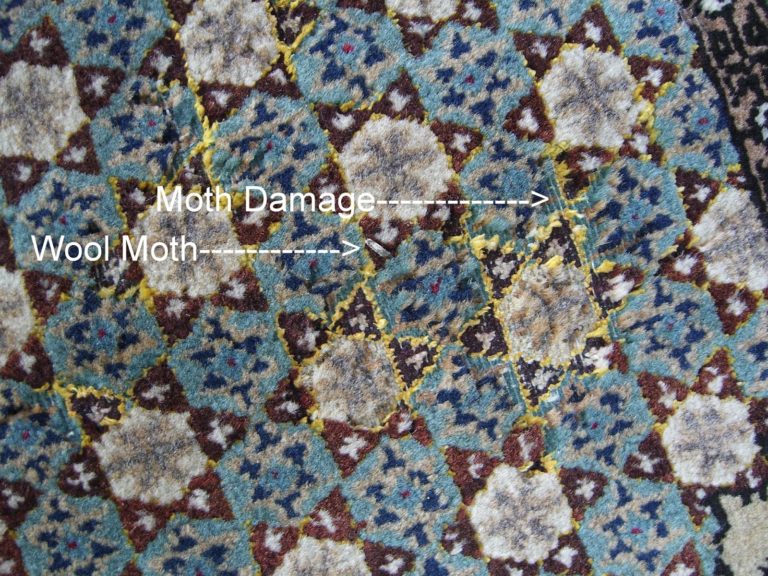
With a panicked frenzy, we grabbed the nearest rug and pulled the knot to release the rolled carpet from its bindings. Relief washed over us as carpet after carpet revealed only a moth or two, many with none. We almost started rejoicing too soon, as we got to the last three carpets, and opening the first of the three, there spilled out a myriad of fluttering wings and dusty debris. We dragged it outside and in the front lawn surveyed the damage to the thick wool pile with dismay. The next two proved even worse. One went right into the trash, as it was beyond saving, and likely the source of the infestation. Insult to injury, as the rug had been purchased from an antique dealer who had ended up defrauding us on a later, bigger purchase. Unfortunately, that story will have to wait to be told, as our settlement contains a gag order forbidding us from telling the tale of his underhanded techniques. He won’t live forever, however…But in the meantime, it was somewhat satisfying, symbolically, to heave that carpet into the trash, even if it was an antique Heriz.
The rest of the rugs would need a vigorous vacuuming, and mothballing, and all of them would need to be wrapped in plastic to prevent future moth infestations. A few would need to be sent off for repairs. Once wool moths get into your house, the only way to get rid of them is to starve them out or freeze them out, or both. I intended to start by depriving them of their food source, but the immediate needs of the house conflicted with my urgent need to protect these old carpets…we had a wall to build, after all, and the favorable season in which to do it was slowly slipping away.
I am forever the “mud girl” and can mix mortar with the best of them, and could confidently tackle the proper proportions of ingredients and methods unique to mixing lime mortar. The types of mortar correspond to the alternating letters in the phrase “mason work” with MSNO and K as the designation for each type, with M being the hardest, having the highest Portland content, and K being the softest, without any Portland at all. K is rarely used anymore, except in specific applications where mortar analysis of an older structure determines that originally there was only lime in use at the time the building was built. When building a masonry structure, the load to be borne, as well as the amount of frost, weather, and exposure also determine what type of mortar to use, as well as the proportion of sand to add to the mix, the formulas are clearly spelled out for each of the mortar types for consistency and predictable outcomes.
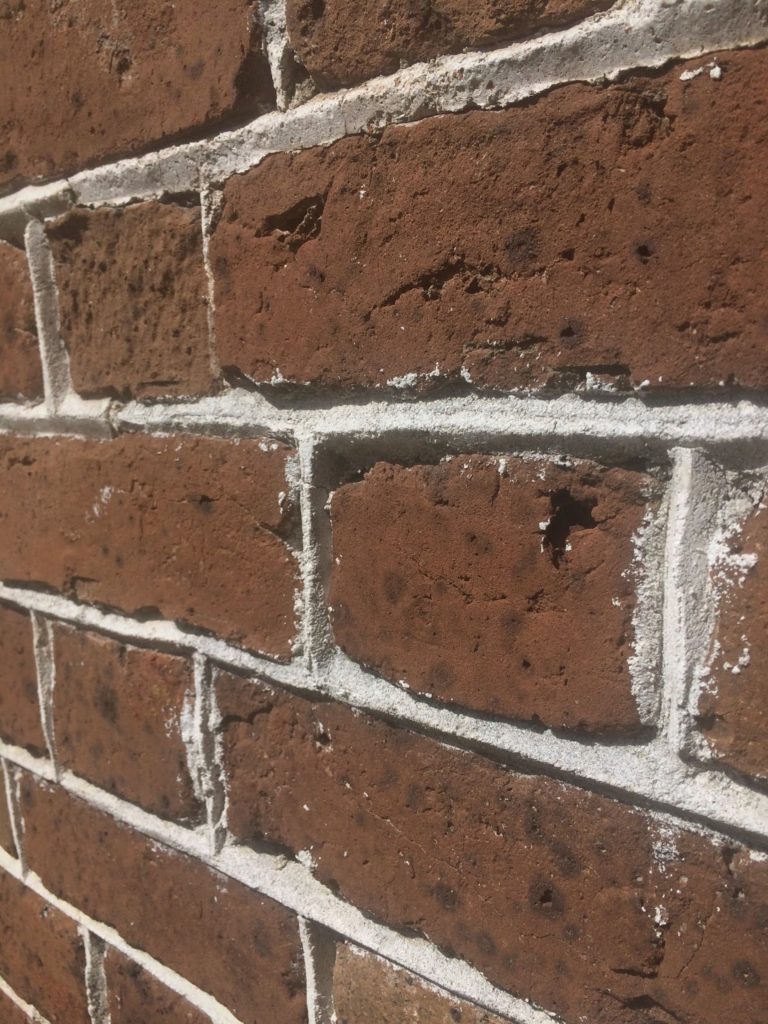
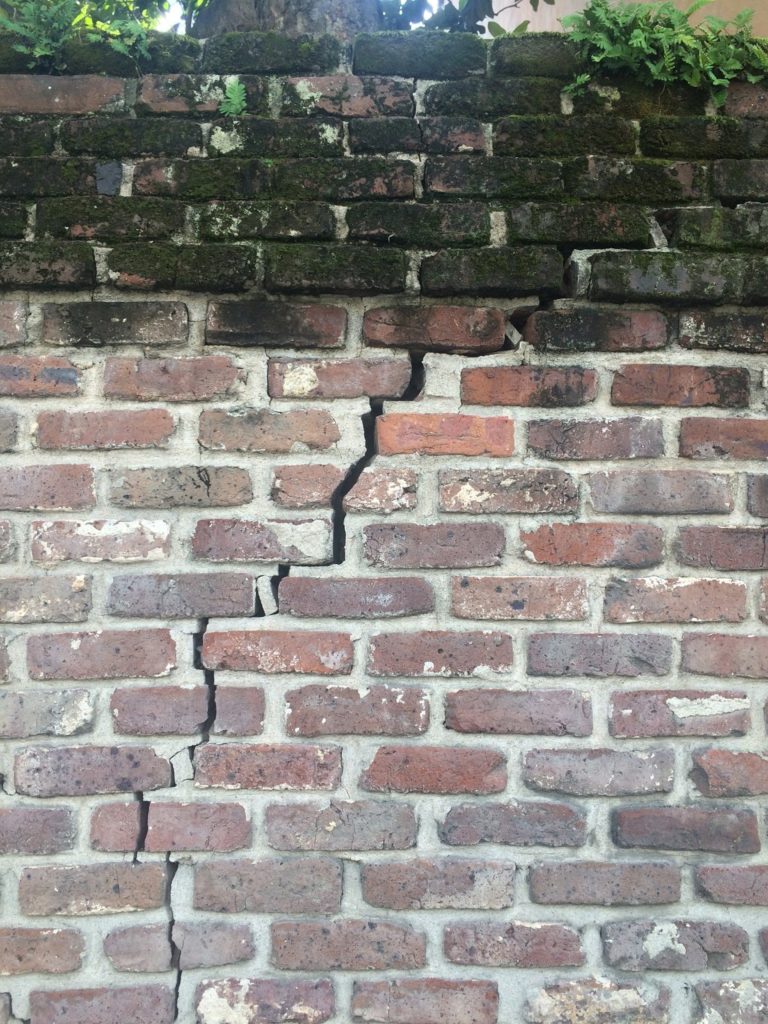
Using hydrated lime putty, a wet, clay-like material, was certainly more expensive than using dry bags of powdered lime and mixing them with water on-site. The shipping costs of those 50-gallon barrels alone was considerable, but once the lime is “slaked” (water added), and the longer it has to mature, the better the end product. In fact, slaked lime putty mortar with a low Portland content is considered to be “self-healing” mortar, because it can move with the building as it slowly settles over time without fragmenting and cracking. Take that in contrast to modern mortar, which has a high level of Portland (type M or S) and you will always see foundation cracks when a building settles. This explains why you don’t see such foundation cracks on historic homes. It is not necessarily that they were better built (though often that is the case) but it is the malleability of the mortar and its’ ability to move with the shifting of the bricks that keeps it intact and allows it to continue its’ supportive role. The evidence is in the rows of bricks, shifted in places no longer completely level, rising in some places, falling slightly in others, yet the mortar is the original, and unbroken.
That is the number one reason why re-pointing with the inappropriate type of mortar can damage those bricks over time. Trust me, you don’t even want to get me started on that subject–I absolutely hate it when people repoint with a stronger material, thinking it’s better, without doing the research. It is what most modern Masons will do to your house unless you know better. It may not show for a decade or more, but eventually all of your brick faces will “spall” (fall off), and you will have paid someone handsomely to ruin your beautiful old bricks.
By the third weekend, we had the first bricks for a corner laid, and the budding start of a wall, but were discouraged by the amount of time it would take us to complete the project if we laid bricks as slowly as we were managing to do thus far. We were hopeful that as we gained experience, we would gain speed, and this wall wouldn’t take us a lifetime to build.
On the fourth weekend, as we took a break and rested late that afternoon on Sunday, still discouraged by our progress and ready to call it a day, a pickup truck pulled up and a solid-looking guy, his head covered with flyaway brown hair with wisps of grey, looked at us with skeptical curiosity as the drivers’ side window rolled down. The thick Southern accent coming from his deep booming voice was asking doubtfully if we were the Masons, because he was looking for work. His eyes, looking us up and down, left more uncertainty in his query than his voice; it was clear that we didn’t look like any Masons he had ever seen. Tom and I looked at each other, shrugged, and both put down our tools giving each other the “what the hell do we have to lose by talking to this guy” look, using the telepathy that you get from a long marriage, and invited him to come on over to chat.
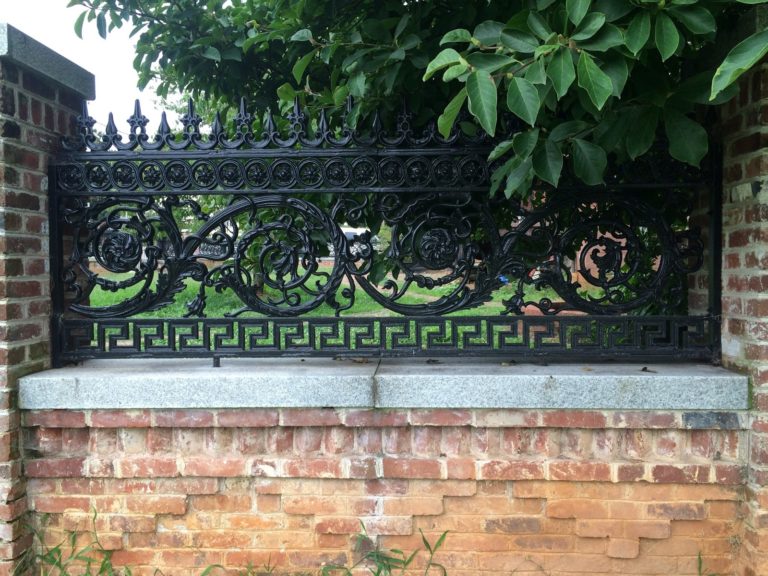
As promised, he was back in two weeks and met us with a firm handshake and a smile, and began to talk intelligently about the materials and methods we were asking him to employ. He asked relevant questions, and seemed comfortable with giving it a try. We showed him the pattern we hoped to erect, driving him downtown to the old tobacco warehouse building which had been the inspiration for the design. In addition to the standard straight courses of brick, we wanted the wall to be capped with a row of brick laid on the long side and turned at an angle to produce a zigzag effect, bordered by a row of bricks protruding further than the rest above another section, also protruding, forming an inverted pyramid. It was a traditional Victorian design. The entire wall would be capped with four-inch thick granite slabs, and of course the fence would reside above, between the tall columns that would rise well above the height of the wall itself, and even taller than the fence.
This was completed at just about the same time that the third floor tower arched window was completed, and we were likewise pleased with the results. Even the curved molding on the outside was done just perfectly. Although we paid handsomely for such a thick piece of 3/4-round trim to be manufactured, it was worth it in the end.
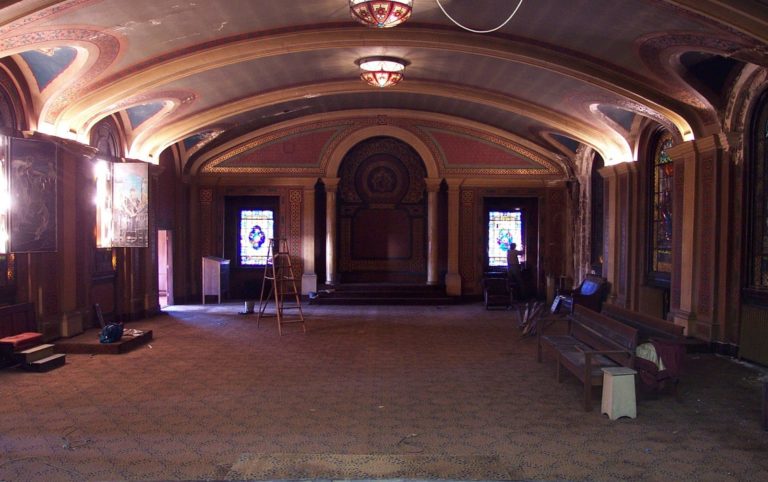
As we had also purchased the original wool strip carpet from an entire floor from a Knights of Pythias temple, that antique wool rug required the same treatment. I approached those enormous sections of carpet like a scroll, unrolling from one side, vacuuming, mothballing, measuring it in sections, then rolling it up on the other side, working inside the main hallway upstairs. The challenge came with the wrapping process. The Persian rugs could be tipped on end and wrapped around their circumference, then laid down to wrap the ends. I could barely lift one end of these monstrous rolls; maneuvering them was an impossibility. By using a lever to lift it in sections and strategically kicking a paint can under each section of the rolls, I got enough clearance to pass the plastic wrap under their immense girth, and with shifting the cans when necessary, I managed to get each enormous roll securely wrapped. This is why I will never have to pay for a gym membership, and why I see gym equipment as a colossal waste of good energy. Want a workout that hits your core, your endurance, and strengthens both upper and lower body? Come to my house, and I’ll give you all that, and I won’t even charge you a dime!
As the final bricks were being laid on the wall, and the granite caps were ready to be put into place, we realized what a shame it would be not to keep this mason busy. So…we tore out the rickety old wooden fence at the back of the property, bordering the pool, and set him to work on building a solid rear perimeter wall for the pool area, as well as adding height to the existing masonry wall alongside the rear side lot. The wall turned out just as we had hoped, and with an extra flair of design at the top.
As a testament to Tom’s OCD and Tommy’s ability to follow our measurement exactly, every single section of granite, which we had ordered while the front wall was in the process of being built, fit perfectly into its section between each pier with exactly 1/4 inch on each end for a nice tight mortar joint for the brick columns flanking it. Not one brick needed to be shaved down to fit the granite, and each section of granite had a nice tight joint at either end. It was perfection. Our friend, neighbor, and owner of a hardscape company, Fred Meder, lifted each of these immense granite slabs precisely into place with his bobcat, outfitted with forks.
Fred is hands down the most talented and confident bobcat operator I have ever seen. I once watched him lift a 500+lb solid marble pedestal, on muddy ground, with his tires slipping and sinking into the ground, going uphill, into a window with less than an inch of clearance on either side. He set that load down, as gently as a feather onto a waiting dolley without touching either of the window jambs. It was clear that he was “one with the machine,” and the difficulty of the feat didn’t even faze him. There was genuine applause from us, as well as all of the contractors present, when the forks pulled back out of the window, emptied of their load.
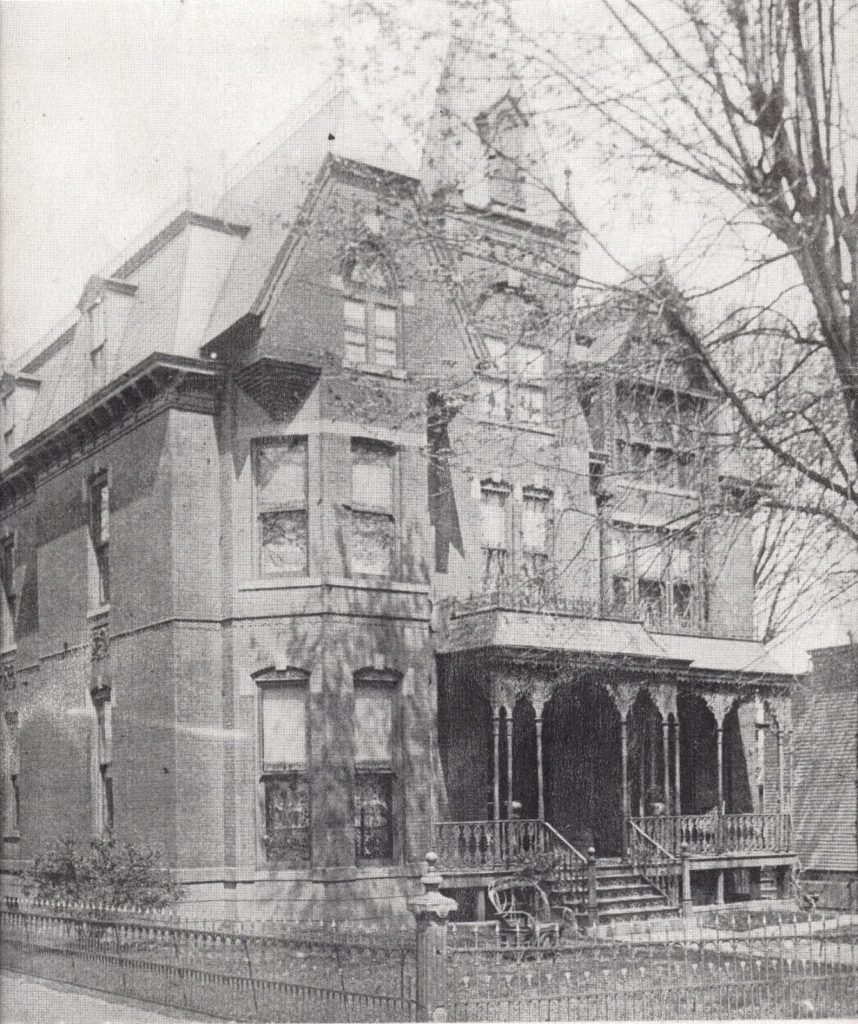
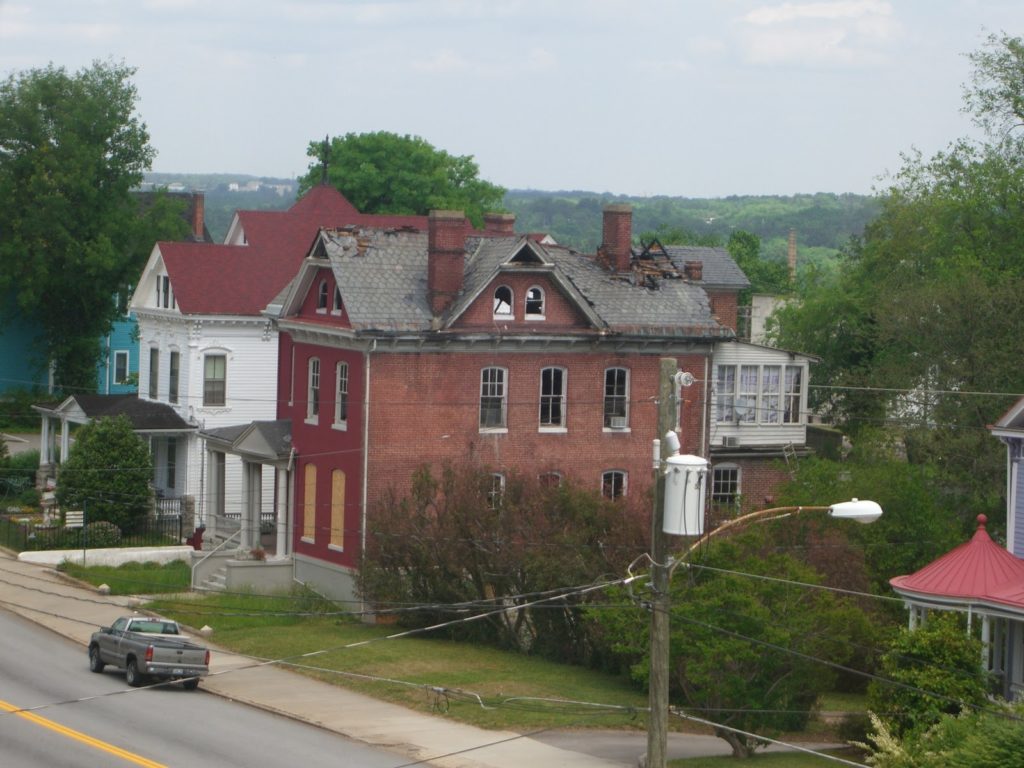
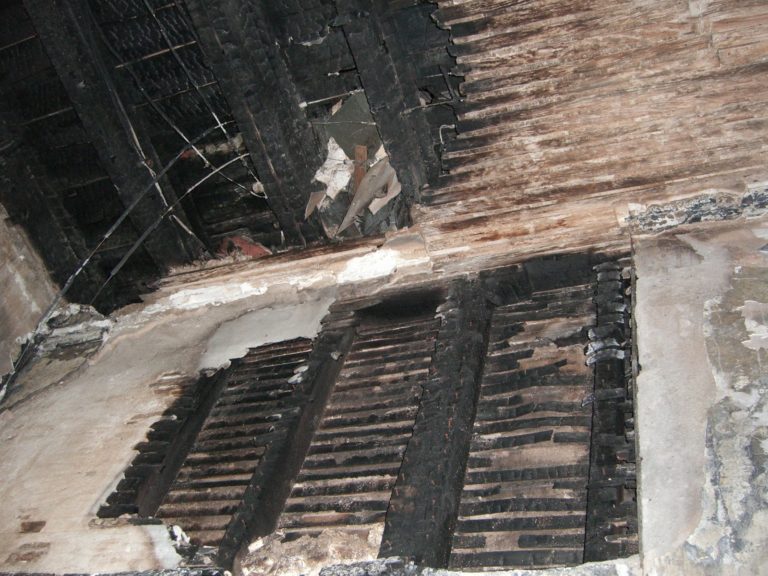
Just as the rear wall project came to a close, the house project across the street at #841 Main Street, the Flinn House, was ready for repointing. Tommy seemed to be the best person for the job, having worked so competently with the lime mortar thus far. We reviewed the Department of the Interior Preservation briefs with him to be sure that the repointing would be done properly. The main issue with repointing antique brick is a concept that I live by in my professional career — first, do no harm. Repointing old brick the right way is intensely physical work. Electric saws and other modern devices, which would quickly and easily remove the old mortar, are too rough on those soft old bricks and will literally chew them up and spit them out. Hand-raking out the old mortar is hard work, but the only way to do it without undercutting the fragile bricks and damaging them. Tommy agreed to tackle the project and climbed the scaffold every day to help us make right what years of mistreatment, improper repairs, and the fire at #841 had wronged.
In the meantime, the rest of the fence was going up atop the beautiful wall, and above the gloriously chunky slabs of granite. To read more about the history of the fence, a previous blog post will tell you everything you wanted to know about its previous two homes, and how it ended up in Danville, Virginia. By now, the house was looking beautiful!
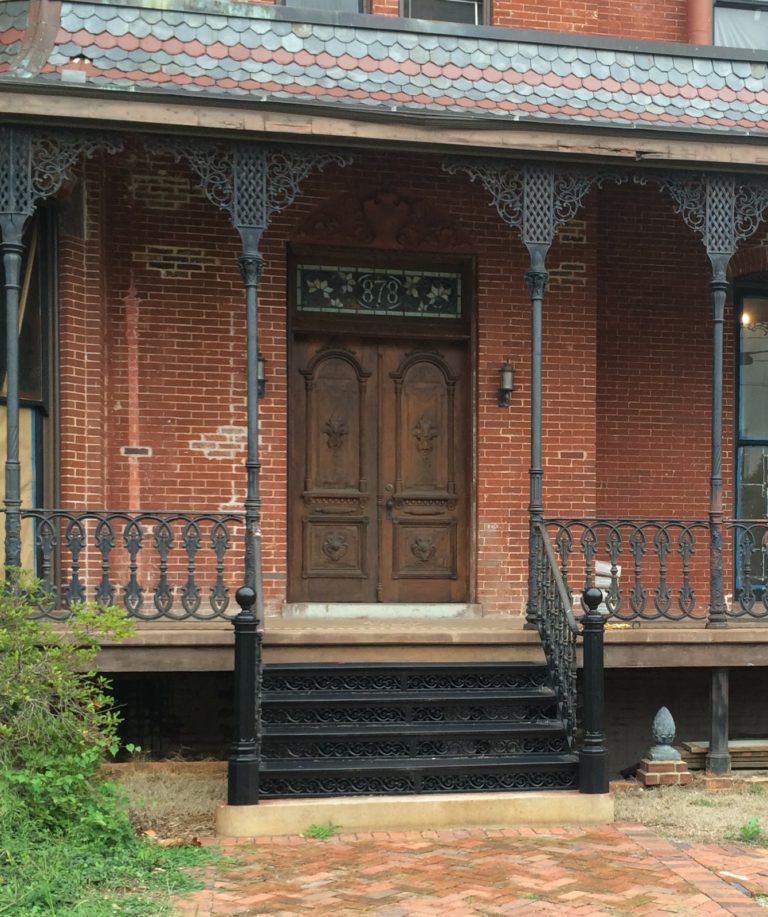
Our front doors, as well, needed some work, so off they came so that we could more easily strip them and have a new surface put on in a dry and temperature-stable environment, in the newly-installed sunroom, aka “the workshop.” We had temporary, yet functional doors made out of 2x lumber and plywood. The were far from elegant, but served their purpose. Meanwhile a piece of brick made its way from the sidewalk through one of our front windows. It was heart-rending to see the wavy glass, that had survived intact this far for over 130 years, shattered in an instant by some vicious unknown person. A piece of plywood was installed in its place, and the other windows lined with brown paper on the inside to keep the curious from peeking in.
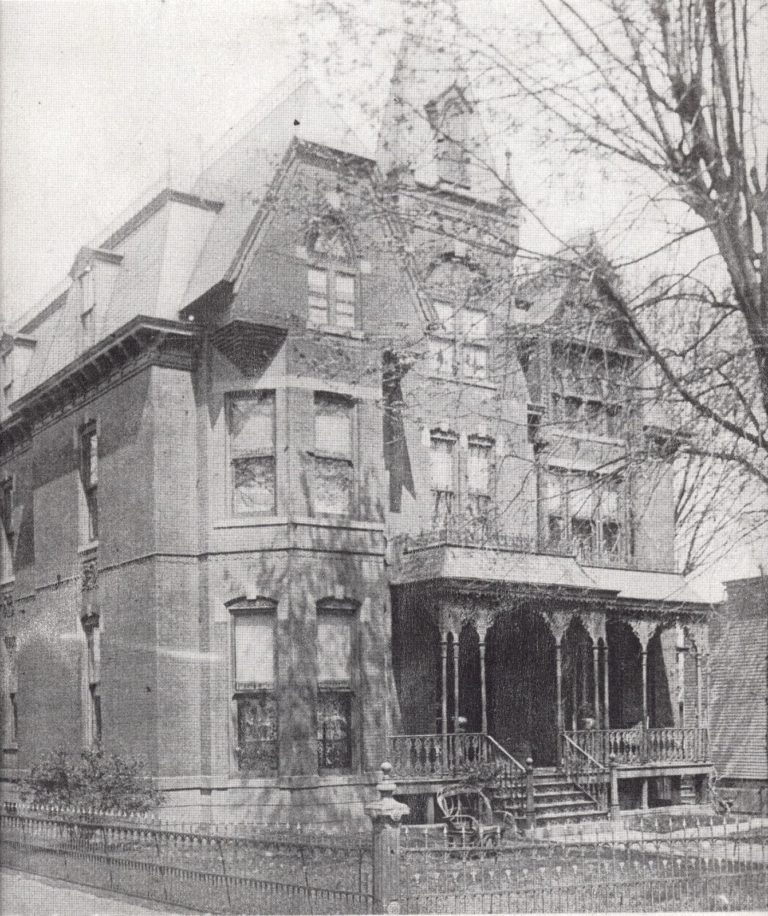
It was with some surprise that I discovered, not many months later, that our house was “abandoned” and “haunted” when it showed up on a Facebook page for old abandoned and haunted houses, photoshopped into a moody brooding edifice, and clearly looking boarded-up with the plywood over the front doors and side windows.
You would think that the clearly-displayed permits on the first floor window would be a dead giveaway that the place was not abandoned, but the hundreds of messages people left were so much fun to read.
Most people wanted to fix it up, or prayed that someone would. Others wanted to do some “urban exploration” and break in just to see the inside. Most were convinced that it must be haunted, and dozens actually saw the images of ghostly figures in the upstairs windows. I suppose the marble angels we had stored in the upstairs bedroom could have been the origin of these rumors.
Probably every fourth one called it “The Addams Family House.”
I can kind of, sort of see the similarity…
Another ten percent or so called it the “Munster House” or “1313 Mockingbird Lane”
I just don’t see the resemblance to that one…Ha ha ha ha! Though I would love to have a car that is a modified hearse like they did, that would be too cool! Anyway, it was an amusing experience to read so many people’s comments on the house, thinking it a wreck and a derelict. I find it so interesting that the “decrepit” is so much more inspiring to people than the “restored.” It is as though people cannot help but to find the potential in every wreck of a house that they see, and yearn to see it returned to its former glory. Perhaps that is the same instinct that drives people to help one another, to build each other up, to be a part of the recovery of a human being crushed from circumstance and bad luck. Perhaps that is why there are healers in our community, volunteers, and caretakers; fixers, people who like to work with their hands. These are the people who don’t panic when something is broken, they are the people who are brave enough to try to fix it themselves, even if they are not 100% sure of how to do it, but they want to be a part of the solution. It is this element of being able to see through the broken parts to the spark of a future that “could be.” That hope and caring part of them that that I love in old-house people. That is why I love people who love old houses and who restore old houses. We are alike.
While it is clear from my writing that we have had our share of incompetent, sometimes ignorant, and occasionally malicious contractors, We have also had some very good craftsmen. It was comforting to have someone talented like Tommy Davis on the job, doing his very best to make our houses whole again. Fast forward some 7 years, and we are still pleased with the sight of our perimeter wall and fence. After so many years of work, the house is now getting its final paint colors on the windows and other wood trim. We chose a dark and somber color combination, to go along with the character of the house. To highlight the delicate little flower in the center of each corbel some 30-feet overhead, we chose a gold-leaf treatment.
Our outside painter approached me one day while this work was going on, and asked me to take a ride with him on the lift. He had something he wanted to show me, because he didn’t know how to describe the problem he had encountered. Hovering over 50-feet high in the air, he stopped the lift at the peak of the arch of the central tower window and explained that he was having trouble scraping the paint off of the large curved 3/4-round trim around that window. I explained that the wood and painted surface up there was only seven years old, and probably didn’t need much scraping, just another coat of paint would do. He shook his head and said that scraping the paint wasn’t exactly the problem, and pulled out his scraper to demonstrate. As soon as the tool hit the top layer of paint, it went completely through the molding, and a fist-sized piece tore off like…well…like Styrofoam. He grabbed the section and handed it to me. The expensive 3/4 round thick curved molding I had paid so dearly to have “manufactured” seven years ago was nothing more than a painted pool noodle. Yes, one of those Styrofoam floats, hollow in the center, that kids float around on in swimming pools. A pool noodle. I am still shaking my head over that one.

Carla Minosh
While I am new to Blogging, I have always enjoyed sharing the stories of my crazy life, so this is simply another medium to share, and hopefully entertain and enrich others. Perhaps you can feel thankful that your life is so steady and predictable after reading these, perhaps you can appreciate the insanity and wish you had more of it in your life. Either way, the crazy tales are all true (to the best of my spotty recollection) and simply tell the tale of a life full of exploration, enthusiasm, curiosity and hard work. I hope you all enjoy being a part of the journey.








I am always so pleased when you post! The magnitude of your project and outlook on restoration are inspiring, and even better, sometimes even relevant! We're bringing home some 1910 strip carpeting soon, and knowing how you stored yours is immeasurably helpful.
I have been checking daily since March for a new post! Thank you!
What a labor of love! It is looking great. I have to do some tuckpointing on super soft brick, so this was really helpful.
Tommy Davis is certainly a hero! When he has a moment, can you send him to Kansas to repoint my three 122-year-old chimneys?
Also, it was a THRILL seeing a new post! I always learn so much from each of your posts. I often smile, too! And often gasp in amazement and admiration!
This is one of those gasp instances: "one mason even had the audacity to laugh in my face, saying that he wouldn't have some little girl telling him how to do his job."
I hope you punched him right in the nose!
It is always such a pleasure reading your posts. You are such an inspiration
Carla this was so informative and interesting. I love the pictures.
I really enjoy reading your blog about your fixer upper…! I do not know what context the time frame is on your window trim predicament but I wondered if you ever found someone to make a curved wooden piece of molding to match the existing trim details of your window?
If you "like" the Sublett-Miller house on Facebook, I announce ther when I have a new post. I'm so glad you enjoy it!
Mission accomplished. It's looking good again.
It has been WAY too long since you did a post. I am suffering withdrawal!
I thought I'd share my adventure on a sad, but similar issue regarding the wool rug. I was restoring a home and I was so determined to finish this one room. The Persian rug that I planned to use had moth damage. Since my entire project focused on the colors of this one rug I was very upset. I went to town to the local woolery. Spoke to the owner and she suggested "felting" to fill in the damaged areas. This requires knowing colors: tone and hue. She assisted in selecting the colors. They looked great. Then she gave me a very quick tutorial on how to felt.
There is a barbed needle and you simply take a very fine amount of colored wool to the area in question and stab it to death until the fiber adheres to the other surrounding fibers. So this massive rug was saved–it took me a total of 7 hours-it would have taken a lot less if I had confidence in myself. Quite a lovely end product, I was beyond pleased. Visually standing over it you see a difference but it does look like a natural progression of fading that is not ugly. I thought I'd share this in case anyone reading your lovely blog is faced with same predicament such as I.
You have discussed an interesting topic that everybody should know. Very well explained with examples. I have found a similar website<a href="https://coopersenviro.com.au/
waste oil collection, waste oil disposal visit the site to know more about coopersenviro
This comment has been removed by the author.