Okay, so I will warn you ahead of time, there is some strong language in this post, but I promise you, it won’t be as offensive as you think…
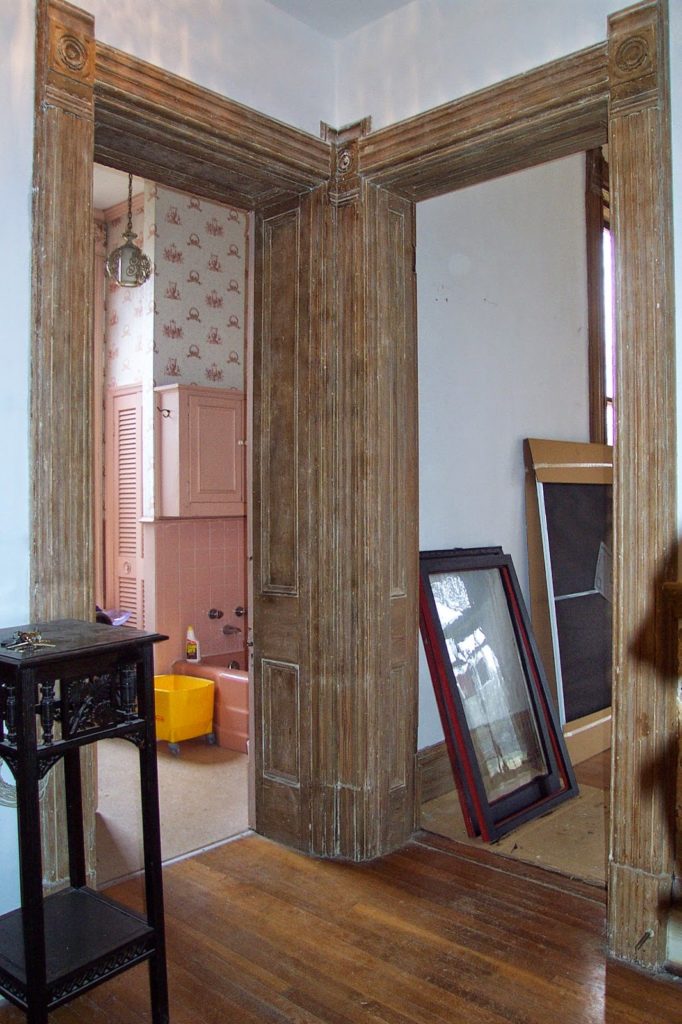
The main bathroom on the first floor was a complete mess when we bought the house. The floor under the linoleum was squishy and moved when you bounced on it. There was water running down the wall, originating from somewhere in the vicinity of the ceiling. The wallpaper was peeling. The ceiling was a suspended ceiling constructed below another suspended ceiling, hiding, who knows what, above it. Oh, and it was pink. Did I mention that it was PINK?! Anyone who knows me well understands that I have this powerful disdain for anything pink, yet somehow it is my lot in life to have that color thrown in my face in so many ways. This house already had so many pink features, this bathroom was just one more glaringly offensive insult to my aesthetic.
My goal was to “de-pink-ify” the house.
We would later discover that all of the pink louvered cabinet doors used in various locations around the home were, in fact, the original plantation shutters that had been removed from all of the windows in the house, cut down, painted pink and installed on the front of cabinets here and all throughout the basement. The damage to those original plantation shutters was permanent, and the cost to replace them exorbitant. All I can do is shake my head whenever I think about it.
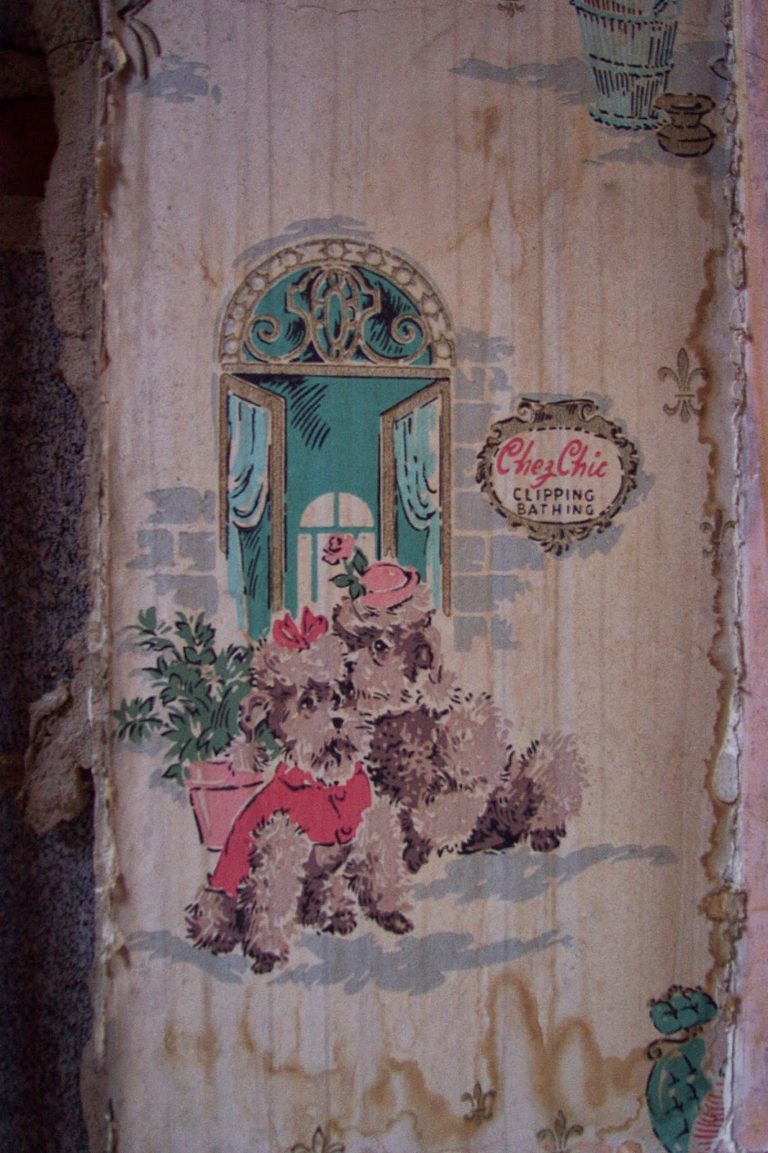
Beneath the peeling layer of Federal style wallpaper, we found the original paper from when the bathroom had been installed. Pink poodles at the groomers with a French theme. How apropos. I saved a panel for documentation purposes, but it ALL had to go, and so, it went!
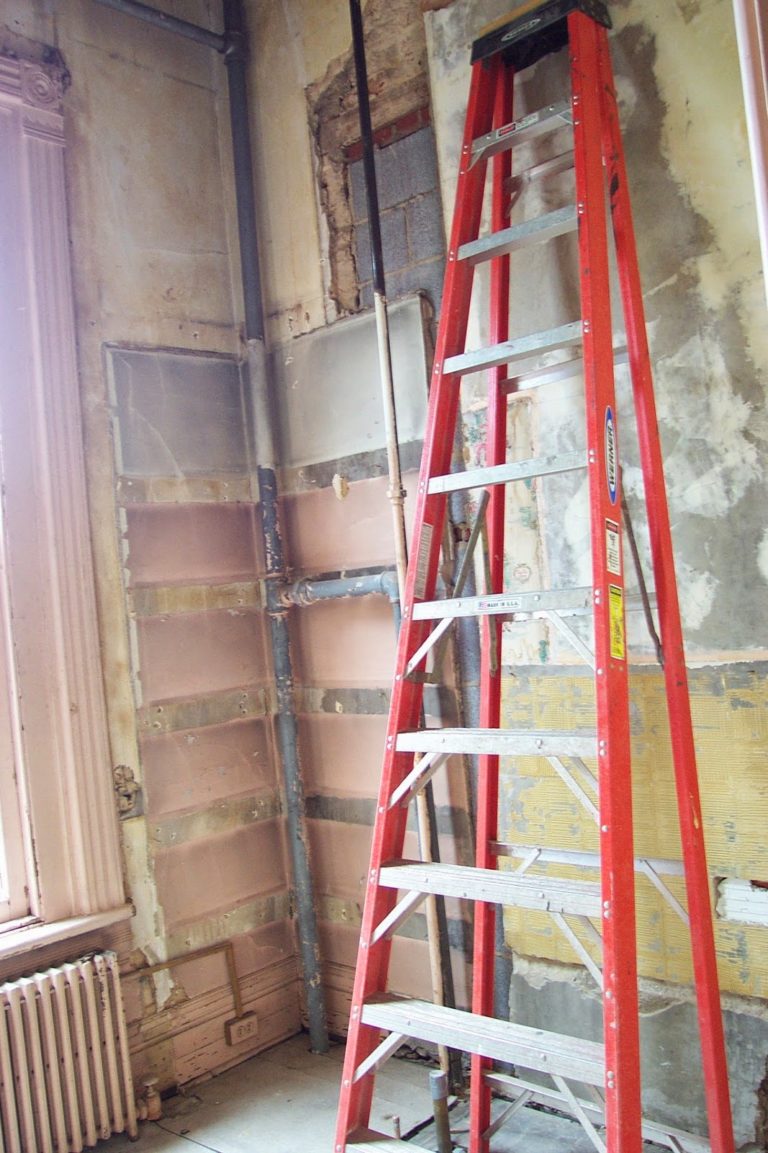
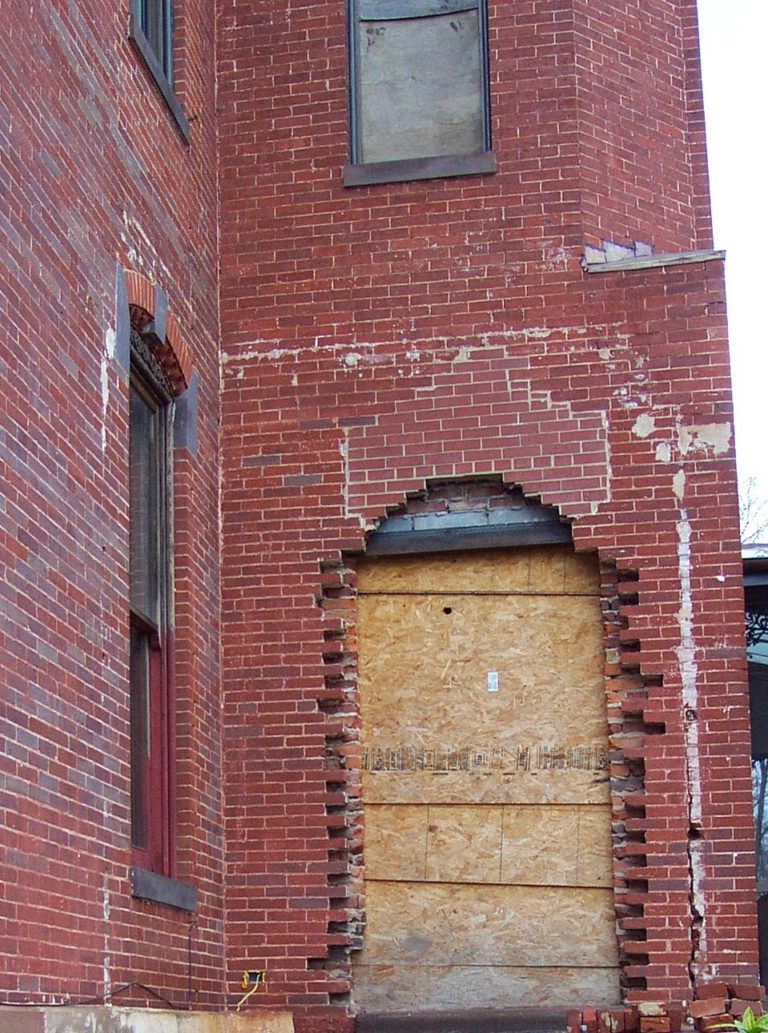
Where the pink bathtub once sat, with the pink cabinet backdrop, we could see a blocked-up doorway and the baseboard intact behind where the cabinet had been installed. What on earth a doorway was doing in the bathroom, we had no idea.
The sewer line servicing the bathroom above ran on the outside of the wall, and intruded upon the space. It clearly needed to be re-routed in order to make this space work. It certainly explained the awkward corner cabinet that had formerly hidden its existence, but which also had made it impossible to open the door completely. This became the top priority for creating a grand first floor bathroom. We continued to attempt to track the source of the moisture which had rotted out the corner cabinet, the baseboard, and the flooring, but it was not a constant moisture, more like a slow drip that came and went, seemingly at random.
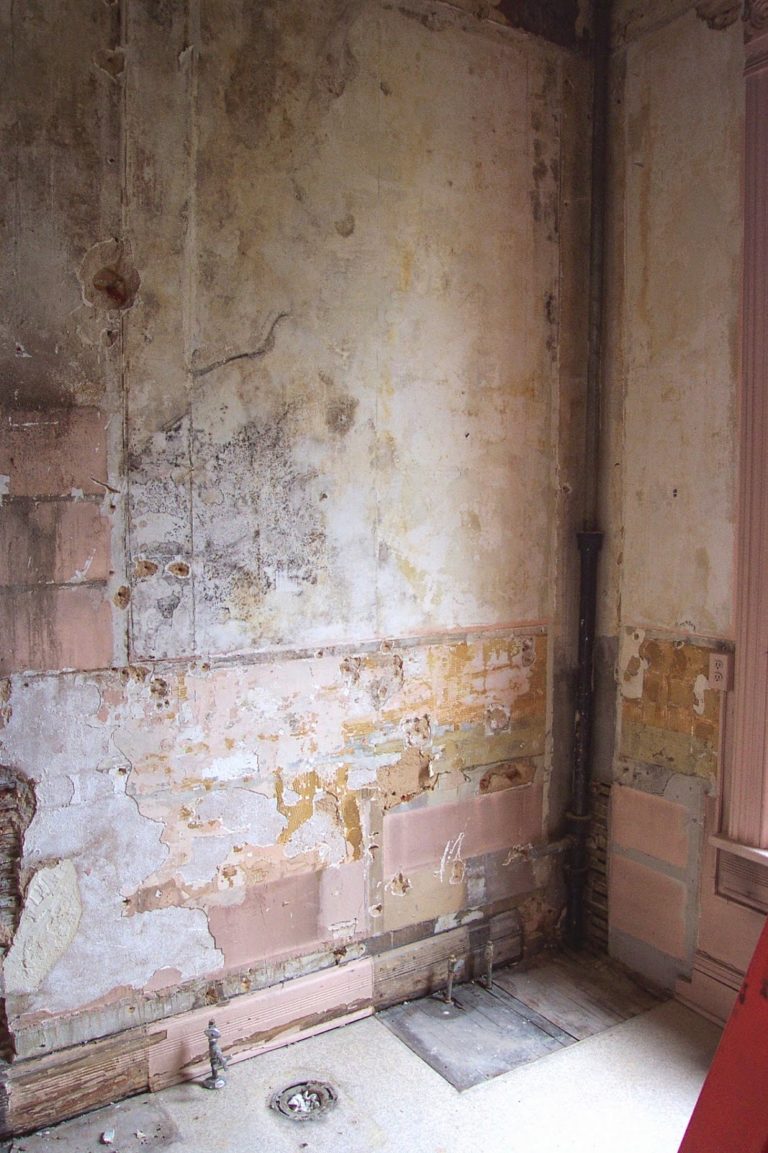
Where the white toilet and pink sink had once stood, again the baseboard remained intact. It wrapped around the entire room, leaving us to scratch our heads about the original purpose of this tiny little room on the first floor. The hardwood floor beneath the linoleum was water-damaged, and ill-used, but they were clearly once finished oak hardwood floors, and not the rough sub-flooring we were expecting to find. The plaster on this wall was moldy and chalky after years of moisture seepage from somewhere above. When we found the source it was even more bizarre than we could have imagined. The exterior hidden gutter that drained the rainwater from the roof was draining into a pipe which ran INSIDE the house. That drain had corroded at an elbow, was holding water after a rainstorm, and was leaking slowly until the elbow emptied. That explained the intermittent nature of the drip and why we were having such trouble tracing the water source.
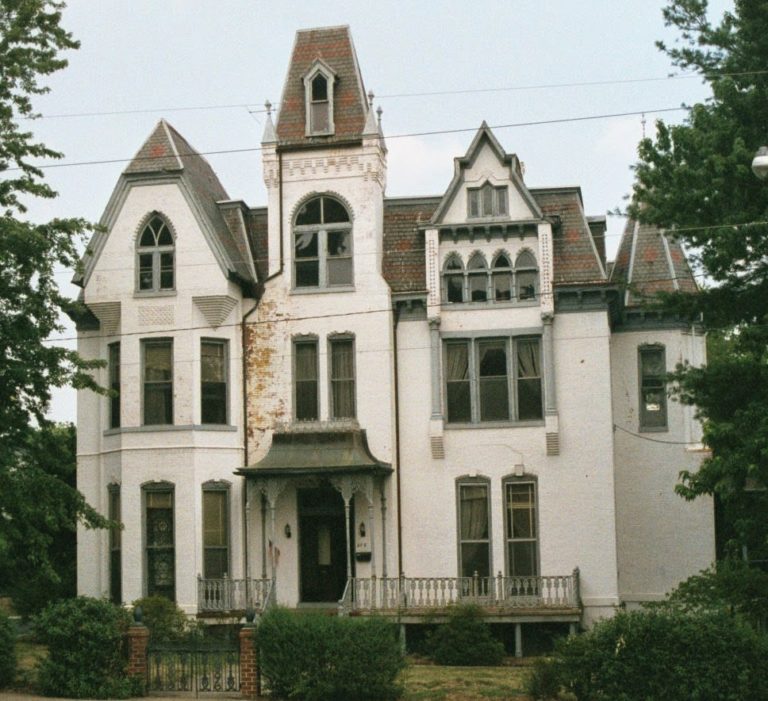
Meanwhile, we had decided to do something about the white paint on the exterior of the house. It was crumbling and flaking, and simply had to be dealt with. We put out bids to a number of painting contractors in the area, as well as a few independent contractors. One enthusiastic independent contractor put an affordable bid on the job and encouraged me to take a look at his most recent work, assuring me that I would take his bid after I saw for myself the professional quality of his product.
A newly-white clapboard gingerbread Victorian in town was the specimen he brought me to examine. After seeing the “quality” of his work, I politely declined. No scraper had ever touched the surface of that exterior, prior to a thick gloppy coat of paint being applied as heavily as possible to hide the unevenness of the surface. He had simply painted over the cracked and peeling layers of paint already barely clinging to that poor house. I am sure that he still wonders why we turned him down.
Ultimately, the bids to re-paint the house were exorbitant. We call those “kiss-off” bids, meaning that the contractors really didn’t want to do the job, but if we were absolutely desperate to hire them anyway, the bid was easily three to four times what it would actually cost them to do the job, which would give them the enthusiasm needed to do it despite really not wanting to. As we are not interested in hiring anyone who is not excited about working on this house, we decided to consider a different option.
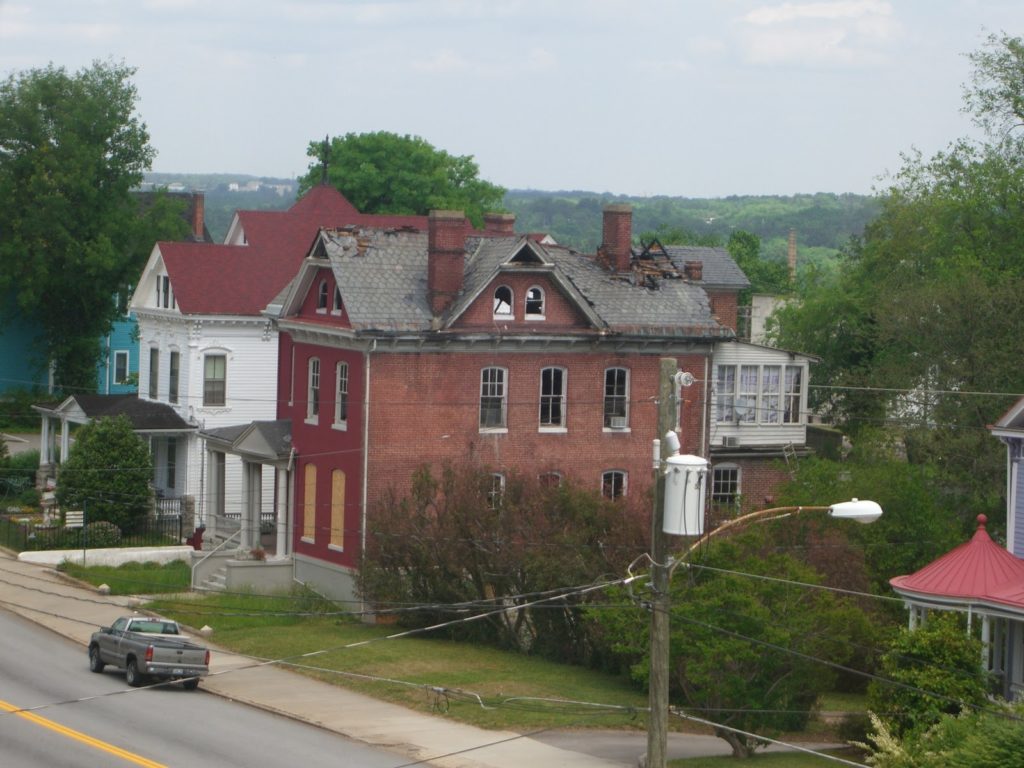
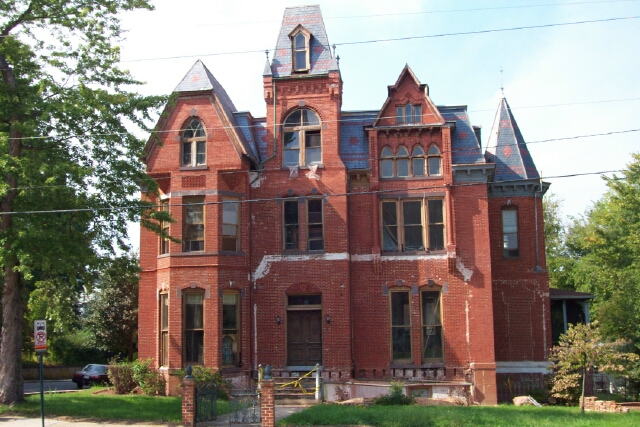
In the end, we found it was going to be cheaper to take the paint off altogether. Besides, painting the house would require repeating the process every decade or sooner. Un-painting the house would leave us with a relatively maintenance-free exterior forever. We researched a paint removal product which was approved by the Department of Historic Resources and found a team able to work with the product. The paint stripper was a very mild stripper and required multiple applications to do the job. We bought barrels and barrels of this stuff, lined the ground around the foundation of the house with tarps and hay to trap the paint as it came off the house, cut back the shrubbery, and rented a telescoping boom lift. The team would spray the product on the house until late afternoon, then wet down what they had applied before it got too dark. The next day they would hose off what had been applied the day before and start applying more stripper to the next section of house. Around and around the house they went, multiple times, until the brick began to re-appear. It began to look like my house was melting. Lots of people thought there had been a fire.
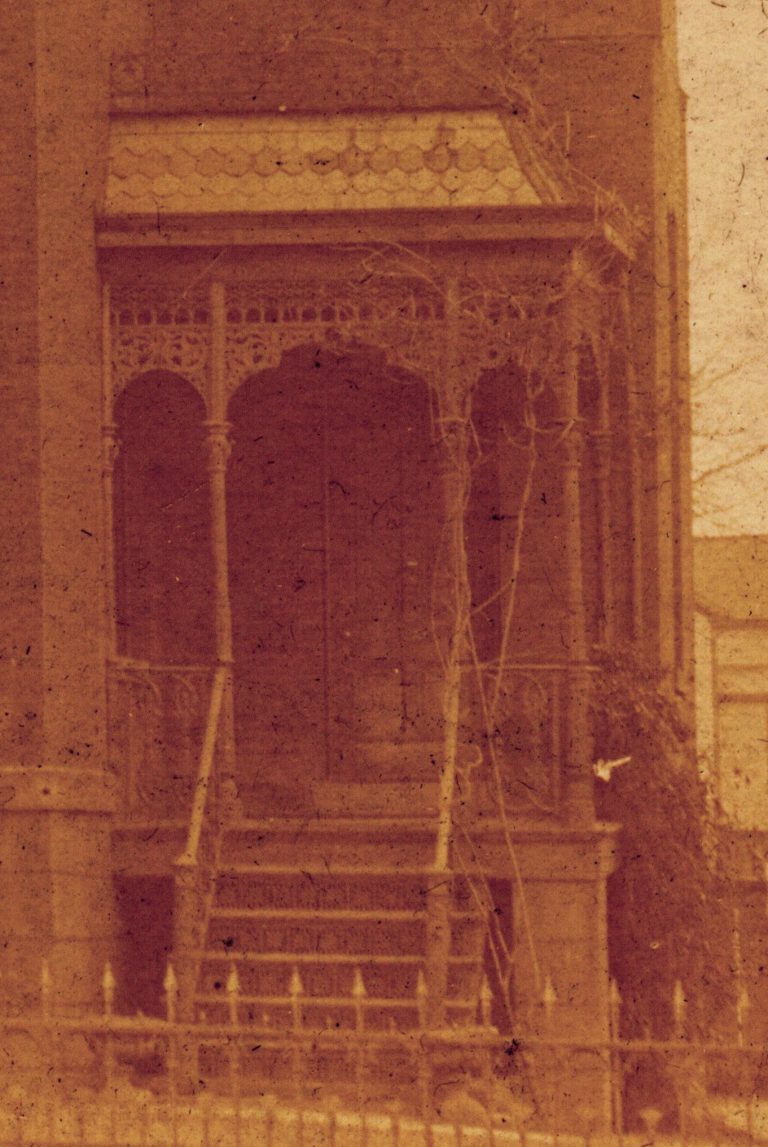
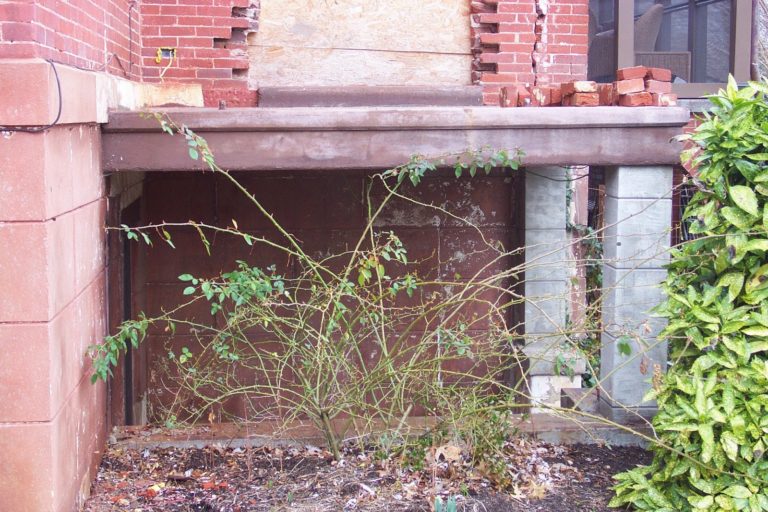
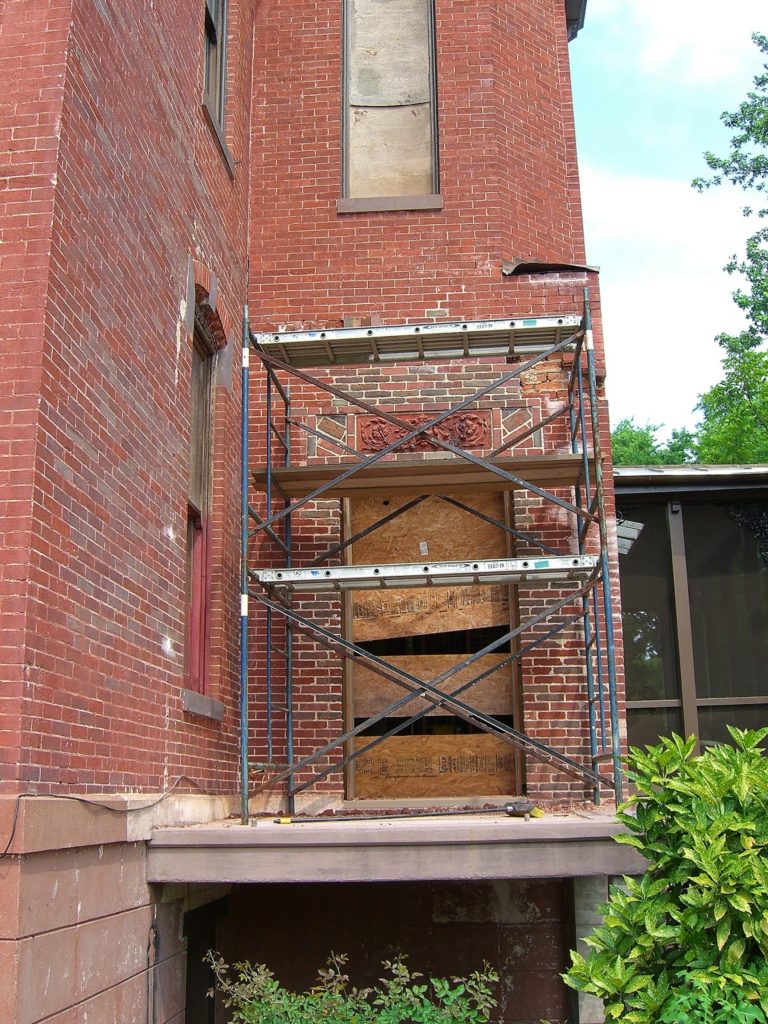
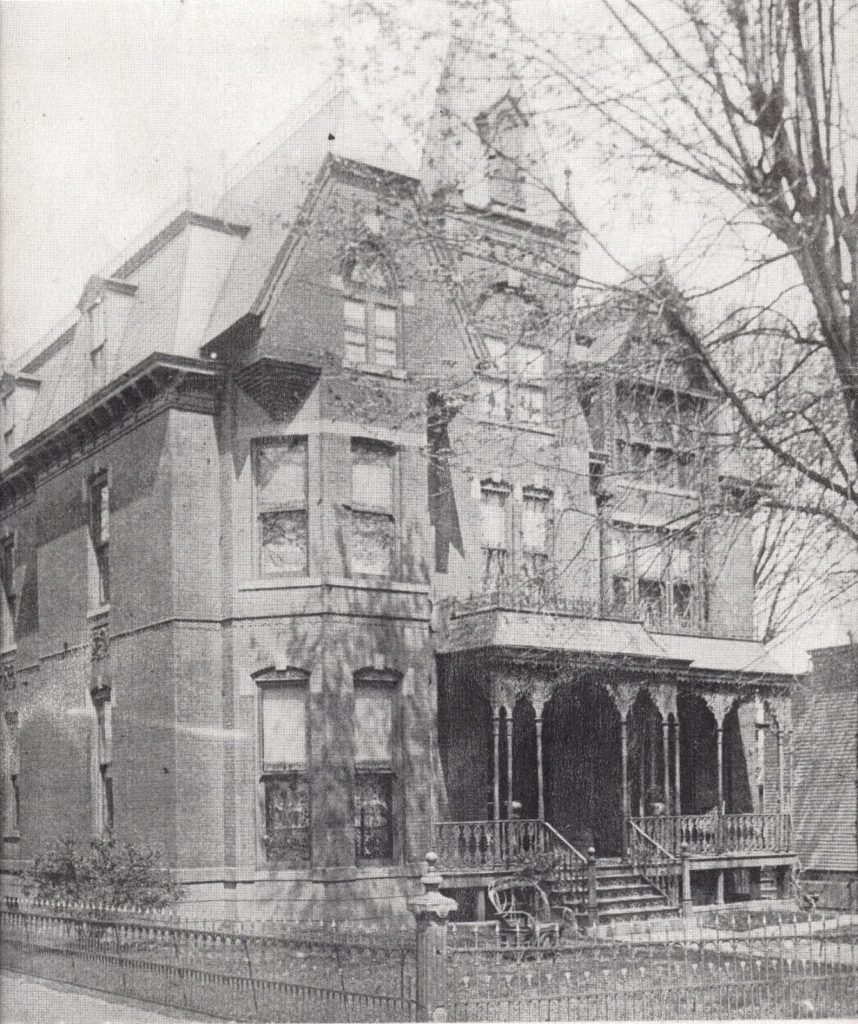
The “shadow” on the front porch of the old roofline, along with the old photographs, allowed us to re-build the front porch. It was clear that there was something going on with the tower at the right, and we could now see the bricked-up doorway from the outside that was blocked-up from inside the pink bathroom. If only we knew what that opening dated to. Was it original? Had it been added at a later date, then bricked up? Who knew. In the meantime, it was certainly an eyesore on this beautiful façade. Until we knew more, there was nothing we could do about it.
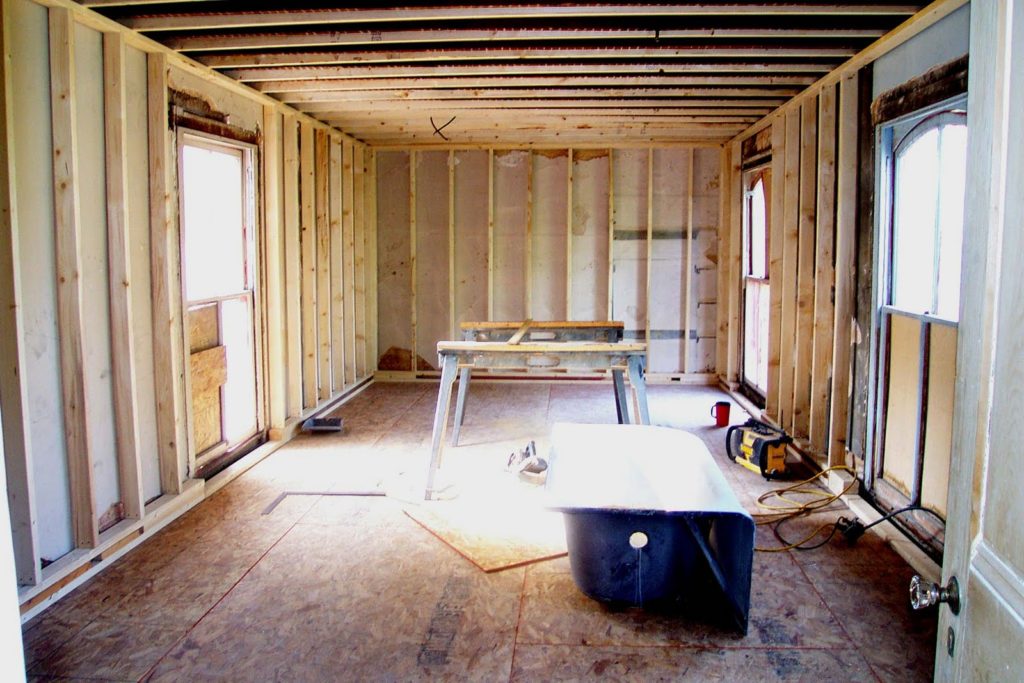
Bringing our attention back to the interior of the pink bathroom, we stripped away the crumbling plaster and the first layer of brick in order to gain enough room to allow us to build a stud wall and recess the plumbing inside the wall. The drain stack now set back where it would never again impede the door swing. Good old copper water lines were then installed, both for this bathroom as well as for the bathroom above. No pex for this house, that’s for sure!
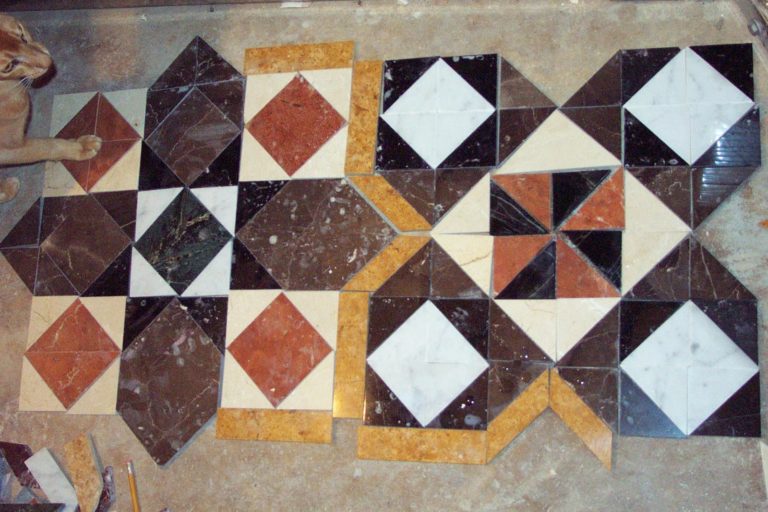
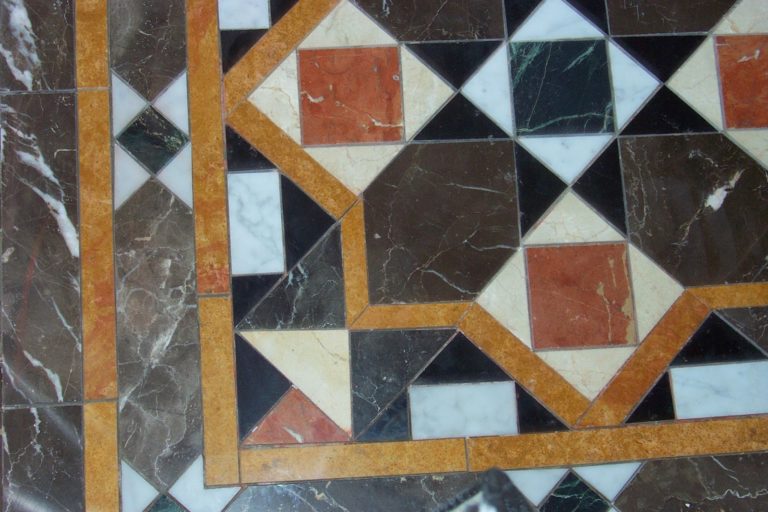
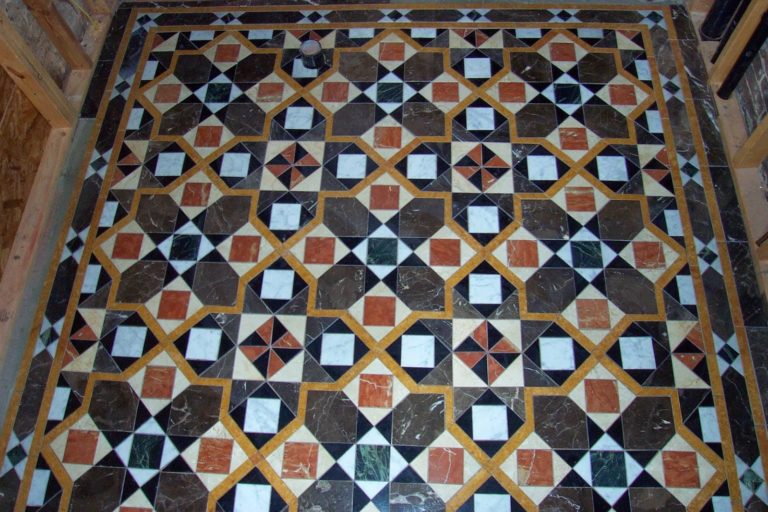
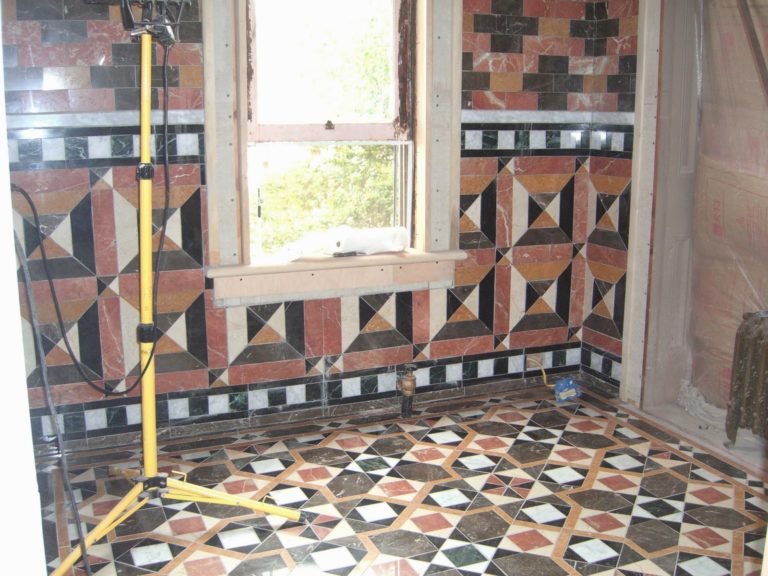
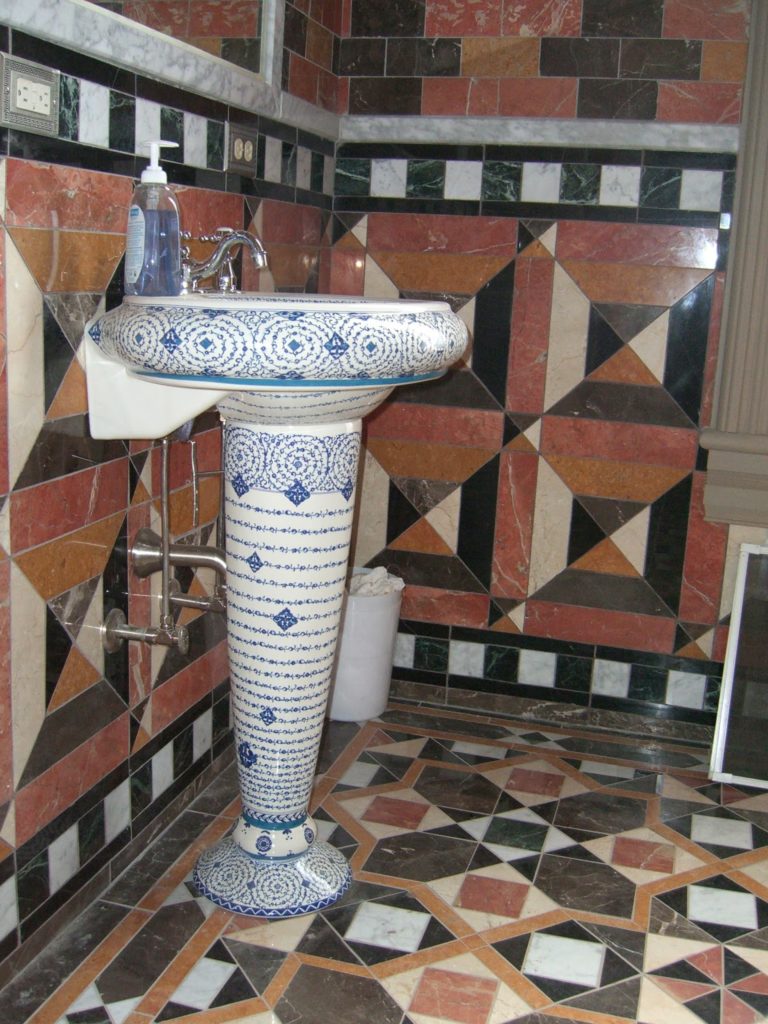
Tom came up with a marble design for the floor, and it was simply brilliant. He wanted to do a Turkish/Gothic style bathroom with a bold Turkish star done in a brilliant gold marble. As you can see, Sam, our orange flame point Siamese cat, helped to choose the final design. I think he may have been the inspiration for that lovely gold accenting. Wasting no time, Tom set up the wet saw and started cutting the marble.
He buys large amounts of colored marble in 1-foot squares, sets them down on his marble saw and cuts them into smaller squares, triangles, and any other shapes and sizes he needs. The loud crescendo-decrescendo wail of the wet saw with a background of blaring rock& roll, oldies, blues, soul, football, soccer or basketball coming from the vicinity of the basement became the backdrop of our daily life between the end of the workday and the start of dinnertime. The piles of marble pieces began to mount. Every trip to Danville was accomplished with the trunk of the car loaded with boxes of cut marble.
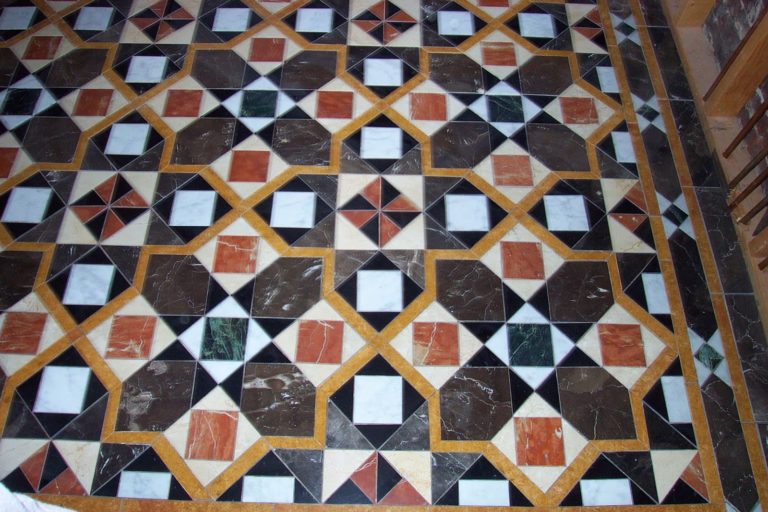
I tell people that a lot of “Fucking” went into making this floor, but it’s not what you think. When it was done, it was clearly the most beautiful marble floor that Tom had conceived to date, but it was not a pattern we were eager to repeat. He had, in fact, cut enough marble for two of these floors, hoping to install the same pattern in the bathroom below, or in the secret room in the attic, above, but the boxes are collecting dust in the basement until we feel up to facing this challenge again.
The final product is just beautiful, and the Turkish stars are perfectly lined up. A testament to the perfectionism and OCD of Tom’s artistic design genius.
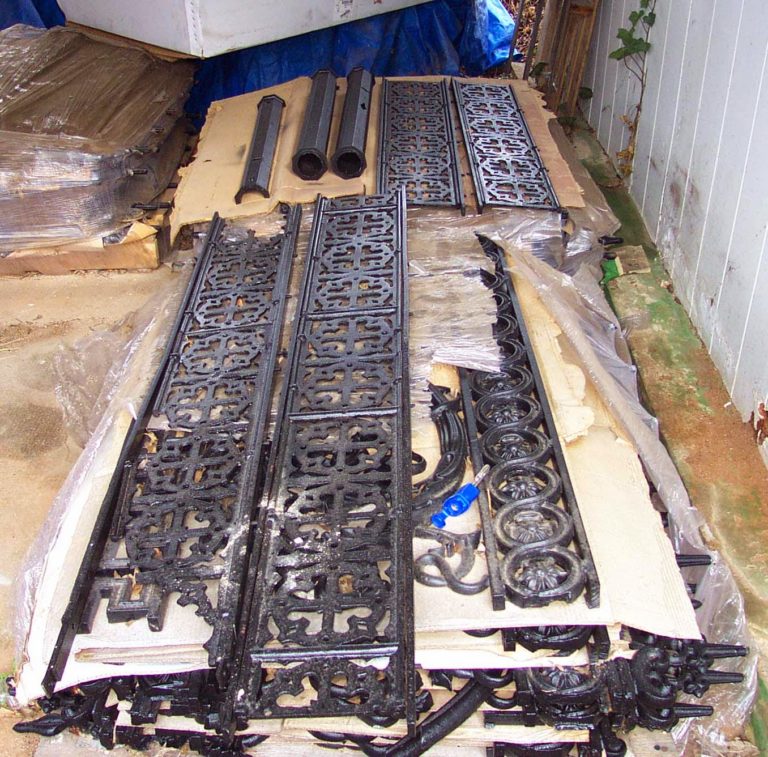
Now that we had a photograph to support our desire to re-create the second front porch in its original design, Tom drew up the designs for submission to the Virginia Department of Historic Resources for approval. The photograph would allow us to re-build this porch, and we were able to gather together the missing ironwork necessary for the job. One item that is in very short supply at salvage yards is antique cast iron steps. We considered the impossible task of re-creating the steps, in light of the fact that this doorway now entered into a bathroom. We designed this second front porch with a railing completely around it, but with the option of adding a staircase at a later date, if desired, by removing that one section of railing where the stairs would be installed.
As always, our renovations were only part of what we were trying to accomplish with the house. Furnishing it with period American pieces of furniture was always our second priority, and we were constantly on the hunt, mining all of our resources for fine pieces suitable for such a home.
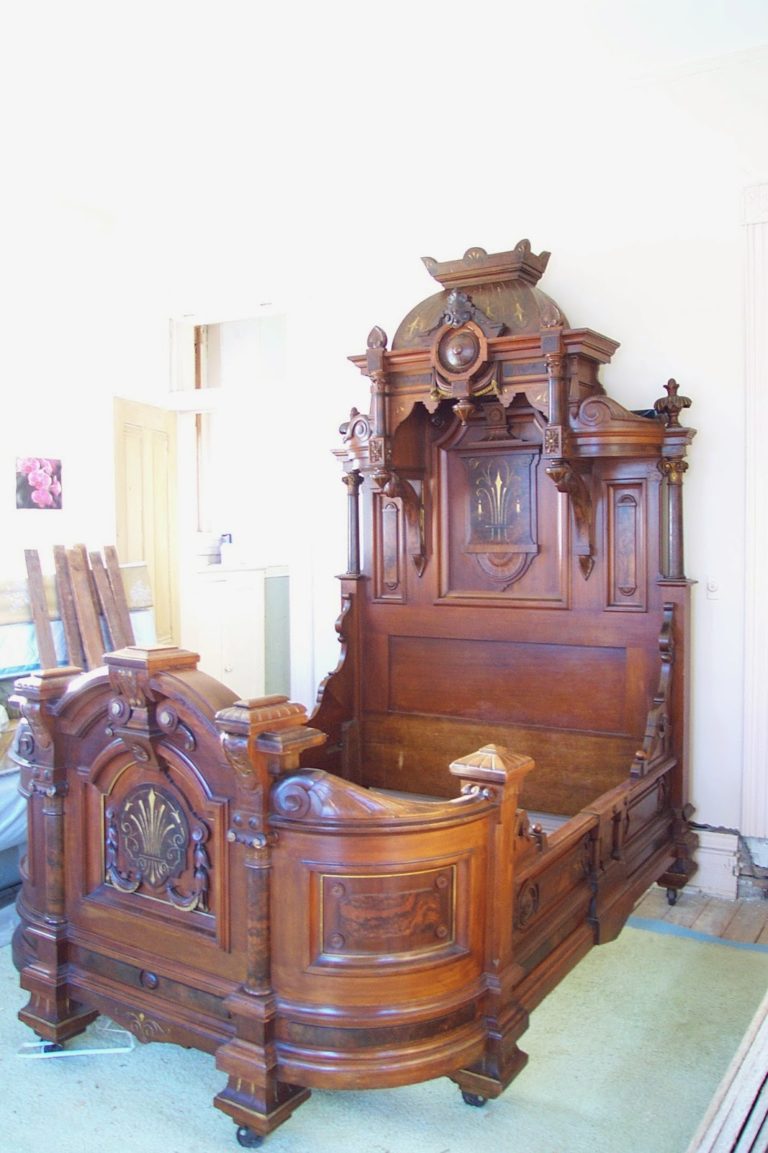
One of our antique newspapers came with a notice of a stunning bedroom suite up for auction. It had formerly resided in the Carson Mansion in Eureka, California. Anyone with a copy of the “Painted Ladies” book on Victorian painted mansions has a picture of this beautiful home.
This is one of the most often-photographed homes in America, and for good reason. It is a rare survivor of Queen Anne “Stick” style Victorian. It has been impeccable maintained, and is currently owned by a private club, the Ingomar Club.
The bedroom suite was handed down from Mr. Carson, a lumber baron, to his grand-daughter, Mrs. John Forrester, who, at the age of 87 sold it to C. W. Thomas of Carriage House Galleries in Seattle, WA in 1960. It was eventually bought by a couple who had to remove a wall in order to get this large-scale furniture into their home. When they divorced a year later, they again removed the wall in order to move the grand pieces out again. It was re-sold back to Carriage House Galleries. In 1970 it was purchased by Calmar McCune, a Port Townsend WA attorney who donated it to the Jefferson County, WA, Museum in 1975. The pieces were marked by the maker, F.M. Holmes Furniture Company out of Boston, MA.
The museum was looking for funds for a remodeling project and were hoping to find a buyer in the form of some individual or organization in Humboldt County, CA, where the Carson mansion resides. As there were no takers at their minimum price, they put the suite up for auction. It was an unusual form of auction, however, as it was being auctioned off by sealed bid. On the bid form you wrote a single number–your highest bid, signed the form and sent it along by the due date. After the due date, all of the bids would be opened, and the highest bid of all the entries would be contacted as the winner of the bedroom suite.
As we were in the full throes of renovations, our cash flow was not what we wished it could be. We didn’t want to lose an opportunity to at least bid on this set, however, so we counted up what we could afford, knowing it would not be enough, wrote in our bid amount and sent off the form. We would never know who ended up with this furniture unless it showed up at an antique show or auction some day. Knowing we wouldn’t be the high bidder, we put this beautiful bedroom suite out of our minds and got back to work.
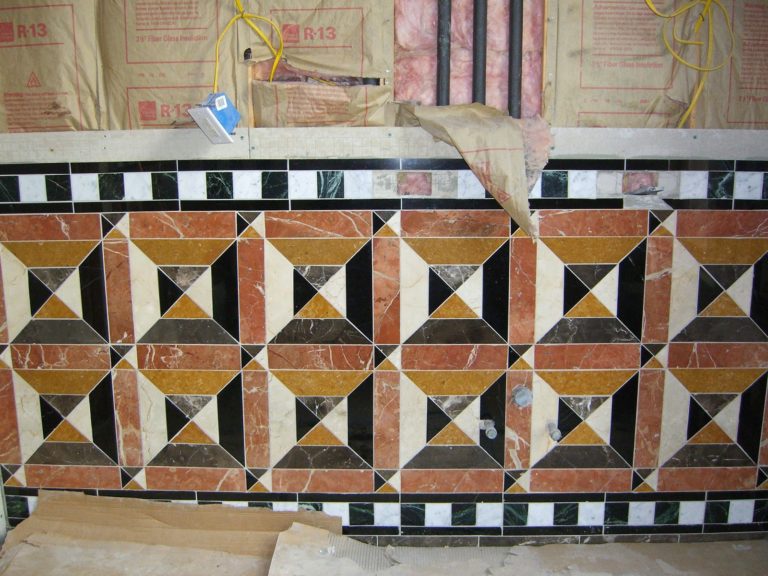
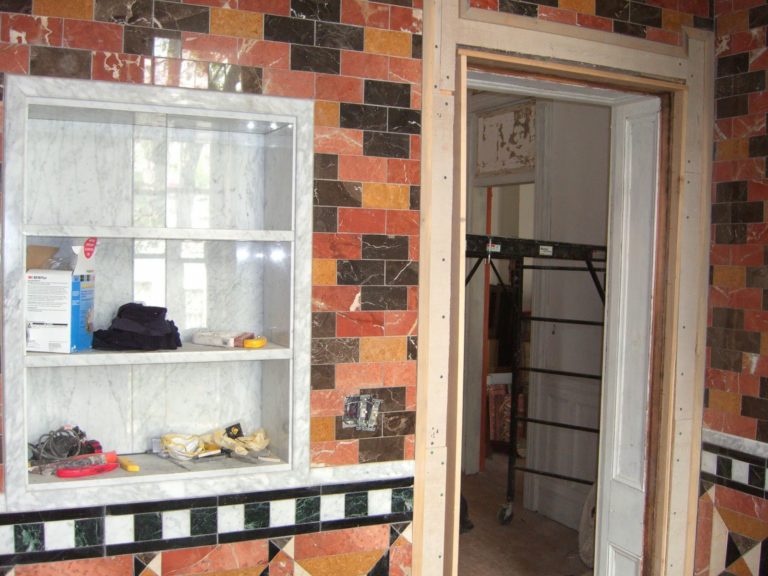
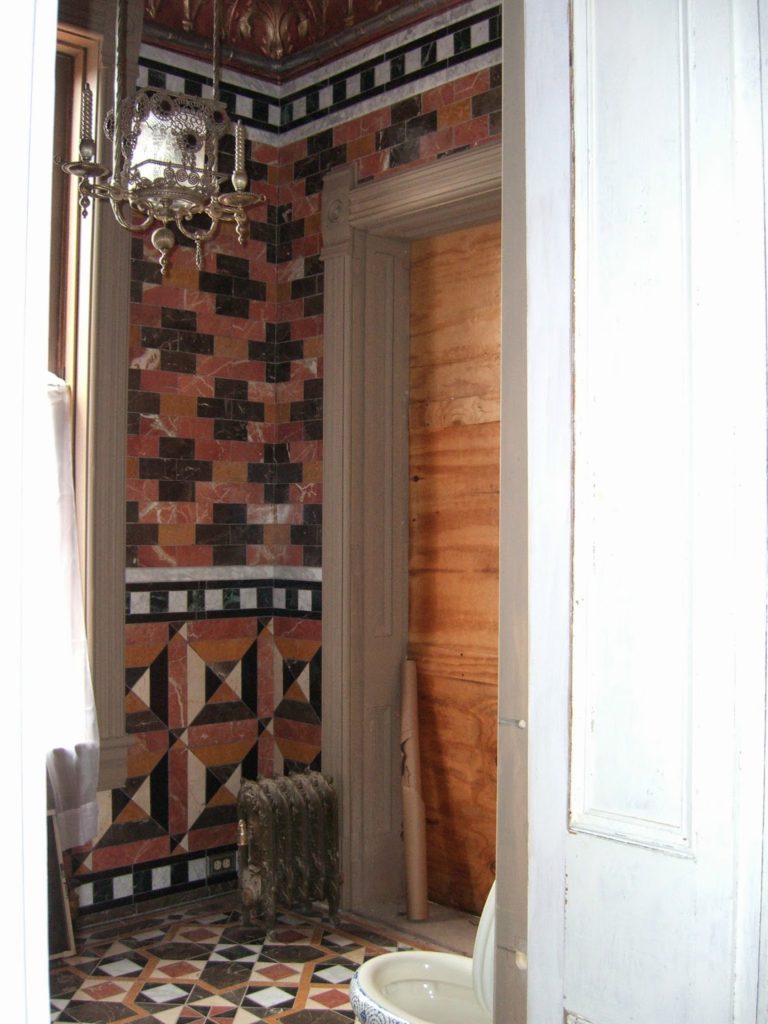
With the bathroom newly-insulated, and backer board installed on the walls, we started up the vertical surfaces with the marble designs. A separate design for the wainscot separated by a Cararra marble strip of threshold used as a molding, leading up to the fill design on the walls.
We repeated the colors from the floor every step of the way, all the way up to the ceiling.
During the demo phase, we encountered an old walled-off doorway into the music room to the left of the existing doorway. We took advantage of this space, and used our large supply of Carrara marble threshold pieces to create this marble inset shelf above where the toilet would be placed. As this room and the adjoining hallway would not have a linen closet or any space for supplies, it was important to have a place for storing toilet paper and other necessities. Besides it was a great opportunity to show off what could be done with inexpensive Carrera marble threshold pieces.
The space was taking shape nicely.
The Turkish arched mirror was a powerful feature in the room as well. Again, great use of all of that Carrera marble threshold we had bought. Though I am still scratching my head trying to figure out how he managed to cut that stuff in a curve…or did he just do a whole lot of little squares to fool the eye into seeing a curve?
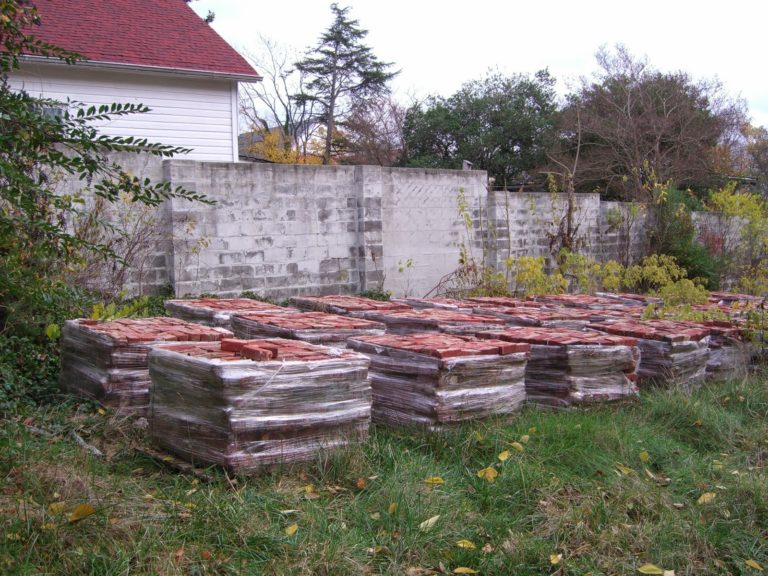
We found our brick seller sitting among a pile of old bricks, wielding a mason’s hammer, hammering away at the mortar clinging to an old brick. He was singlehandedly taking down this enormous warehouse one brick at a time, cleaning the bricks and stacking them onto pallets for sale. It was a herculean task for sure. He was an interesting man, and we stopped to chat for a bit before comparing his bricks to our sample. We were lucky this time, as we had finally found bricks that would match in size perfectly and match in color very closely. We bought twenty 4×4 pallets stacked three feet high with antique bricks. We now had old bricks to accomplish anything else we would ever want to do with that house. Now what would we do for doors?
The existing 1960s vintage screened porch on the side of the house had a really cool old solid wood door for access. Behind that door was a glass door. The wood door had clearly been cut down at some point, but that could be remedied. If we removed this door, the glass door could easily serve on its own for access to the screened porch. As luck would have it, there was a second, matching, solid wood door in the attic. We had a pair! Could these have been the original doors?
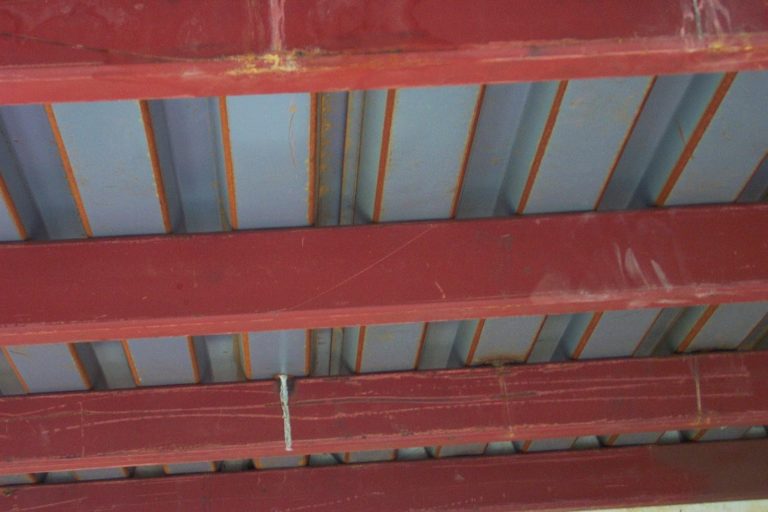
The sub-structure, however, was built to last over 100 years. Steel beams and corrugated steel base supporting the concrete pour. There was no way this porch would be rotting out if we had anything to do with its construction.
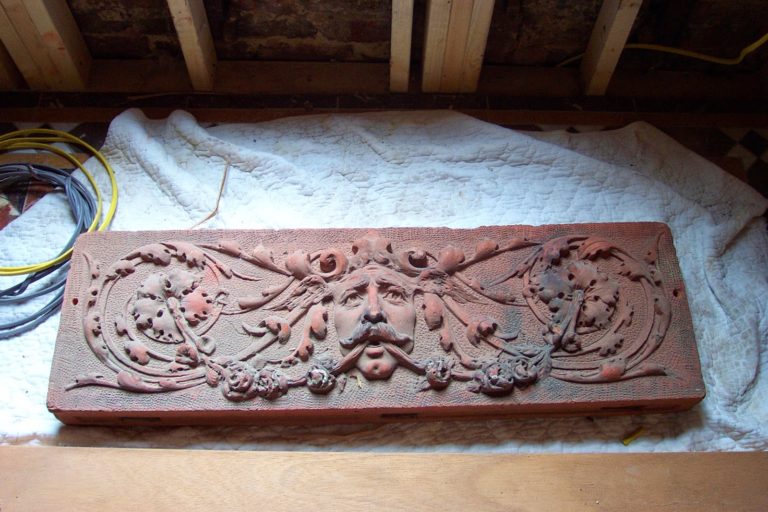
Our Mason did an excellent job toothing in the new brick with the old and setting the terra-cotta piece into its new home.
At last, the cast iron elements we had found began to rise, and the lovely black metal stood proudly where once it had before.
Next, the roof began to take shape, and a rubber roofing system installed underneath where the slate tiles would be placed.
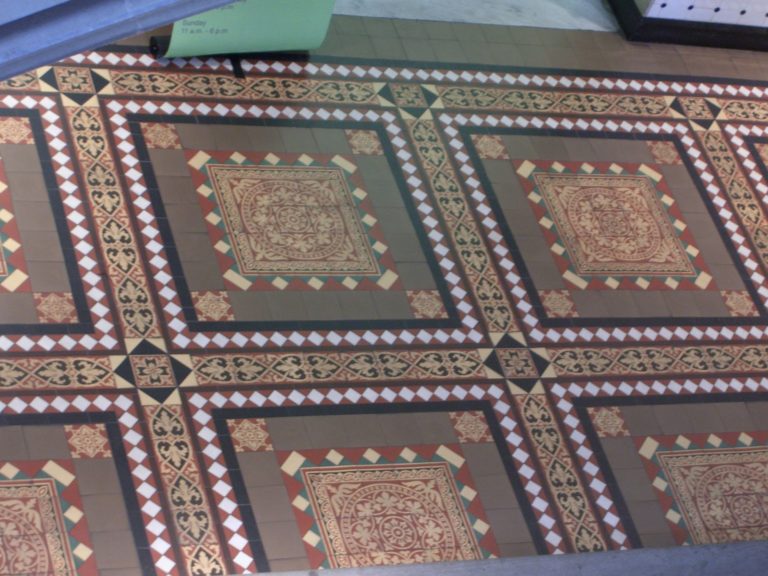
The error that the MAW tile company had made with the CADD drawing for the front porch left us with some extra tile. This turned out to be a boon for us, as we now had a full medallion and fill, along with accent pieces. We lacked a lot of white and green triangles, but were able to complete the pattern with our cache of antique encaustic tile in the basement. This small porch floor now matched its larger counterpart out front.
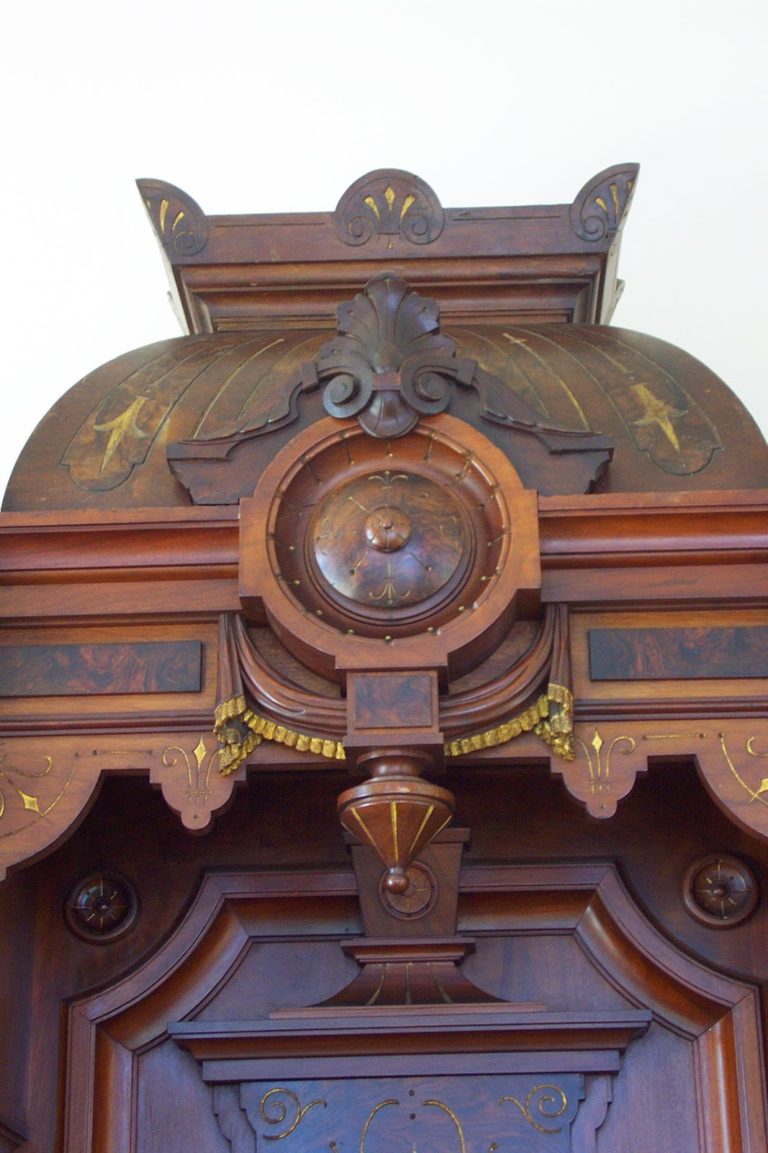
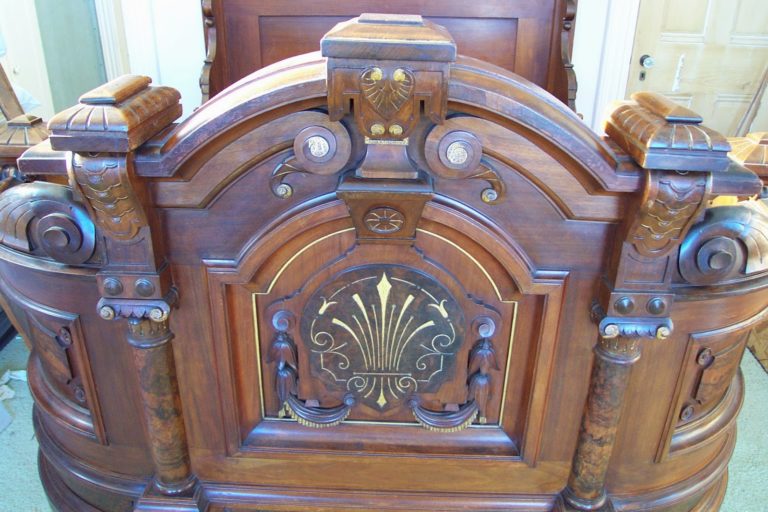
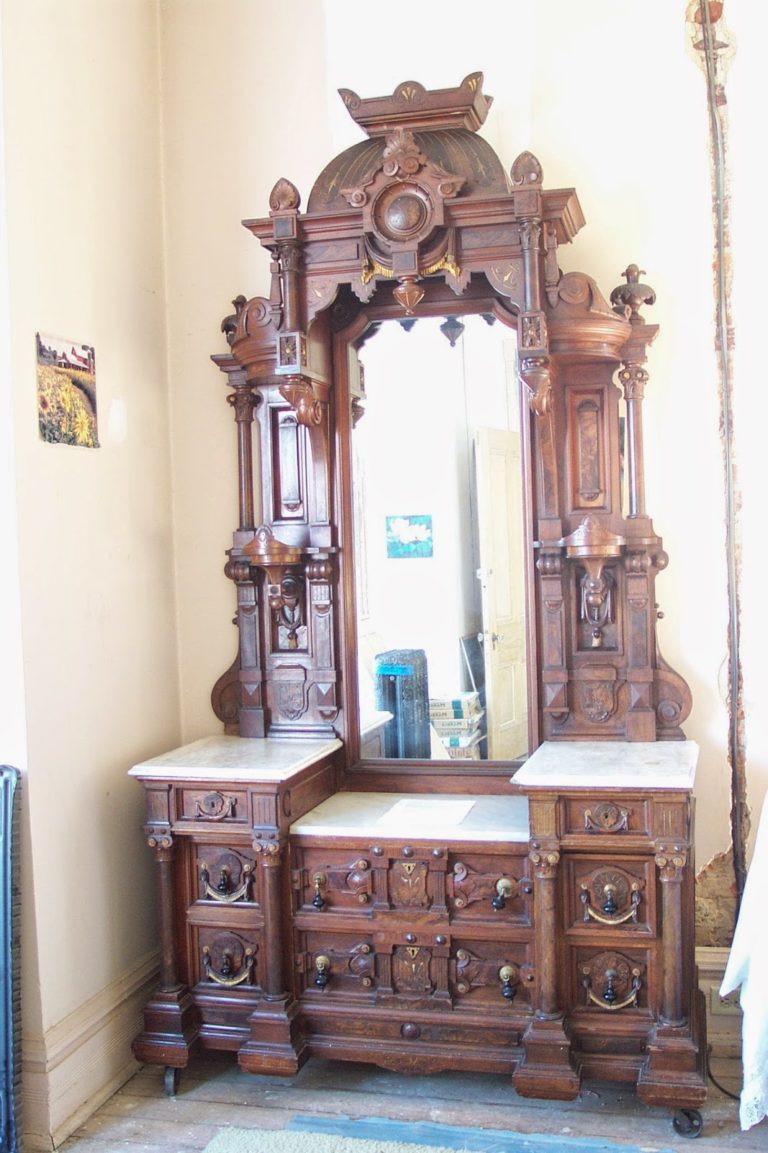
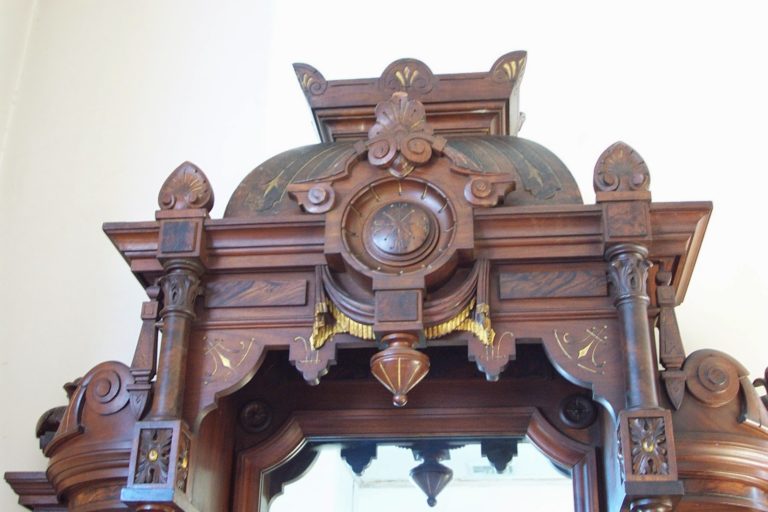
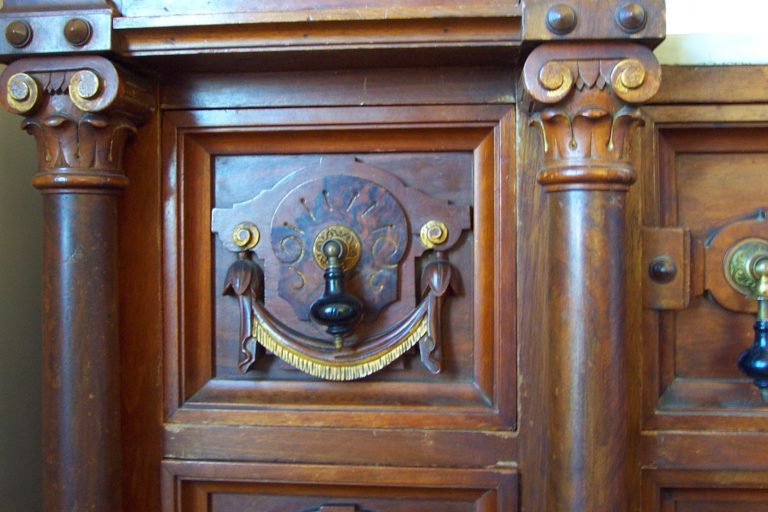
The wooden columns were wrapped with burled walnut and topped with ionic capitals, and the drapery-carved motif with gilded tassels echoed throughout both pieces. A beautiful shell-motif with gilded incising adorned the footboard. I just loved the bell flowers supporting each end of the carved drapery.
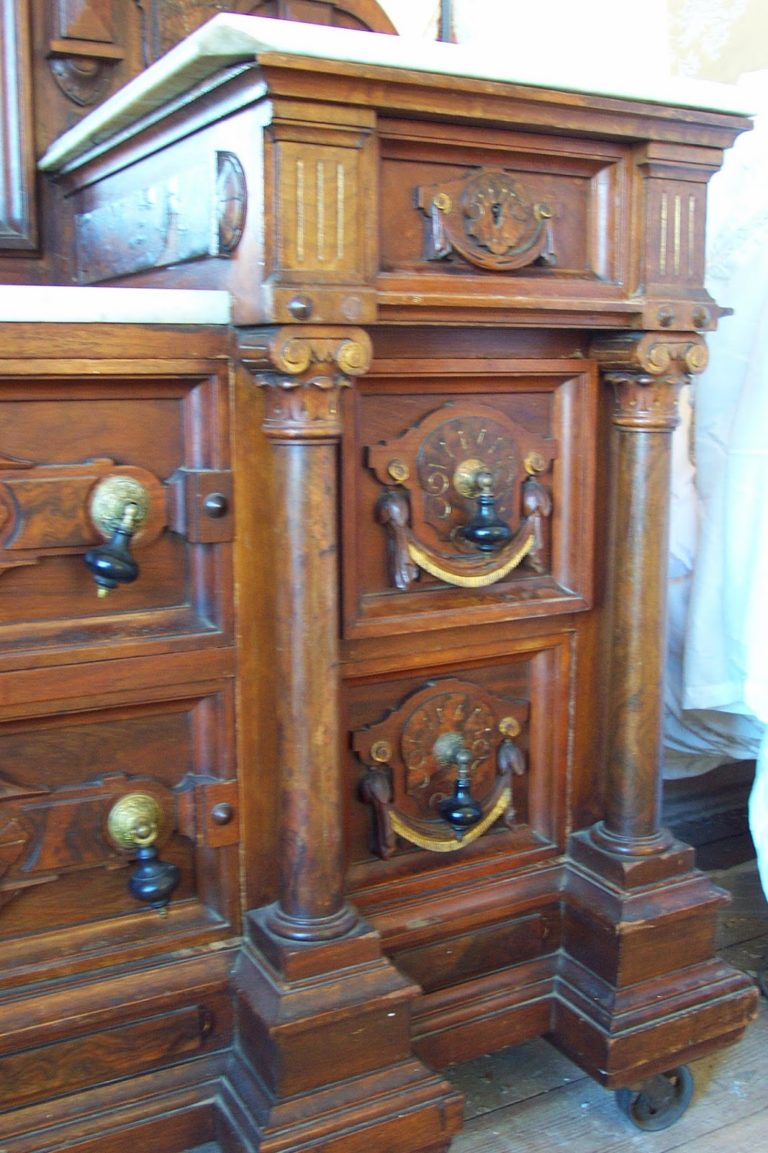
The classic 1870s teardrop-pulls on the drawers featured wooden handles instead of porcelain handles. The burled walnut showed up in unexpected accent features, and the gilding was mostly intact.
The sheer heaviness of the pieces toward the base gave a balance to the enormous hoods above, leaving the viewer with a sense of proportion, not overwhelmed with the bulkiness at the top. We had never seen a “Boat Bed” suite quite so ornamented and oversized, and to this day still have not.
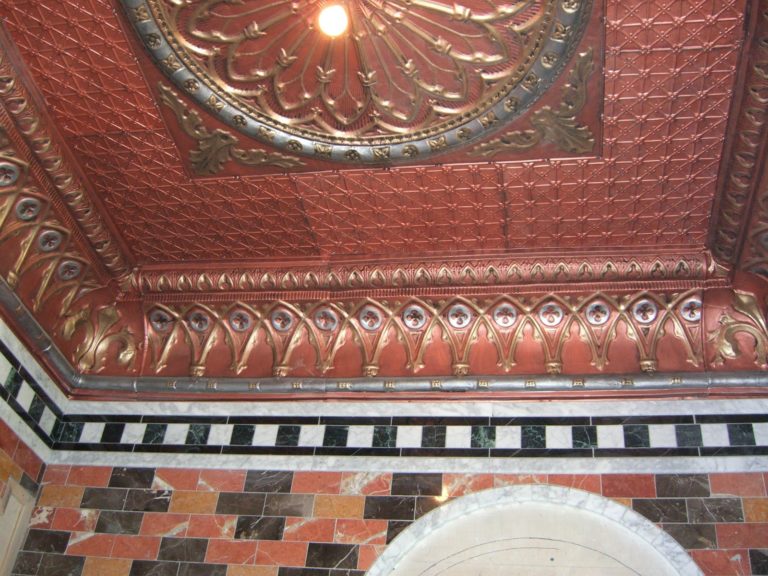
Back in the formerly pink bathroom, the ceiling was being installed. The tin is from a the W.F. Norman company, founded in the 1890s, and still operating today using their original dies. The Gothic pattern complemented the Turkish tile and brought in elements similar to the kitchen, to help tie all of the decorative surfaces of the house together.
The chandelier was a gift from a dear friend, Darrell Strader. The chandelier now hanging in the Music Room is from a Baltimore row house he lovingly restored. This silvered twisted wire gasolier also came from that home, and was a parting gift from him to me. I am sure he is looking down on its new home and smiling. He had the most uncanny gift of calling at just the craziest moments in my life. I would always answer, and he would excitedly ask what I was doing “right now” and when I told him how I was in the catacombs of the National Cathedral, or standing in the center of the Tiffany room at the 7th Regiment Armory in New York City, or perched on the roof of the house with the mason inspecting the chimneys, or touring the Virginia State Capitol building, or rollerblading through Central park, or replacing the motor in the dishwasher, or standing on the top of the tower in the Mt. Auburn cemetery, he would laugh, and say “of course you are!” and call me his “Adventure Princess.” I swear he NEVER called when I was doing laundry, or cooking, or cleaning the house, or shopping at the mall…wait, okay so maybe that’s because I don’t do those things, but whateverrrrrrr! I miss him so much, even all these years later, but I smile and think of him whenever I flip the light switch and illuminate his gasolier.
The mirror is a tribute to the perseverance and patience of Carlos from Designs in Glass. Once that man commits to a job, by gosh, he will see it through. He broke three mirrors trying to get that point at the middle of the Turkish arch, and we came up with a solution so that it could be more of a curve than a point for the fourth attempt. Don’t worry, we compensated him for his earlier attempts, but we sure do appreciate the fact that he doesn’t give up easily.
The etched glass in the bathroom door now made sense as it was once a servant’s entrance. A bit awkward for bathroom doors, but I’m not going to change it now…
The toilet and sink are Kohler from their Ankara line of hand painted fixtures.
We still have more work to do…of course. The woodwork and doors will be faux-marbled to look like Carerra marble. The windows need draperies suitable for such a jeweled box, and the exterior doors need weather-stripping. Some also say that the etched glass in the door also needs some sort of privacy curtain, but I am liking them just the way they are. In the end, there is not the slightest hint of pink left in this glorious marbled Turkish/Gothic Fucking bathroom.

Carla Minosh
While I am new to Blogging, I have always enjoyed sharing the stories of my crazy life, so this is simply another medium to share, and hopefully entertain and enrich others. Perhaps you can feel thankful that your life is so steady and predictable after reading these, perhaps you can appreciate the insanity and wish you had more of it in your life. Either way, the crazy tales are all true (to the best of my spotty recollection) and simply tell the tale of a life full of exploration, enthusiasm, curiosity and hard work. I hope you all enjoy being a part of the journey.





This comment has been removed by a blog administrator.
Excuse my language but that is one f*cking AWESOME bathroom! And well done porch replication. Bravo!
I continue to be speechless at all you have accomplished. In just this post there is an incredible range of projects!
WOW! Just beautiful! BTW- Do you people have an endless supply of cash?
Hilarious! I was laughing out loud!
Shits tight son.
Beautiful and necessary work. I have a question regarding the tin ceiling in the bathroom. On magnification it looks like the ceiling tiles and cornice were painted by hand. Could you verify that and if possible, tell me the colors you used? The base/background color looks like Copper or rose.
The tin comes "Tin" colored, and always needs a coat of paint to match your project. We used Metallic paints in Copper, Gold, and Silver, and finished off with thinned black paint spread on lightly and wiped off quickly for an aged look.